Introduce
Jupyter is a free and open source tool that helps people learn python easier. The name Jupyter comes from the Jupyter = Julia + Python + R. coupling. And before that Jupyter was derived from IPython, since 2014 it changed its name to Jupyter. Note: Jupyter Notebook and Jupyter Lab are two other things, basically JupyterLab is a “next-generation” including notebooks.
When I first started using jupyter notebook because it was simply a filebrowser with a notebook. If you need to use more features then switch to JupyterLab.
And probably many of you have used the jupyter lab to code and also thought that you want to debug above how. Initially, I did not know how to use debug, but I could read code, search for logic, and print () things …. watching the code run like that is very inconvenient and long, important is even I don’t know how and how the code was handled. So I have found out and here I would like to introduce you how to debug on Jupyter. There are also some good tips or shortcuts on the jupyter you can see more in the following link , which will be very helpful and greatly improve the process of code.

Install and Debug
First we will install an environment using anaconda with python = 3.8 (you can use other versions also ok, depending on your project only). Still a familiar command when creating a new environment.
1 2 | conda create --name jupyter_with_debug python==3.8.2 |
After a few seconds, we have installed a separate environment to install libraries serving the coding. To activate the environment just installed with version python = 3.8.2 we installed above we use the command:
1 2 | conda activate jupyter_with_debug |
So we have to environment, next we install xeus-python a Jupyter Kernel for python, you can see more in its repo.
1 2 | conda install xeus-python notebook jupyterlab -c conda-forge |
It also takes a long time (or because my network is poor ????). Next we install an extension for jupyter web debug (font -end):
1 2 | jupyter labextension install @jupyterlab/debugger |
Install this much longer @@. After installing run jupyter lab , it will show the browser to code + debug on it.
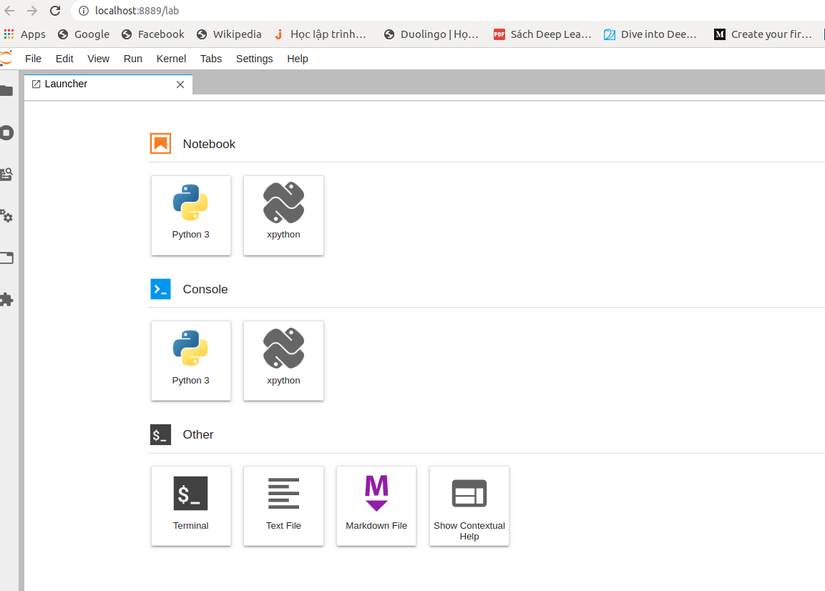
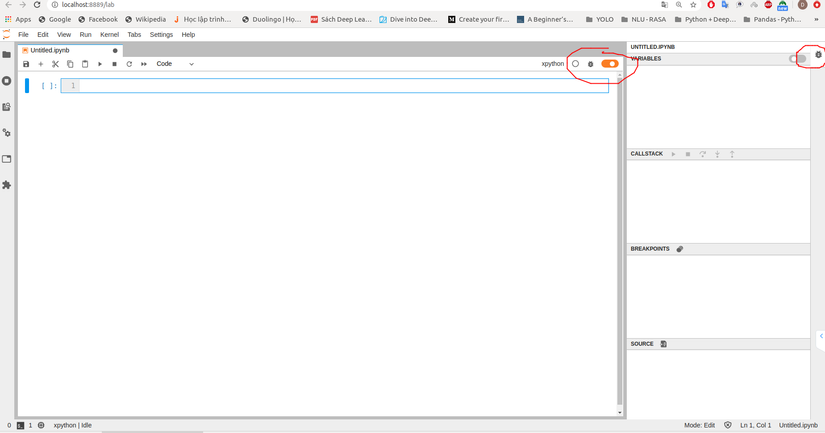
We will click on xpython . You can customize the settings on the tabar accordingly. We will pay attention to the red circle to start debug mode, OK
Try to code and debug to see how to use ntn. Declare an array with 3 elements and we will loop through the array and print a string. If you want to debug anywhere, click on the code. You notice in the position that I draw that number 1 is the variable i (the number of elements in the array). We will click on the second position, it will in turn print the string and increase i.
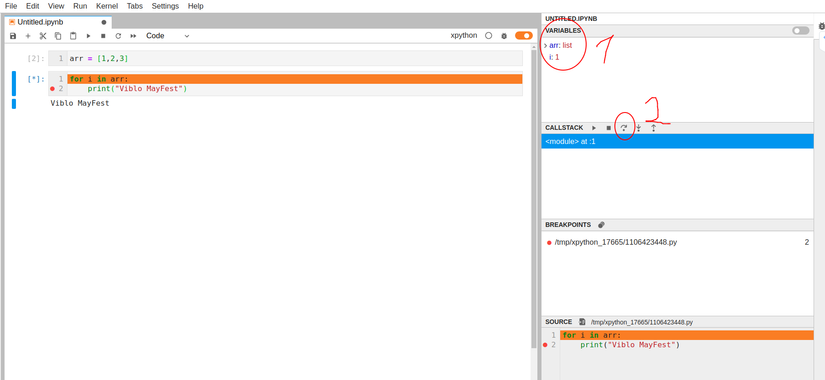
As a result, the Viblo MayFest will be printed three times, equal to the number of array elements or the variable i . Try your own code to see how it runs step by step, as well as better understand the content of the code.
In addition to debug, xeus-python also has other tips such as Error handling, Output streams, Input streams, ..
- Error handling:
- Input Streams:
- And of course widgets:
1 2 3 4 | from ipywidgets import IntSlider slider = IntSlider() slider |
- Show video:
1 2 3 4 | from ipywidgets import Video video = Video.from_video("link_video") video |
So I have shared how to debug on jupyter lab, and some ways to show code, as well as frequently used link tips. Hopefully it will be useful for you, helping you debug and find bugs more easily when using Jupyter during work.