Apple recently started with support for widgets for iOS. They provide minimal but useful information to the user without accessing the app.
This article is intended to introduce this new Widget world. We will explore the WidgetKit SDK extensively and understand the widget building components and procedures. You will need to be familiar with SwiftUI as building widgets will use SwiftUI. Since a widget is not an application by its very nature, it does not use the App Delegates or the Navigation Stack. Furthermore, a widget only exists with a parent application, it is not a standalone entity. In short, widgets provide users with quick information of the application. The OS automatically refreshes widgets at preset intervals.
Requirements
First, to get started with widgets, we need:
- Mac OS 10.15.5 or later.
- Xcode 12 and above.
Setup
As mentioned before, a widget cannot exist without the parent application. So let’s first create a Single View App. For the Life Cycle option, I am choosing SwiftUI lifecycle, which will use the new convention of the main attribute to define the starting point in the code. Once done, we now need to add a new widget extension that will contain the code for our widget.
Select File -> New -> Target -> Widget extension.
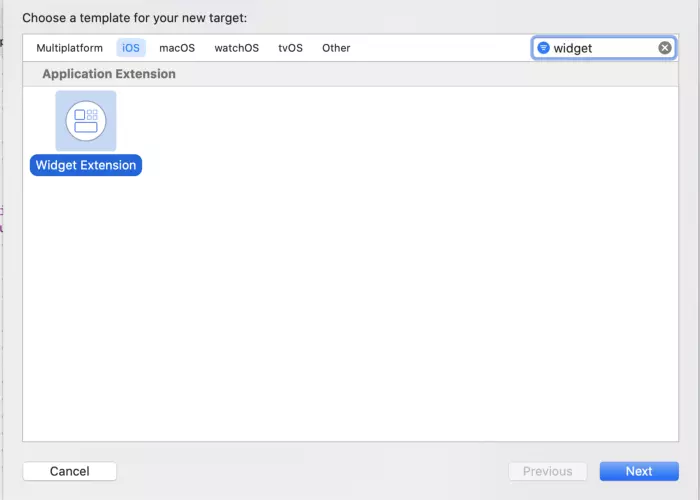
Give the widget whatever name you want, make sure you uncheck the ‘Include Configuration Intent’ option. I will explain this later.
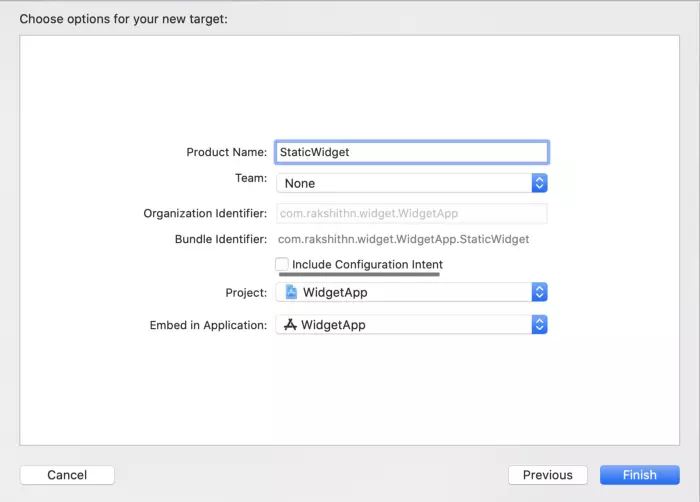
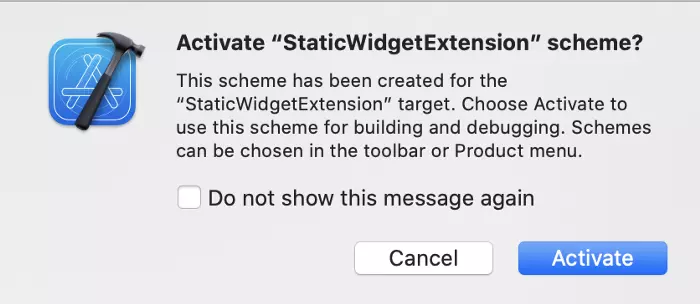
Next, click Finish and you will see a pop-up asking you to activate the extension scheme, click active, and that’s it.
Now, selecting Swift File in the extension widget, you will see that Xcode has generated the most of the code frame. Navigate to the Widget’s struct, which will be the name of the widget file you entered during setup. You will notice the ‘ main ‘ attribute for this struct, indicating that this is the starting point for your widget.
1 2 3 4 5 6 7 8 | StaticConfiguration(kind: kind, provider: Provider()) { entry in Static_WidgetEntryView(entry: entry) .frame(maxWidth: .infinity, maxHeight: .infinity) .background(Color.black) } .configurationDisplayName("My Widget") .description("This is an example widget.") |
Kind : identifier for widget, which can be used to perform updates or perform queries.
Provider : This value is of type ‘TimelineProvider’, which is datasource for the widget. It is responsible for determining what data needs to be displayed on the widget at different times.
Content : This is the SwiftUI view that will be displayed to the user.
Supports different sizes of Widgets
WidgetKit supports three sizes, namely small, medium and large. Use the ‘ManagedFamilies’ option while launching your widget to determine which sizes you want to support, by default all sizes are enabled.
supportedFamilies([.systemSmall, .systemMedium, .systemLarge])
Given that users can choose from three sizes for the widget, we would need to incorporate the UI for the widget likewise, to have the best look and feel for each size. In our View file, we need to be able to determine which size family has been selected by the user in order to change the UI in line with it. For this, widget kit provides an environment variable of the family size selected. We could then set up the UI based on the selected size.
Since the user can choose from three sizes for the widget, we also need to match the UI for that widget to get the best look for each size. In the View, we need to be able to determine which size family has been chosen by the user to change the UI to suit it.
1 2 3 4 5 6 7 8 9 10 11 12 13 14 15 16 17 18 19 20 21 | struct Static_WidgetEntryView : View { var entry: Provider.Entry @Environment(.widgetFamily) var family @ViewBuilder var body: some View { switch family { case .systemSmall: ViewForSystemSmall(entry: entry) case .systemMedium: ViewForSystemMedium(entry: entry) case .systemLarge: ViewForSystemLarge(entry: entry) @unknown default: fatalError() } } } |
The TimeLine Provider
The struct Provider is of type ‘TimelineProvider’, providing 3 methods:
1 2 3 4 | 1. func getSnapshot(in context: Context, completion: @escaping (SimpleEntry) -> ()) 2. func getTimeline(in context: Context, completion: @escaping (Timeline<Entry>) -> ()) 3. func placeholder(in context: Context) -> SimpleEntry |
One to provide the Placeholder for the widget, the second to provide the snapshot, and the third to return the current timeline.
Snapshot is used by the Operating System to request the fastest possible return 1 view without downloading any data or performing network requets. It is used in the Widget library, allowing users to preview the widget before adding it to the home screen.
The getTimeline function, which configures what the widget should display at different times. The Timeline is basically an array of objects that conform to the TimelineEntry protocol. For example if you decide to create a widget to count down the days left for a particular event. You will need to create some views from the current day until the deadline.
This is also where you can make any asynchronous network calls. Widgets can make network calls to fetch data or you can use a shared container from the main server application to collect data. The widget will display data after completion is called.
Timeline Reload Policy
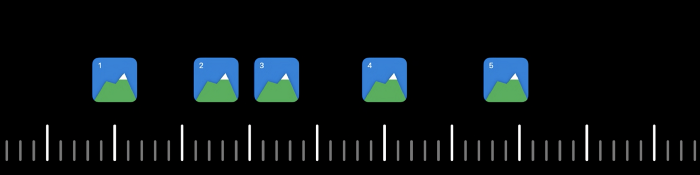
To decide when the OS needs to update to its next set of views, it uses ‘TimelineReloadPolicy’. The ‘.atEnd’ reload policy specifies that the operating system will reload the timeline entries when there are no more entries. You will see that I created a timeline one minute apart. Five entries of the view are added, this way the widget will update every minute and display the time accordingly. After the 5 minute interval has elapsed, the ‘getTimeline’ method is called to access the next set of views. TimelineReloadPolicy also provides options like ‘after (date)’ and ‘never’, to update the timeline after a specific date and never update the timeline respectively.
1 2 3 4 5 6 7 8 9 10 11 12 13 14 15 16 17 18 19 20 21 22 23 24 25 26 | struct Provider: TimelineProvider { func placeholder(in context: Context) -> SimpleEntry { SimpleEntry(date: Date()) } func getSnapshot(in context: Context, completion: @escaping (SimpleEntry) -> ()) { let entry = SimpleEntry(date: Date()) completion(entry) } func getTimeline(in context: Context, completion: @escaping (Timeline<Entry>) -> ()) { var entries: [SimpleEntry] = [] //enteries are separated by a minute let currentDate = Date() for hourOffset in 0 ..< 5 { let entryDate = Calendar.current.date(byAdding: .minute, value: hourOffset, to: currentDate)! let entry = SimpleEntry(date: entryDate) entries.append(entry) } let timeline = Timeline(entries: entries, policy: .atEnd) completion(timeline) } } |
Run the project, on the main screen, press and click the ‘+’ in the top left. From the list of options, choose your widget, then you can choose the type of widget you want to add and click ‘Add Widget’. You will see a widget that shows the current time.
Dynamic Widget Configuration
So far our widget is more or less static, the user cannot interact with the widget or determine what the widget displays at runtime. By using the Configuration Intent, we can make our Widget dynamic. Initially when setting up the project we unchecked the option ‘Include Configuration Intent’ to make the Widget customizable, now let’s see how we can make our Widget more interactive. For the purpose of this demonstration, we will be setting up our widget to allow the user to choose from a list of options, in this case a list of cities.
Setup for a custom intent
- We need to create a custom intent definition, we will use ‘SiriKit Intent Definition’ for this. Click the File menu option, choose the New File option and proceed to select ‘SiriKit Intent Definition’, name it, I’m naming it ‘CityNamesIntent’.
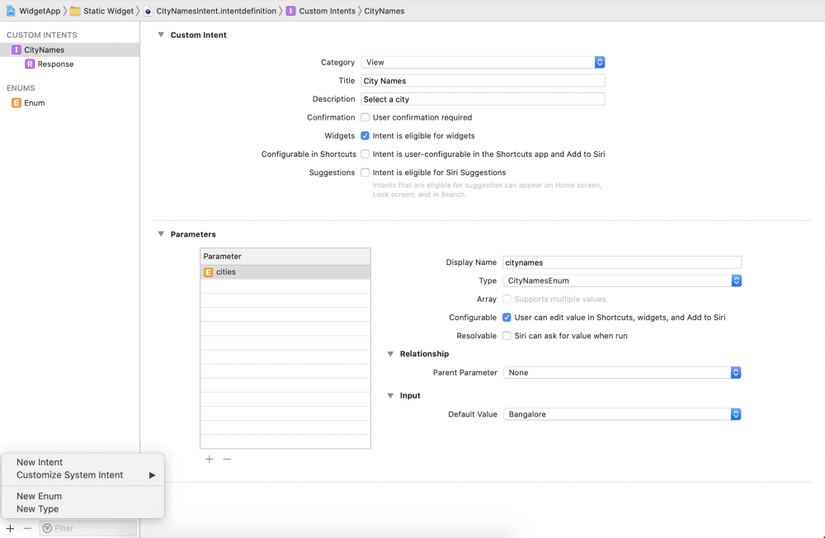
- Select the newly created Intent file, now we need to add a new Intent. To do this, click the ‘+’ icon in the bottom left, select New Intent, name it CityNames. Next in the Custom Intent section on the right, set the category to ‘View’ and make sure the option ‘ntent is eligible for widgets’ is selected.
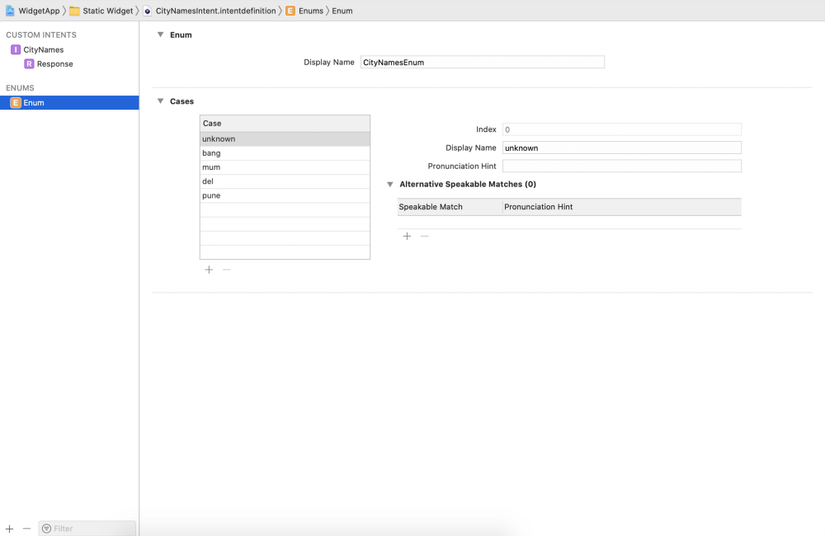
- With the new Intent added, we now need to define the properties that the Intent will handle. In our case, a simple enum for city names would suffice. Click on the ‘+’ icon again, choose ‘New Enum’. Click on the newly created enum to access its properties. In the Cases section, click on the ‘+’ icon to add value to the enum, I’ve added different city names as you can see.
- Finally, go back to the Custom Intent CityName we created, in the parameter section click the ‘+’ icon at the bottom and add a new parameter, name it cities. Provide the appropriate Display Name and under ‘type’ select the CityNamesEnum we created earlier. With that said, our custom intent definition is now complete. However, our Widget needs to be able to access this Intent in order for us to use it. To display Intents for our Widgets, go to Project Targets and under Supported Intents select the intent we created. Now we need to update our Widget from Static configuration to Intent configuration. For this, let’s first create a new provider instance. Create a struct ‘ConfigurableProvider’ of type IntentTimelineProvider. We define the same three functions we did in the case of TimelineProvider, the notable change here is the addition of the ‘configuration’ parameter, of the type CityNamesIntent we defined. The configuration parameter can now be accessed to take user-selected values and update or modify your timeline accordingly.
1 2 3 4 5 6 7 8 9 10 11 12 13 14 15 16 17 18 19 20 21 22 23 24 25 26 27 28 29 30 | struct ConfigurableProvider: IntentTimelineProvider { typealias Entry = SimpleEntry typealias Intent = CityNamesIntent func placeholder(in context: Context) -> SimpleEntry { SimpleEntry(date: Date()) } func getSnapshot(for configuration: CityNamesIntent, in context: Context, completion: @escaping (SimpleEntry) -> Void) { let entry = SimpleEntry(date: Date()) completion(entry) } func getTimeline(for configuration: CityNamesIntent, in context: Context, completion: @escaping (Timeline<SimpleEntry>) -> Void) { var entries: [SimpleEntry] = [] let currentDate = Date() for hourOffset in 0 ..< 5 { let entryDate = Calendar.current.date(byAdding: .minute, value: hourOffset, to: currentDate)! let entry = SimpleEntry(date: entryDate) entries.append(entry) } let timeline = Timeline(entries: entries, policy: .atEnd) completion(timeline) } } |
One last thing to update is changing our Widget definition from Static to IntentConfiguration. Under Static_Widget definition let’s add a new IntentConfiguration, we notice that it requires an intent instance, let’s provide CityNameIntent here. For the provider, use the ConfigurableProvider that we created. The rest remains the same.
1 2 3 4 5 6 7 8 9 10 11 12 13 14 15 16 17 18 19 | @main struct Static_Widget: Widget { let kind: String = "Static_Widget" var body: some WidgetConfiguration { IntentConfiguration(kind: kind, intent: CityNamesIntent.self, provider: ConfigurableProvider(), content: { entry in Static_WidgetEntryView(entry: entry) .frame(maxWidth: .infinity, maxHeight: .infinity) .background(Color.black) }) .configurationDisplayName("My Widget") .description("This is an example widget.") .supportedFamilies([.systemSmall, .systemMedium, .systemLarge]) } } |
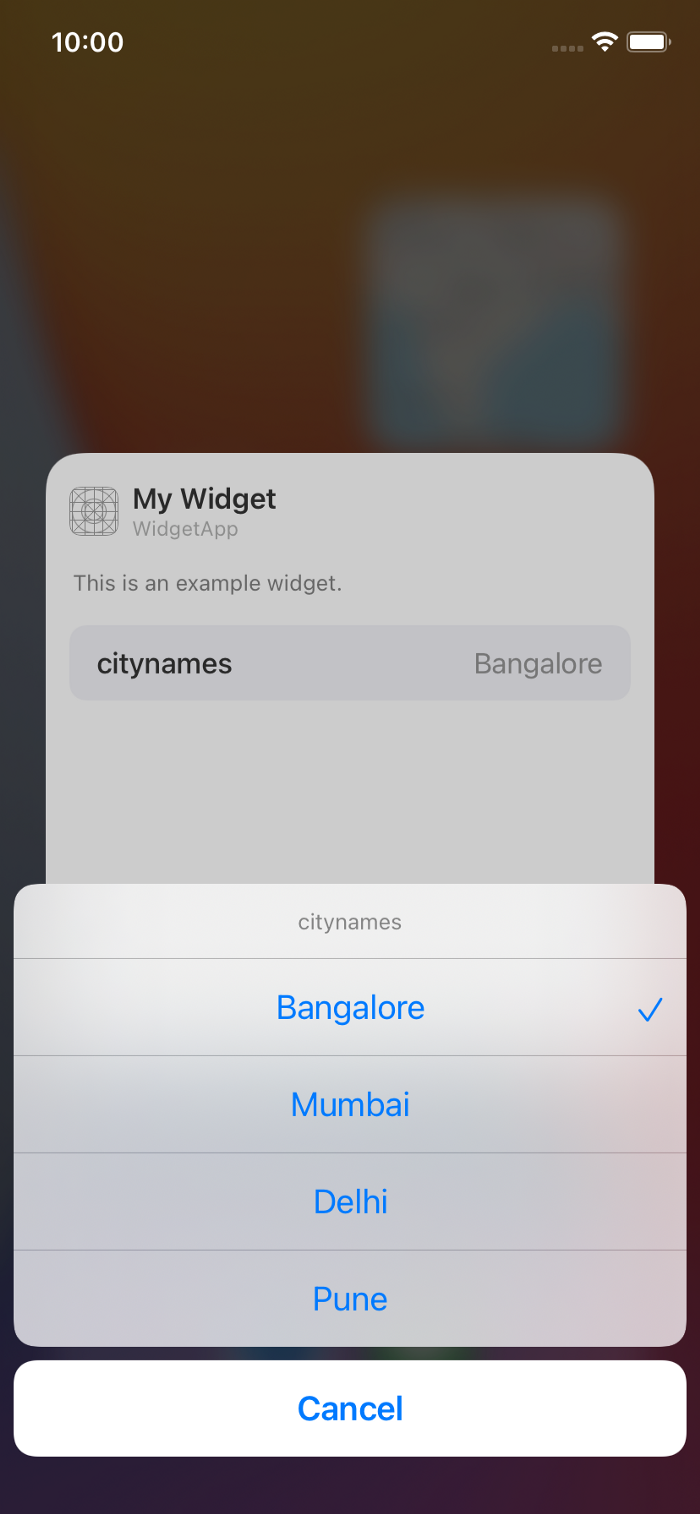
With that said, our Widget is currently configurable. Run the application, press and hold the widget and select Edit Widget, you will see a list with the city names we have provided. When any selection is made, you can access selected value in Provider and change view accordingly.
Reference source: Widgets on iOS