Study REACT / REDUX through practical examples: Create project
I've written some React introductions for AngularJS developer, or Learn ReactJS for 15 minutes, but that may not be enough for you to dive deeper into React's world, I decided today. Giving you a new series, in this series I will guide you to React / Redux by practicing a practical example through the same process as the AngularJS series for newcomers I have written.
By the end of this series I hope you will have enough knowledge to write yourself an application based on React and Redux. This time I will guide you to make music applications on SoundCloud, you can log in with your SoundCloud account, then display the playlist and can listen to them with React / Redux.
Having said that, nothing can help you learn as much as starting a project from scratch. You can find boilerplate, starter kit, or sample projects on the Internet but then when you start a new project, you will easily fall into the situation of not knowing how to start. We will start step by step so that you do not only understand React / Redux, but also understand Javascript, and the environment developed by Javascript. Maybe then you can create your own boilerplate and share it with the community.
Let's start!
First of all, make sure your computer has fully installed Node and npm . The way to check is as follows.
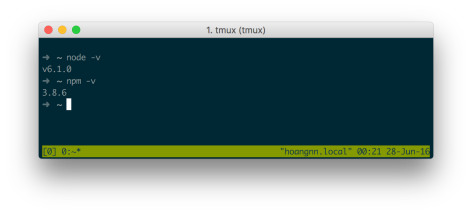
As shown, the environment is its use Node with version 6.1.0 and npm is 3.8.6 . If not, you can download it at https://nodejs.org/en/ .
Once you've installed Node , create a project by doing the following.
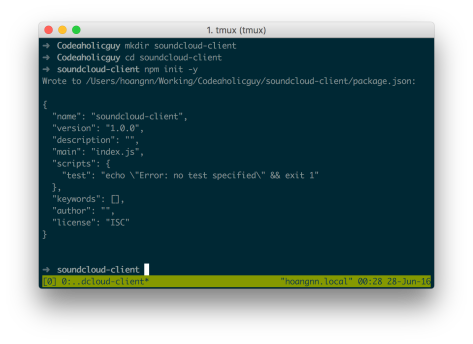
Create the soundcloud-client folder soundcloud-client this will be the project folder, then in the soundcloud-client folder soundcloud-client you enter npm init -y This command helps you to create the package.json file where you will declare the dependency packages as well as the scripts to run in the project.
After initializing the directory and the package.json file, we will install webpack .
Webpack is a tool that helps pack the entire source as well as help you build the project easily. Moreover, we will use webpack-dev-server to serve the development of the app in a local environment that is more convenient. The details of webpack will not be easy to say in this article, maybe I will write my own webpack articles to share with you more.
In the terminal, enter the following command.
1 | npm install --save-dev webpack webpack-dev-server html-webpack-plugin |
This command will help us install the webpack , webpack-dev-server and html-webpack-plugin packages into the project, the --save-dev command specifies to save the dependency of these packages to the package.json file so we can It is possible to carry source code to many different machines without carrying dependency packages.
After installation is complete, we will add the start script to run webpack-dev-server into the package.json file as follows.
1 2 3 4 5 6 | ... "scripts": { "start": "webpack-dev-server --progress --colors --hot --config ./webpack.config.js", ... }, ... |
As you can see, we have declared webpack-dev-server to use some config from the webpack.config.js file webpack.config.js
In the project folder, create the webpack.config.js file and enter it as follows.
1 2 3 4 5 6 7 8 9 10 11 12 13 14 15 16 17 18 19 20 21 22 23 | const webpack = require ('webpack') const HtmlWebpackPlugin = require ('html-webpack-plugin') module.exports = { entry: './src/index.js', output: { path: __dirname + '/ build', publicPath: '/', filename: 'app.js' }, devServer: { contentBase: './build' }, plugins: [ new HtmlWebpackPlugin ({ template: 'src / index.html', inject: true }) ] } |
Easy to see, this config file says, we want to use src/index.js as entry point to pack all the files imported into the project. The packaged file will be named app.js and will be placed in the build directory. This folder will be used for our app. Also we use the HtmlWebpackPlugin plugin with the HtmlWebpackPlugin attribute inject: true to append the app.js script file we have the above build in the index.html file.
What we're missing now is two files src/index.html and src/index.js , let's create those two files.
1 | console.log ('Soundcloud client !!!'); |
1 2 3 4 5 6 7 8 9 10 11 12 | <! DOCTYPE html> <html> <head> <meta charset = "utf-8"> <meta http-equiv = "X-UA-Compatible" content = "IE = edge"> <title> Soundcloud Client </title> </head> <body> <div id = "app"> </div> </body> </html> raw view |
Note, id="app" in the index.html file will help us specify this is where the React component root is rendered.
In the package.json file, add the build script!
1 2 3 4 5 6 7 8 | { ... "scripts": { "start": "webpack-dev-server --progress --colors --hot --config ./webpack.config.js", "build": "webpack --progress --colors --config ./webpack.config.js" }, ... } |
Test run npm run build if you see the folder build was born contains two files index.html and app.js , file index.html with script tags include file app.js . Next enter npm start in the terminal, open the browser, and access localhost:8080 , check the console for the log you entered in the index.js file. If that's the case, congratulations, you've done all the steps.
Today paused here, in the next post, I'll show you how to install Hot reloading, Babel and write the first components of the app. Do you pay attention to it.
P / S: How do you see the article? Is it easy to understand or understand? What needs improvement to help you understand better? Do you want to add videos to the lesson? Please comment for my opinion! Maybe I will make screencast video for this series.
ITZone via codealohicguy