Before coding, we have to set up the environment to code, in this article I will guide you how to setup and for those who own a computer without a GPU, don’t worry because we will code on Google Colab. (The temple is the best). And rest assured it will be surprisingly easy and quick
Step 1: Create a new Notebook
Create google colab
Click New handbook
Click Runtime –> change runtime type
Step 2: Download the necessary things
Surely on the internet you will see a lot of downloads and a long time and the results are not successful (I tried ) and after a lot of experience, this is the fastest and easiest way
As you can see cuda has been pre-installed from the beginning (version 11.8) so we don’t need to do the steps to delete and re-download cuda like the instructions on the net.
2.1. !nvcc –version
2.2 !pip install git+https://github.com/andreinechaev/nvcc4jupyter.git
2.3 %load_ext nvcc_plugin
2.4 Congratulations on your setup. A small note is that when running the code, remember to write something before coding
%%cu
Sample code for you to test
%%cu
#include <stdio.h>
#include <cuda_runtime.h>
#define N 10
__global__ void a(){

        printf("%dn", threadIdx.x *threadIdx.x );

}
int main(){
    a <<<1, N>>>();
    cudaDeviceSynchronize();

    return 0;
}
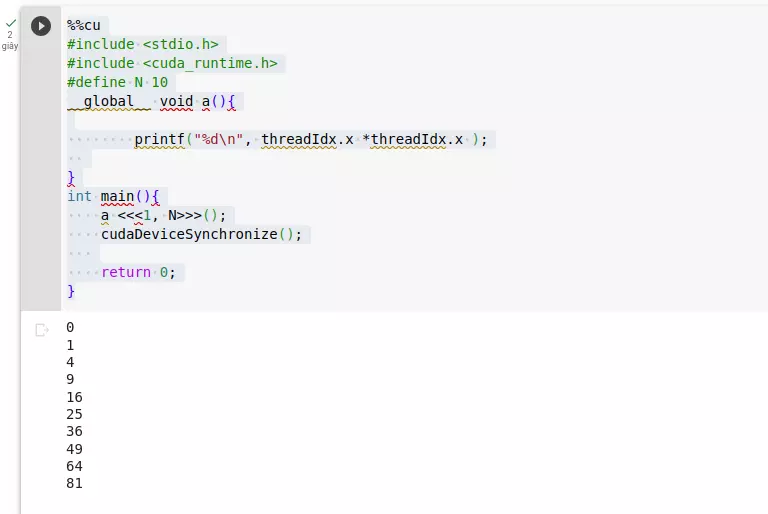
It’s okay if you see a few red underlines at the bottom (I don’t know why)
Explain the steps
This small part I explain the steps and you can skip it but it’s quick, it doesn’t take much time
As you can see I don’t need to reload cuda like other instructions because cuda is already preinstalled ( !nvcc –version) and luckily gcc support for version 11.8.

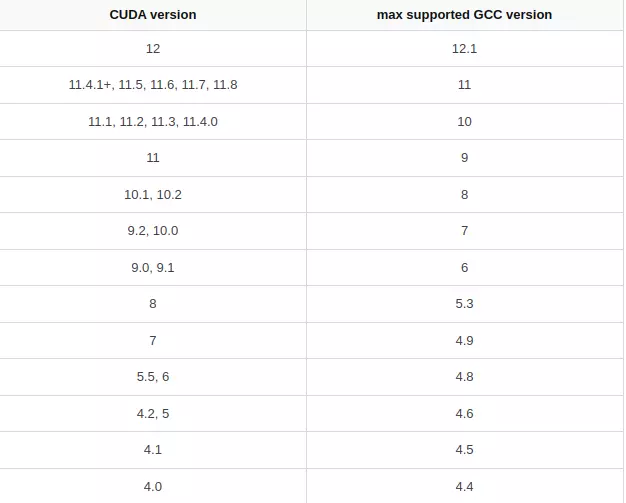
And some of the errors that you often encounter are because when reinstalling cuda and the newly downloaded cuda version is not suitable for gcc 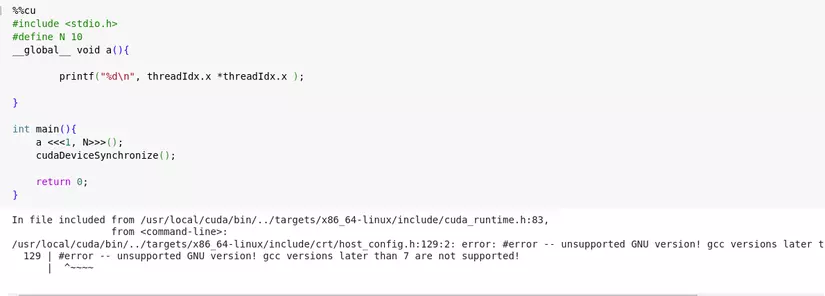
So lesson 2 comes to an end, wish you success and see you in lesson 3
Reference
https://stackoverflow.com/questions/6622454/cuda-incompatible-with-my-gcc-version