Hello everyone, in the field of software testing, testing the performance of a system is also extremely important, especially for systems with a large number of accesses. In this series of articles, I would like to share with everyone how to use a fairly popular performance testing tool, which is Jmeter. To understand how to work with Jmeter, first let’s learn the basics of performance testing as well as how to install Jmeter.
1. Basic knowledge of performance testing
1.1 Purpose of performance testing
Performance testing is a type of testing used to determine the performance and load capacity of a software or system. The goals of performance testing include:
- Rate the speed of the software
- Evaluate the scalability of the software
- Assess the stability of the software
1.2 Types of performance testing
Depending on the evaluation objective, one can divide performance testing into different categories:
- Load test: Determine the software load-bearing threshold
- Stress test: Determine the highest load threshold, break point of the system
- Volume test: Determine the load capacity with a certain amount of data
- Eduration test: Test the performance of the system for a long time
- Spike test: Test the ability to withstand large loads in a short time
- Scalability test: Test the scalability of the system with increasing degree
2. Introduction to the Jmeter tool
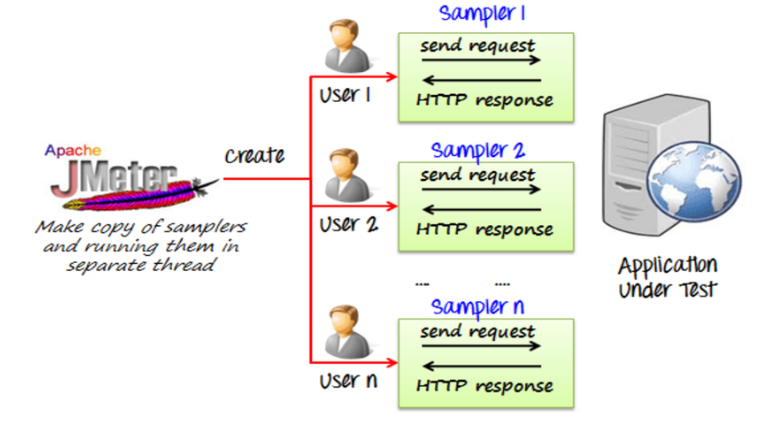
Apache Jmeter is an open source application that allows users to measure the performance and load threshold of applications.
There are many performance testing tools but Jmeter is commonly used for the following reasons:
- Free and always updated
- Easy to use interface
- Can run on many operating systems: Window, Linux, Mac.
- Easy to install
- Display test results in parallel with the test run
- Allows to run different groups of functions concurrently by different groups of emulator users
- Support testing on many protocols: protocols such as HTTP, JDBC, LDAP, SOAP, JMS, FPT. Support testing on both web, mobile, database.
- Helps to record user activity in the browser and display it on jmeter, making it easy for users to get requests for testing.
- Can be integrated with Bean shell and selenium for automated testing
3. Instructions for installing Jmeter
To get started with JMeter, we first need to setup and install JMeter.
Apache JMeter is open source software, a 100% pure Java application. Therefore, we can run JMeter from any Java-compatible operating system, as long as Java is installed on that operating system (Linux, Windows, MacOS).
3.1 Setting up the environment
Check if java is installed on your computer by: Open Terminal on MacOS or cmd on Windows and type the following command
java -version
If you see the information below, it means that your machine has Java installed, you can skip to step 2 Download and install Jmeter.
1 2 3 4 | java version "1.8.0_121" Java(TM) SE Runtime Environment (build 1.8.0_121-b13) Java HotSpot(TM) 64-Bit Server VM (build 25.121-b13, mixed mode) |
On the other hand, if you see the following information on Windows:
'java' is not recognized as an internal or external command, operable program or batch file
or something like that on MacOS:
-bash: java: command not found
i.e. Java is not installed on your machine.
To install java, go to this page, download and install the latest java.
For Windows, you also need to set the environment variable to complete the java installation on your machine, you can read this article for more details.
Now, we go back to check if the java installation is complete or not by typing the command java -version , if you see the information of the java version, we have successfully installed java on your machine.
3.2 Download and install Jmeter
After installing Java, of course, the next thing we need to do is install Jmeter. The job is very simple, let’s follow these steps:
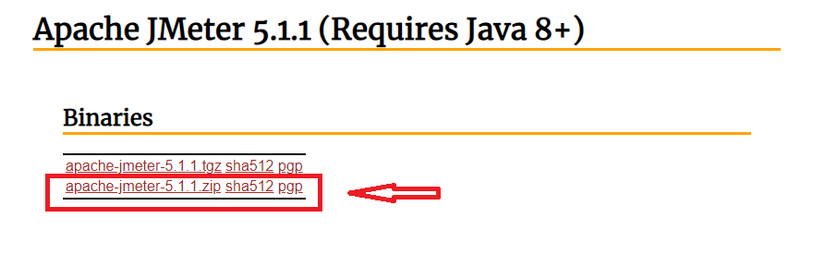
- You go to this link http://jmeter.apache.org/download_jmeter.cgi
- Download apache-jmeter-xxzip under Binaries section. At the moment, the latest version is 5.1.1

- Unzip the downloaded file. We will have a folder like below:
- The next step depends on your operating system
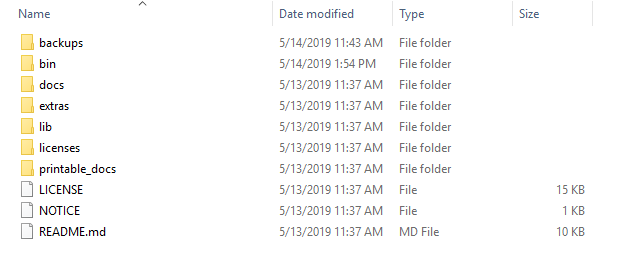
- If you use Windows operating system:
You go to the bin folder and open it, find the file jmeter.bat
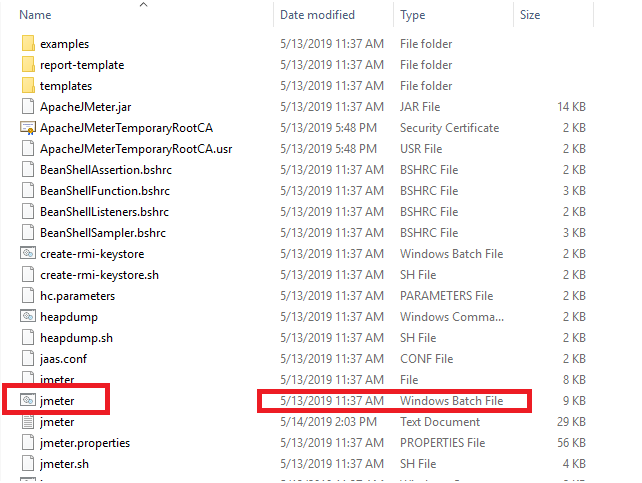
You click on this jmeter.bat file to open it, the Jmeter screen will appear for you to use.
- If you use MacOS/linux
For MacOS is a bit different from Window, you need to type command line to open Jmeter.
– Open Terminal, use cd command to go to /bin folder of JMeter For example, I just unzipped JMeter folder here /Users/user/Desktop/apache-jmeter-5.1.1, so I will cd to /bin directory via the following command:
1 2 | cd /Users/user/Desktop/apache-jmeter-5.1.1/bin |
Then type the command
1 2 | sh ./jmeter.sh |
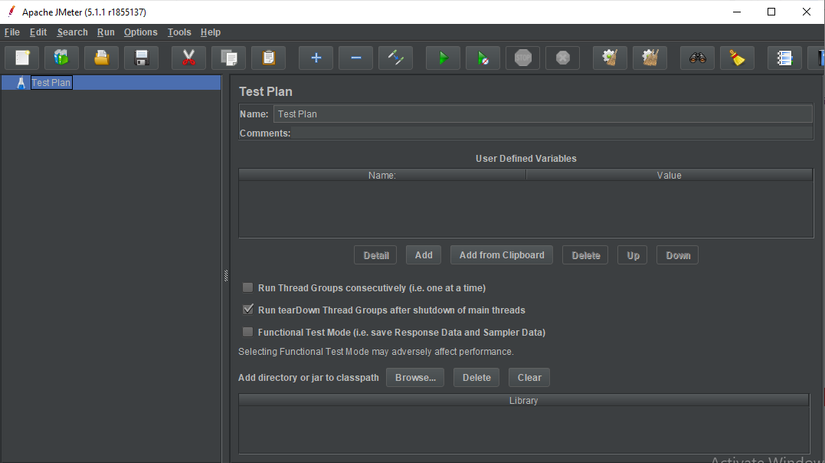
And the Jmeter interface will display as follows:
So we have just finished installing Jmeter and ready to use. In the next articles, we will experience this great performance testing tool together