Preamble
- When completing a project, the next job is deploying it so that everyone can view your app. For projects that are academic, you can deply it on free servers (for example, Heroku ), but because it’s free, it still has many problems. You deploy a Laravel project using Ubuntu VPS.
What is VPS?
- VPS (Virtual Private Server) is a form of virtual server created by the method of dividing a physical server into many different servers with similar features as a private server. And run as resource sharing from the original physical server. And each VPS will have a separate CPU part, RAM capacity, HDD capacity, IP address and operating system, users have full root control and can restart the system whenever they want. .
What are the specifications to know when renting a VPS virtual server?
- Server RAM: To help the VPS server work smoothly and stably, choose a product with as much RAM as possible. Most RAM types have similarities in performance. When buying or renting a VPS, you should carefully ask the supplier if the RAM is for the physical server or virtual server.
- What is the VPS virtual server SWAP? : SWAP is a virtual memory that stores old processing actions if the RAM memory is full. SWAP itself is a storage space on the hard drive rather than an independent memory. Not all VPS support SWAP memory but only XEN VPS support SWAP.
- Hard disk (disk): Is not stored will be used to save the installation files of the operating system and the files of the website source code you save on it. Current drives are divided into 2 types: HDD and SSD. SSDs are usually more expensive than HDDs.
- Band Width: Think of the bandwidth as well as the width of the street. The wider the street, the more convenient the traffic and vice versa. Bandwidth providers usually provide a minimum bandwidth of 10 – 20 Mbps.
- What is the Up-time time of VPS virtual servers ?: Another note you need to know when choosing to buy or rent the server is its Up-time time. The up-time time of VPS is usually estimated from its uptime. VPS uptime from 99.95 to 99.9%, you can accept buying.
- What is the virtual server operating system VPS? VPS virtual server has 2 popular operating systems: Linux and Window. Linux is user friendly, supporting more applications with less cost than Window. However, working with Dot Net or Visual Studio, you should choose VPS Window.
Where does VPS get it?
- Because of that genuine, most VPS must buy. There are some famous suppliers in the world that I know are:
Guide to deploy
Log in
- Open Terminal on Ubuntu and type the command:
1 2 | ssh <a class="__cf_email__" href="/cdn-cgi/l/email-protection" data-cfemail="e99c9a8c9b8788848ca98099">[email protected]</a> |
(with username and ip are the parameters after VPS registration provided)
Then enter the password (VPS registration provided) After logging in is complete with this interface 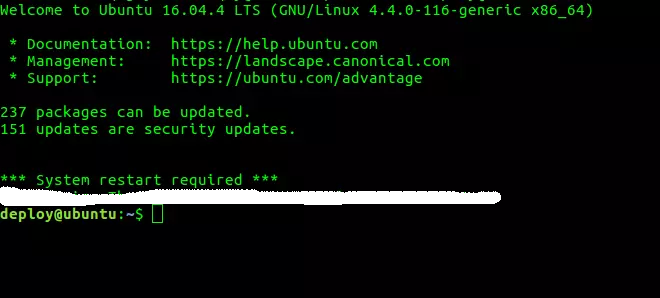
Install the components needed to run PHP Application
Install nginx
1 2 | sudo apt install nginx |
Install PHP + PHP-FPM
1 2 3 | sudo add-apt-repository ppa:ondrej/php sudo apt install php7.3-fpm php7.3-mbstring php7.3-xmlrpc php7.3-soap php7.3-gd php7.3-xml php7.3-cli php7.3-zip php7.3-mysql |
install MySQL
1 2 3 | sudo apt-get update sudo apt-get install mysql-server |
After you have installed the components needed to run PHP Application, we need to configure nginx again with php-fpm , you type the command
1 2 | sudo nano /etc/nginx/sites-available/default |
It appears like this

Then navigate to the location ~ .php$ and edit the paragraph as follows:
1 2 3 4 5 6 7 8 9 | location ~ .php$ { include snippets/fastcgi-php.conf; # With php7.3-cgi alone: # fastcgi_pass 127.0.0.1:9000; # With php7.3-fpm: fastcgi_pass unix:/run/php/php7.3-fpm.sock; } |
Create user deploy – Serve auto deploy (Optional)
- To perform deploying tasks on a specific user. Isolate with other user accounts.
- Need to generate SSH key to be able to pull source code via SSH (for auto deploying)
1 2 3 4 5 6 7 8 9 10 11 12 13 14 15 16 17 | sudo adduser deploy /// cấp quyền sudo cho user deploy sudo usermod –aG sudo deploy /// permission cho user deploy sudo nano /etc/sudoers /// Thêm đoạn này vào %deploy ALL=(ALL): ALL /// Generate ssh key cho user deploy sudo su deploy /// switch user deploy ssh-keygen -t rsa /// generate ssh key cat .ssh/id_rsa.pub /// lấy public ssh key |
Convert the user running nginx process to user deploy
- To avoid file / folder permission issues after deploying. Because Nginx processes need read, write and execute permissions on the “storage” and “bootstrap / cache” directories.
1 2 3 | sudo nano /etc/nginx/ngnix.conf đổi user www-data thành user deploy |
Convert the user running php-fpm process to user deploy
- To avoid file / folder permission issues after deploying. Because php-fpm processes need read, write and execute permissions on the “storage” and “bootstrap / cache” directories.
1 2 3 4 5 6 7 8 9 10 11 12 13 14 15 16 17 18 19 | sudo nano /etc/php/7.3/fpm/pool.d/www.conf đổi user = www-data group = www-data listen.owner = www-data listen.group = www-data thành user = deploy group = deploy listen.owner = deploy listen.group = deploy Sau khi config change user thì restart nginx và php-fpm sudo /etc/init.d/nginx restart sudo /etc/init.d/php-fpm7.3 restart |
Add deploy key to the repository
- Go to the repository on github add deploy key
Deployment
ssh to the server
1 2 3 4 | ssh <a class="__cf_email__" href="/cdn-cgi/l/email-protection" data-cfemail="8efbfdebfce0efe3ebcee7fe">[email protected]</a> su deploy sudo apt-get install git |
Pull the code on your github repo
1 2 | git clone <link repo clone with SSH> |
Install more packages for setup
- install
composer
1 2 3 4 5 | sudo apt-get update sudo apt-get install curl sudo curl -s https://getcomposer.org/installer | php sudo mv composer.phar /usr/local/bin/composer |
- install
node/npm
1 2 3 | curl -sL https://deb.nodesource.com/setup_10.x | sudo bash - sudo apt install nodejs |
- install
yarrn
1 2 3 4 | curl -sS https://dl.yarnpkg.com/debian/pubkey.gpg | sudo apt-key add - echo "deb https://dl.yarnpkg.com/debian/ stable main" | sudo tee /etc/apt/sources.list.d/yarn.list sudo apt install yarn |
Setup packages and config file .env
- Move into the project
1 2 3 4 5 6 7 8 9 10 11 12 13 14 15 16 17 18 | cd ~/{project} composer install yarn install cp .env.example .env php artisan key:generate mysql -u root -p create database phpdeploy; nano .env /// Sửa DB_DATABASE=laravel DB_USERNAME=root DB_PASSWORD= /// thành: DB_DATABASE=phpdeploy DB_USERNAME=root DB_PASSWORD={your_password} |
Run migrate
1 2 | php artisan migrate |
The last and most important step is the Setup virtual host to point to the project directory
- Create config deploy file in nginx and configure it
1 2 3 4 5 6 7 8 9 10 11 12 13 14 15 16 17 18 | sudo touch /etc/nginx/config.d/deploy.conf sudo nano /etc/nginx/config.d/deploy.conf /// Thêm đoạn sau vào server{ listen 80; server_name example.com; root {path_to_project}; location /{ try_files $uri $uri/ /index.php?$query_string; } location ~ .php { include snippets/fastcgi-php.conf; fastcgi_pass unix:/var/run/php/php7.3-fpm.sock; fastcgi_param SCRIPT_FILENAME $document_root/$fastcgi_script_name; } } |
- Because by default nginx it is reading the
file /etc/nginx/sites-enabled/defaultit is necessary to delete the file/etc/nginx/sites-enabled/defaultand symlinks/etc/nginx/conf.d/deploy.confto/etc/nginx/sites-enabledto defaul read config in deploy.conf
1 2 3 | sudo rm -rf /etc/nginx/sites-enabled/default sudo ln -s /etc/nginx/conf.d/deploy.conf /etc/nginx/sites-enabled/ |
- Restart nginx, php-fpm:
1 2 3 | sudo /etc/init.d/nginx restart sudo /etc/init.d/php-fpm7.3 restart |
Go to your browser and type the ip address and see the result 