How to use OpenPGP to encrypt your email messages and files in the cloud (Part 1)
- Diem Do
Putting sensitive data in email messages or cloud storage should give you the heebie-jeebies, but a good dose of cryptography can give you peace of mind. Pretty Good Privacy (PGP) or its open-source implementation, OpenPGP, is the gold standard of encryption online, and when used properly, has the potential to thwart even the likes of the NSA.

Encryption solutions like BitLocker and DiskCryptor don’t secure email messages or files in the cloud. OpenPGP’s industrial-strength encryption can ensure secure delivery of files and messages, as well as provide verification of who created or sent the message using a process called digital signing.
Using OpenPGP for communication requires participation by both the sender and recipient. You can also use OpenPGP to secure sensitive files when they’re stored in vulnerable places like mobile devices or in the cloud.
The trade-off for all this protection is that it’s a little more complicated to use. Follow these steps to get started.
Installing gpg4win
The OpenPGP-compatible Windows program we’ll use is gpg4win (GNU Privacy Guard for Windows).
First, download and run the setup program. When prompted for which components you’d like to install, include the GPA (GNU Privacy Assistant) component in addition to others that are chosen by default. GPA is the program I recommend for managing your encryption keys, which I also cover in this article.
You’ll need to install gpg4win on all the computers you think you’ll have to encrypt or decrypt your files on.
If you plan to use the encryption on your mobile devices, consider downloading the APG app for Android or the oPenGP app for iOS.
Creating the OpenPGP keys
To use OpenPGP, you have to generate at least two keys: a public key and a private key. Keys are just very small files containing encrypted text. Your public key can be handed out to anyone to send you an encrypted message or file. Your private key is passphrase-protected, and is required to decrypt the message or file.

The name you choose will be displayed on the certificate key. If you’d like more anonymity, consider creating another key pair with a fake name and email address.
To create your keys, open GPA and click Keys > New Key…, enter your name, and click Forward.
Next, enter your email address and click Forward.
If you’d like to back up your key pair (highly recommended), select Create backup copy.
If you lose your private key or forget the passphrase, you’ll be toast! You won’t be able to decrypt any messages or files that require your private key. Additionally, if your private key and passphrase are compromised, the attacker will have access to everything you’ve encrypted.
Consider backing up the key pair onto a flash drive, and storing it somewhere safe. Treat your private key file like a digital Social Security card: Never store it in the cloud or on the storage of an internet-connected computer or device.
Once the certificate is created, you can choose a location to back up the key pair.
Finally, you’ll be prompted to enter a passphrase for your private key. Use a strong, long and mixed-character passphrase, and never use words that are in a dictionary.
=
Back up the key pair to a safe and secure location that isn’t on your hard drive. If you use a USB thumb drive, make sure the thumb drive is dedicated to housing your keys, and won’t be used for storing other files.
Exporting or distributing your public keys
Once you’ve generated your key pair, you can export and distribute the public key to receive encrypted messages and files from others. Just right-click the key in GPA, select Export Keys, and save.
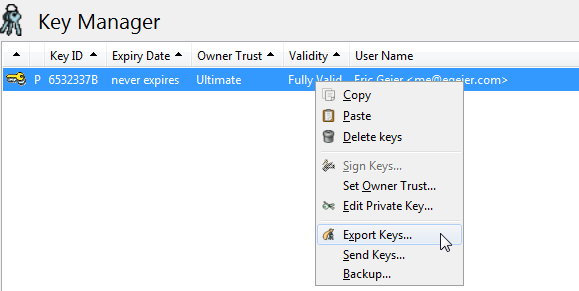
This option only exports the public key from your key pair. To export the private key portion, right-click and select Backup instead.
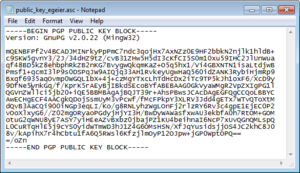
You can include your public key in your email signature or publicize it on your blog or website. You can distribute the file or just the plain text that you see when you open the file in a text editor.
If you’d like the public to find and download you public key on a public server, right-click your key and select Send Keys.

By selecting Send keys, the selected public key is uploaded to the default key server (keys.gnupg.net). You can change what key server to use in the Backend Preferences of GPA.
Importing PGP keys
You may want to import the public or private keys to another PC or device.
Remember, the private key is very sensitive. Import it only to computers and devices that will need it to decrypt files. Conversely, feel free to load your public key onto any device that you’ll need to encrypt files on.
To send encrypted messages or files to friends that use PGP, you’ll have to import their public keys onto your desired PCs or devices.
To import a public key in text format, you can copy the entire raw key block–including the beginning and ending labels and dashes–and paste it into the GPA application.
To import a raw PGP public key into GPA, copy and paste it directly into GPA.
* Importing keys to GNU Privacy Assistant (GPA) on Windows
To import a key, open GPA and click Import. Next, browse to and select the desired key, and click Open.
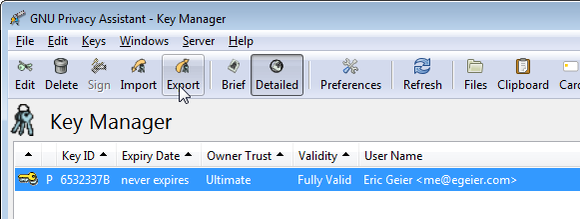
To import keys to GPA, click the Import button.
* Importing keys to Android Privacy Guard (APG)
To import keys to APG in Android, copy the key file or raw key text onto the device.
When importing your private key, use a secure method, like connecting your device to your computer via USB or using an OTG cable to attach a USB stick with your key pair. Don’t email yourself your private key. Just don’t do it.
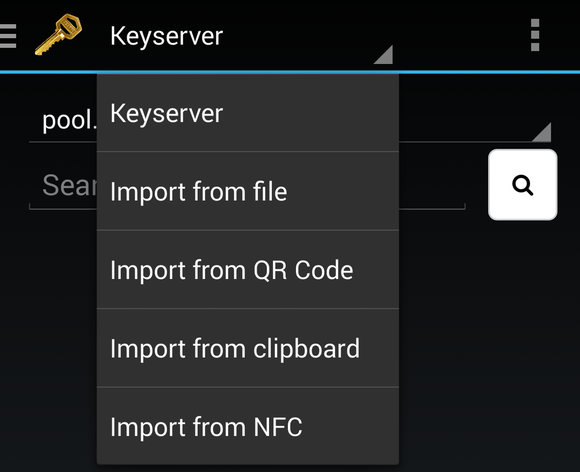
In APG, you can import keys from a keyserver, a QR code or from a file.
Open the APG app, tap the key icon in the upper left to open the menu, and tap Import Keys. If you’re looking for a public key, you can search public servers. Otherwise, select the drop-down menu on top to import a key from a file, QR Code, clipboard, or NFC.
Once the key is loaded, tap Import selected keys.
Now that your keys are ready where you need them, here’s how to encrypt and decrypt your messages and files.
Part 2
Source : pcworld.com