For NoSQL followers, MongoDB is a great choice, and in an age where everyone wants to race, there’s no reason why we don’t try get high to put data to the cloud. 
MongoDB Atlas is a cloud database of MongoDB launched in 2016 running on AWS, Microsoft Azure and Google Cloud Platform.
Data in each Cluster in Atlas is stored according to Replication mechanism, with 3 nodes: 1 master (primary) and 2 slaves (secondary)
1. Get Started
To start using Atlas you visit here and click the Start Free button right away 
Just boldly sign up and be assured that with the free version, Atlas will not require a credit card to see if you can deduct money whenever you are negligent like AWS 
Immediately after successful registration you can choose the service, and poor coder like me, obviously choose the free option 
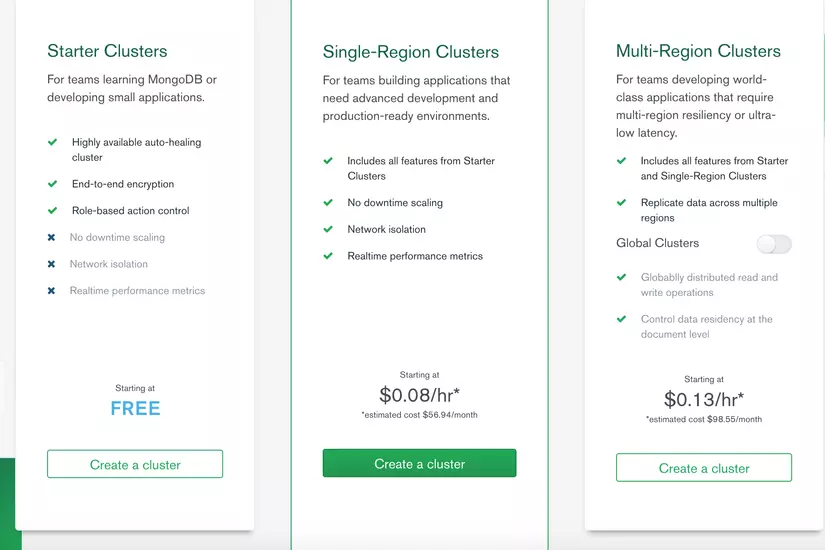
Next is to choose the location of your database as well as the accompanying options. It is said to be cheap, so if you do not want to lose any money, you can only use 512MB of Storage, Shared RAM, 100 max connections and Low network performance 
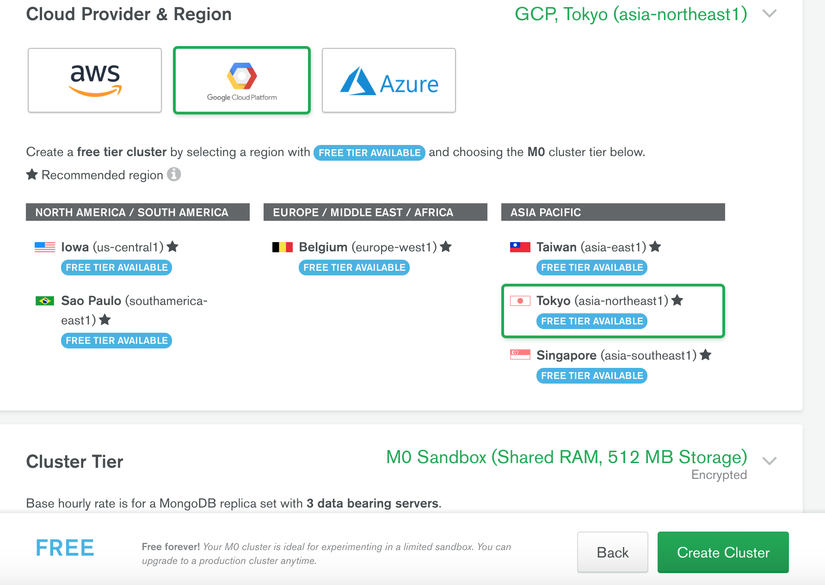
Select Create Cluster you will be transferred to the management interface, what I like about Atlas is its interface is extremely friendly, not as distracting as AWS 
2. Database Access
Click on Database Access and you will go to user management screen. Here you can create users with the rights: Admin, Read and Write, Only Read, and you can create a Custom Role such as write or read a specific Database.

There are two ways to login using Password and Certificate
3. Network Access
Click on Network Access and you will go to Network management screen. 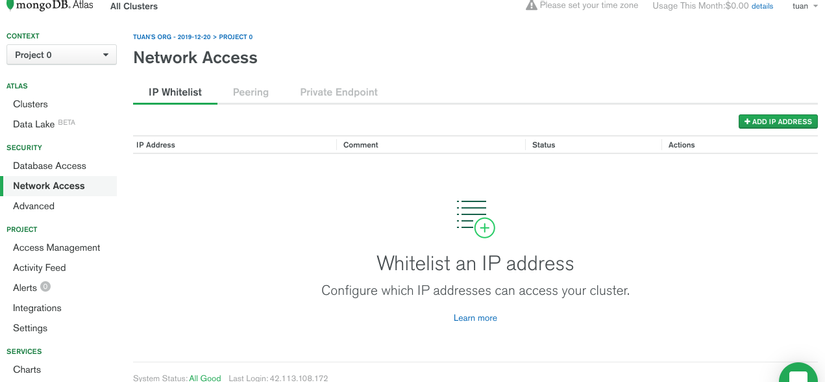
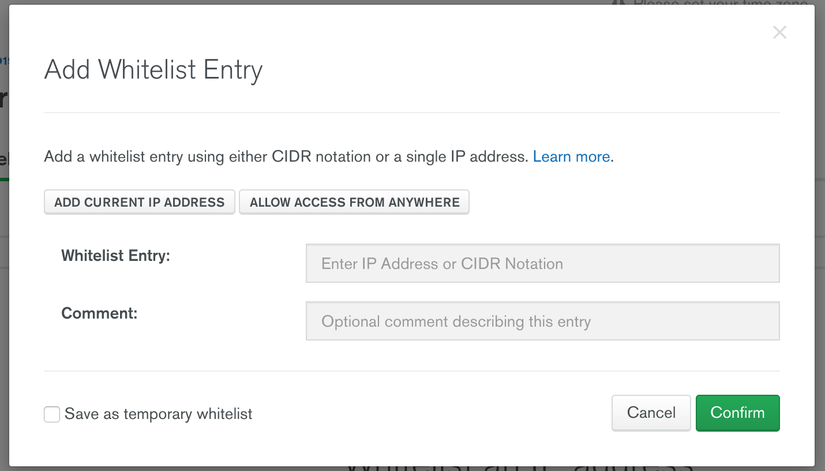
Here you can manage which IPs are allowed to connect to your Database. Click ADD IP ADDRESS to make additional IP addresses.
If you want to access all the IP addresses, you can click ALLOW ACCESS FROM ANYWHERE
4. Connect
Click Clusters to manage your clusters. There will be a full report of your Cluster including Read, Write, Connect, … 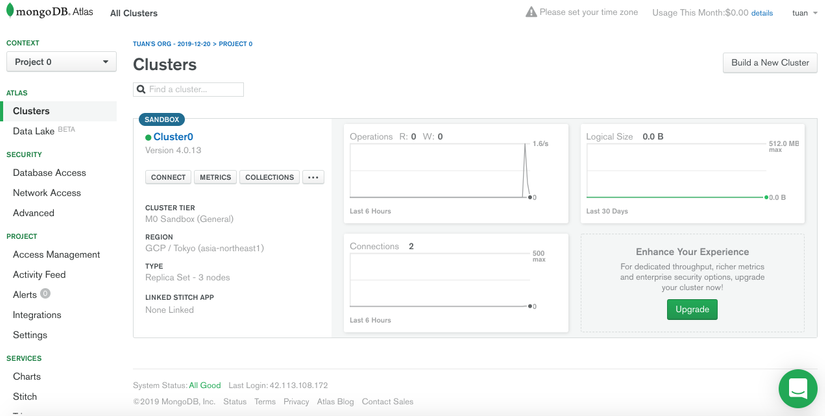
Click Connect to get the connect url as well as read the instructions.
You can connect to MongoAtlas by:
- SSH via MongoDB Shell
1 2 | mongo "mongodb+srv://<url>/<db-name>" --username <username> |
- Connect with the code on your application or MongoDB Compass
1 2 | mongodb+srv://<username>:<password>@<url>/<db-name>?retryWrites=true&w=majority |
- Connect to a 3rd party application like Robo3T: this way you need to select connect to ReplicaSet instead of Direct
5. Triggers
If you’ve been working with SQL, you’ve probably heard of this feature. It is an incremental calculation that runs a number of statements whenever there is a change in the data, be it before or after (insert, update, delete).
Actually, MongoDB didn’t support Triggers at the beginning, one had to listen to something called the Replica Set Oplog , when you ran MongoDB in Replica Set, all of MongoDB’s actions were recorded in the activity log (called is oplog).
However, from version 3.6, MongoDB has a feature called Change Streams that helps you stream changes. However, I will mention this feature in another article.
In this article, I will talk about the Triggers Atlas supports. It was written based on Change Streams of MongoDB.
Click Triggers on your Altas screen to be able to manage Triggers. With MongoDB you can perform Trigger with Events: Insert, Update, Delete, Replace.
There are two ways to implement Trigger:
- Function : is a form of a Trigger function, where you can manipulate the Database, call a function that you define in Mongo or call API.
- EventBridge : You can connect to AWS EventBridge to trigger the serverless servers on AWS Lambda.
In this article I will talk in detail about function.
changeEvent:
Database Trigger will be called with a changeEvent parameter.
1 2 3 4 5 6 7 8 9 10 11 12 13 14 15 16 17 18 19 20 21 | exports = function(changeEvent) { // Access the _id of the changed document: const docId = changeEvent.documentKey._id; // Access the latest version of the changed document // (with Full Document enabled for Insert, Update, and Replace operations): const fullDocument = changeEvent.fullDocument; const updateDescription = changeEvent.updateDescription; // See which fields were changed (if any): if (updateDescription) { const updatedFields = updateDescription.updatedFields; // A document containing updated fields } // See which fields were removed (if any): if (updateDescription) { const removedFields = updateDescription.removedFields; // An array of removed fields } } |
Working with MongoDB Data:
1 2 3 4 5 6 7 | exports = function(changeEvent) { // Access a mongodb service: const collection = context.services.get(<SERVICE_NAME>).db("db_name").collection("coll_name"); const doc = collection.findOne({ name: "mongodb" }); // Note: In Atlas Triggers, the service name is defaulted to the cluster name. } |
Call function:
1 2 3 4 5 | exports = function(changeEvent) { Call other named functions if they are defined in your application: const result = context.functions.execute("function_name", arg1, arg2); } |
Call http service:
1 2 3 4 5 | exports = function(changeEvent) { // Access the default http client and execute a GET request: const response = context.http.get({ url: <URL> }) } |
You can learn more about the context here .
6. Conclusion
My article has instructed you to get started with MongoDB Atlas, they are quite simple if you are familiar with MongoDB. Hopefully with this article, you will have one more option in your tech stack. 
