In part 4, we learned about the guildline about Setting S3 on AWS. This time I would like to continue to introduce the RDS (Relational Database Service) settings on AWS
1. RDS and Dynamo Basics
Database: In the Database world, there are 2 main categories of categories:
- Relational Databases also known as “SQL”
- Non-Relational Database also known as “No-SQL”
Amazon provides users with both of these database types: RDS for SQL database and DynamoDB for No-SQL database.

1.1 What is RDS?
Amazon RDS is a web service that simplifies setting up, operating, and scaling relational databases in the cloud. An affordable service, resizing for relational databases for businesses and managing common data for operating system tasks
Amazon offers us the following options:
- Amazon Aurora
- MySQL
- MariaDB
- Postgre SQL
- Oracle (There are several Oracle options available)
- Microsoft SQL Server (There are several Microsoft options available)
1.2 What is DynamoDB?
DynamoDB is a fast and flexible No-SQL service for applications that need consistency, with single-digit millisecond latency on any service scale. Because of its flexible and high performance data model, DynamoDB is suitable for mobile, web, gaming, ad-tech, iOT application.
DynamoDB can be used as a substitute for (or similar to).
- MongoDB
- Cassandra DB
- Oracle No-SQL
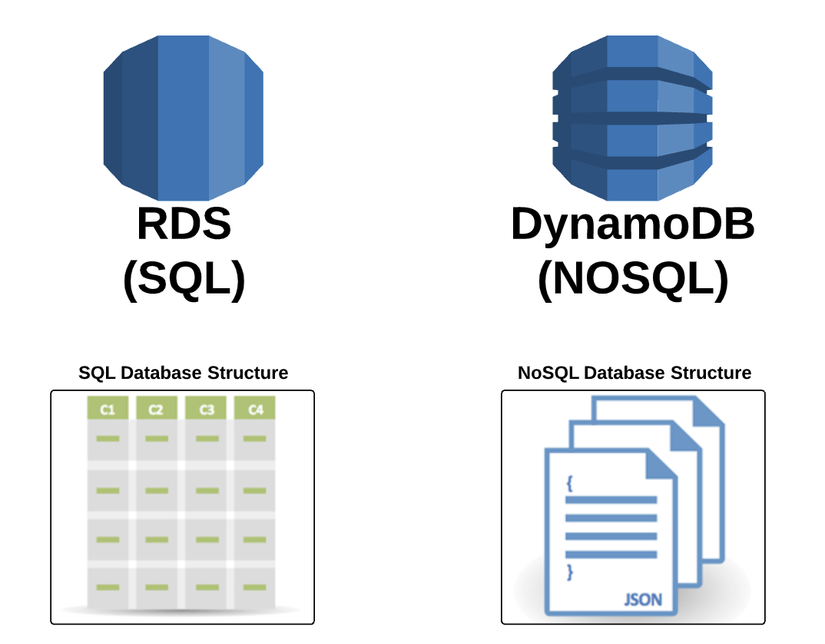
1.3 Difference between SQL and NoSQL
RDS (SQL):
- Save all data in tables (using rows and columns)
- Usually used for DynamoDB (NoSQL) structured data
- Save the data in JSON file format, name-value documents
- Used for unstructured data
1.4 RDS Pricing / Cost Overview: Free Tier apply to all RDS options except for Aurora Amazon charge for RDS usage fee?
- Based on the Engine RDS users use
- Amazon Aurora
- MySQL
- MariaDB
- Postgre SQL
- Oracle (There are several Oracle options available)
- Microsoft SQL Server (There are several Microsoft options available)
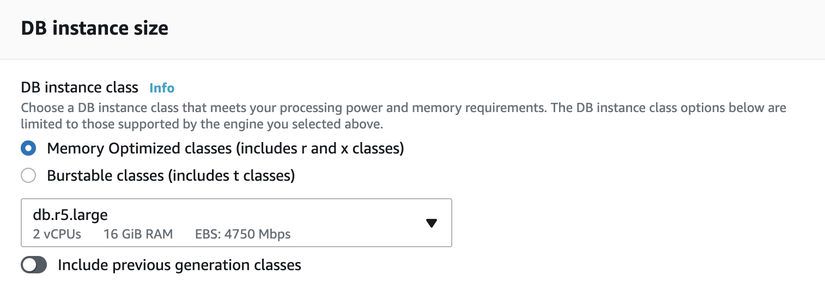
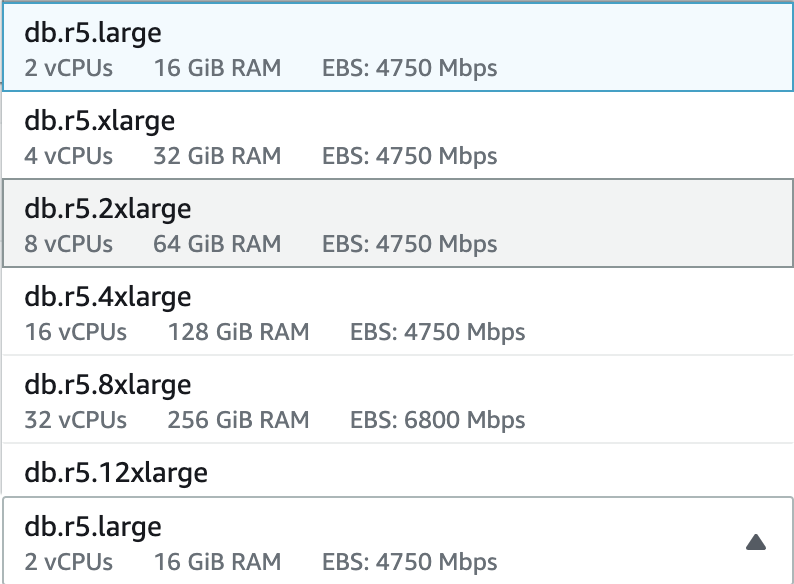
- RDS Instance Class:
- Quite similar to EC2 instance type
- Purchasing Terms: On Demand Reserve
- Database Storage:
- Data Transfer: based on the number of IN / OUT requests from RDS
Specific pricing for each item can be found at: https://aws.amazon.com/rds/pricing/?nc1=h_ls
2. RDS Provisioning
2.1 Provisioning Chart
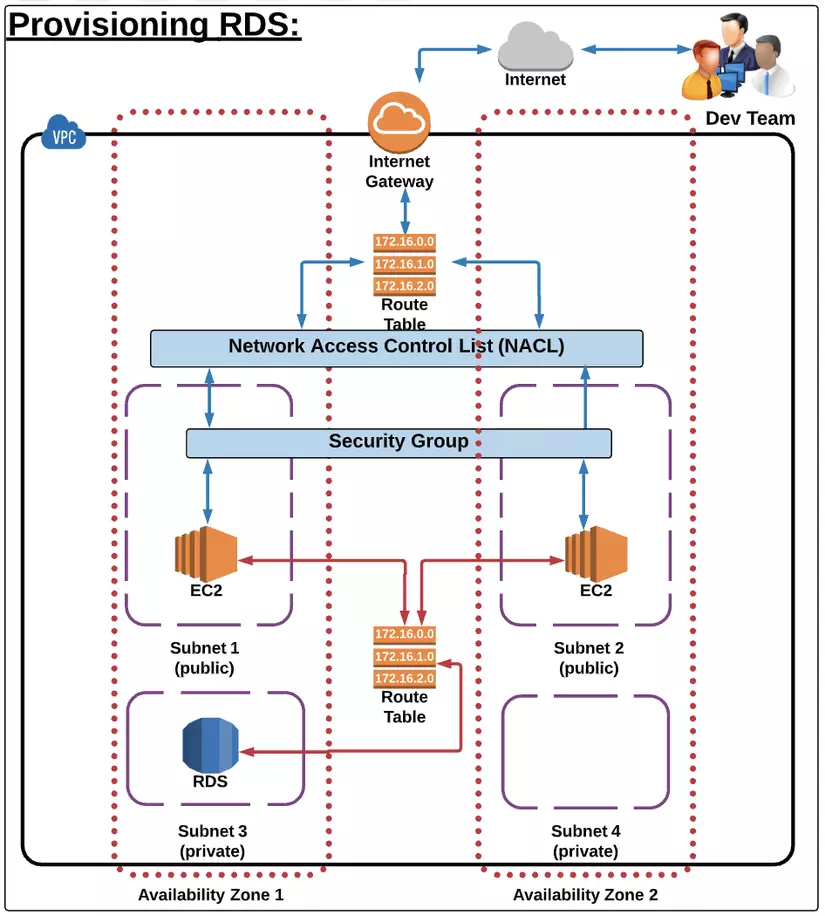
An important note about RDS Database is the security aspect:
- Always make sure that the project RDS will not be able to connect to the Internet.
- All the data stored in RDS is of utmost importance, and it is necessary to set up to block and grant access to data for certain objects.
- Therefore, it is best to provide RDS with a private sub-net with round table and this round table has no direct connection to Internet Gateway, and the only resource that has access to RDS are instances in VPC.
- In addition, we also need to configure the Security Group of the VPC correctly. Because otherwise, instances of VPC will not be able to communicate with RDS For example: MySQL or Aurora using port 3306 then on Security Group will also need config allow port 3306 so that EC2 instance can communicate with RDS. Note that EC2 Instances have a route that connects to the Internet Gateway and because EC2 Instance is taking advantage of this route to connect to the Internet.
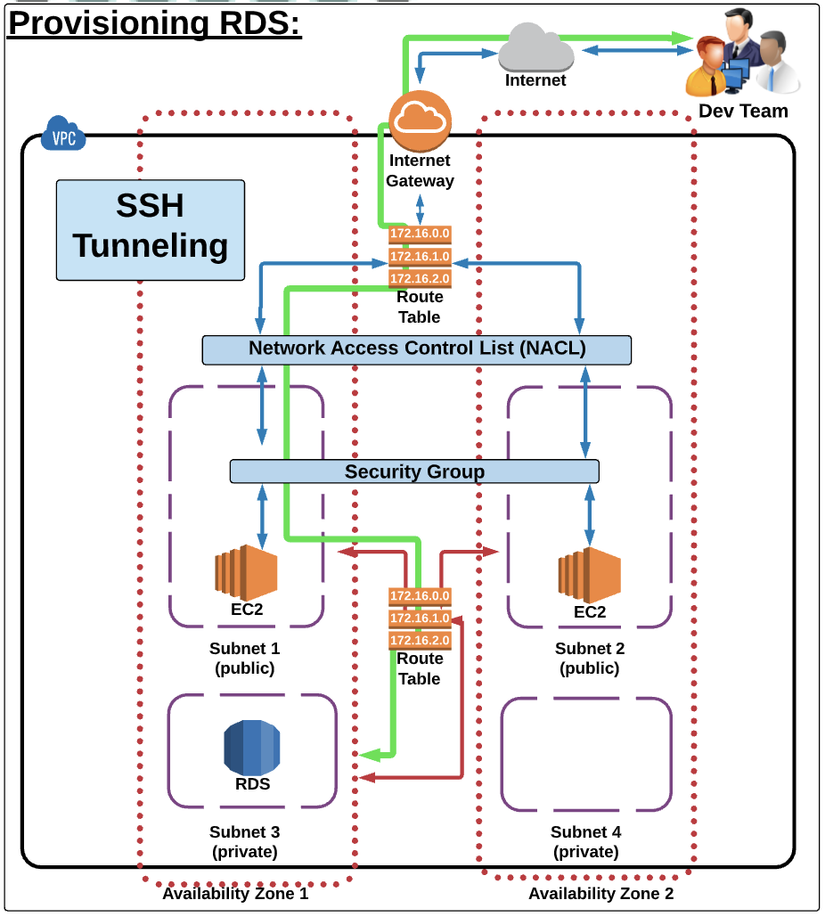
The main goal is for dev team to connect to EC2 Instance, and only on EC2 Instance have access to RDS in private sub-net and EC2 instance is in public subnet and dev team can only connect to RDS via commands SSH is as follows:
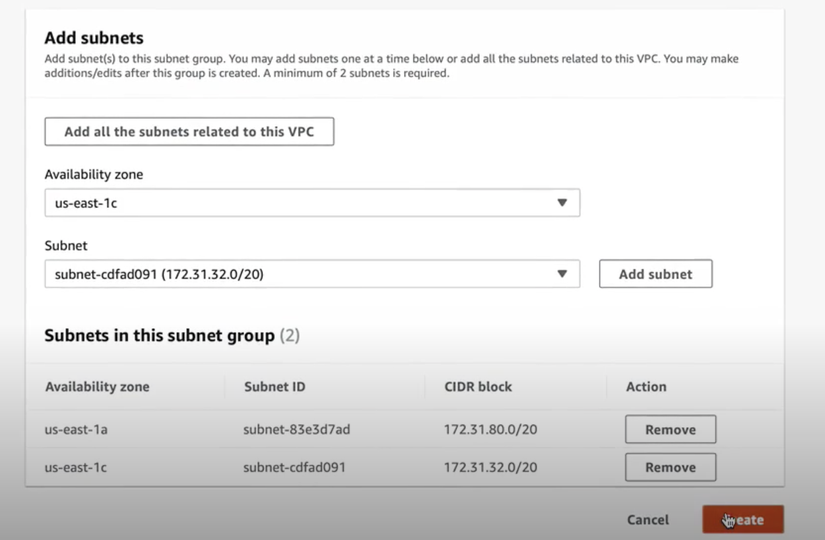
2.2 Config Private Subnet Group:
In RDS, we need to create subnet group containing 2 private subnet.
Steps to configure RDS database into private subnet:
- Navigate Subnet Group Select Subnet Group in the RDS setting screen
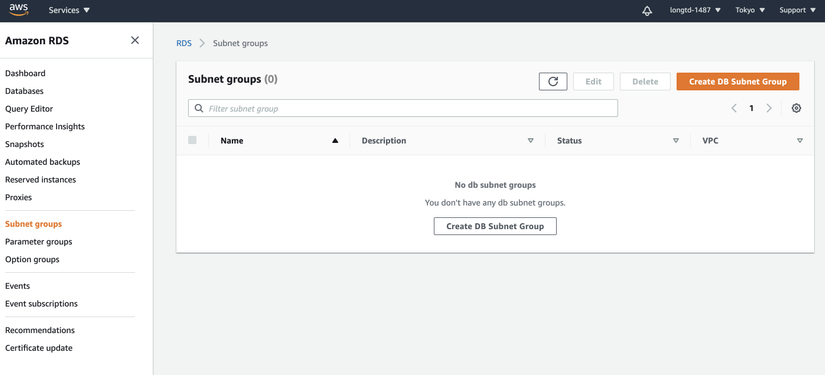
- Create DB Subnet Group
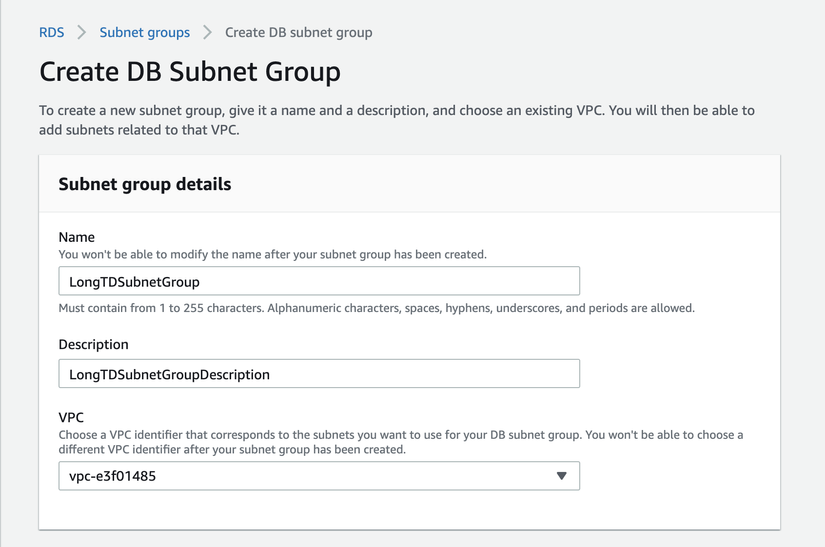
- Complete form and create 2 private subnet
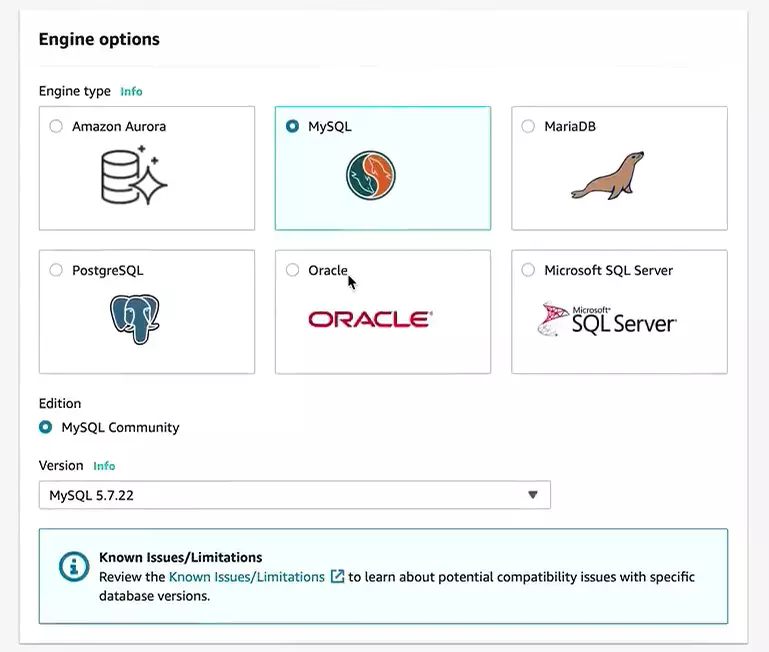
2.3 Launch RDS database according to the following steps:
**first. Select engine: **
- For Free Tier Engine, select ** MySQL → Dev / Test Option **
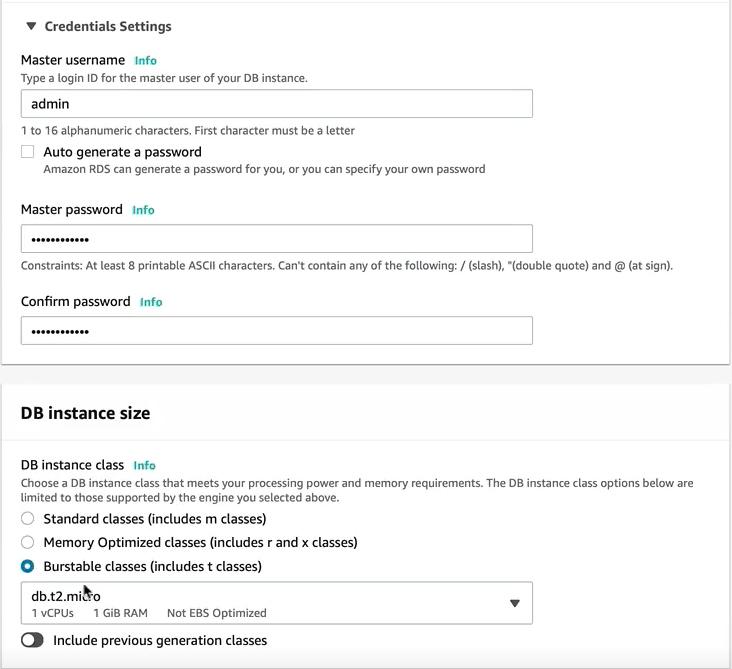
2. Config DB Details
- Config Instance
- Settings
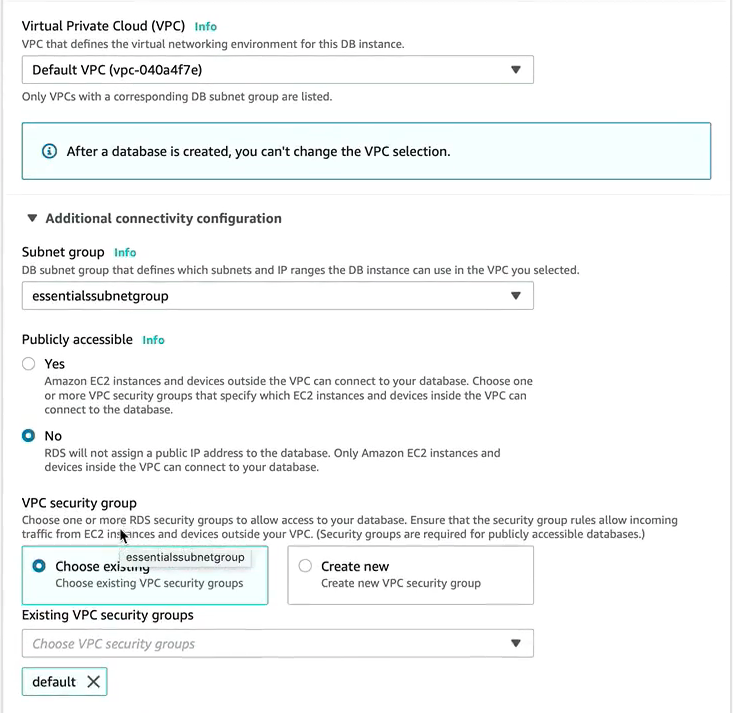
3. Config Advance Settings
- Network and Security: Select private subnet group, do not use default , set Public Accessible to No
- Database Options
- Backup
- Monitoring
- Maintenance
4. Launch DB Instance
2.4 Connect to MySQL RDS Database: Download and install MySQL Workbench ( here ) Open MySQL Workbench Set up new connection on MySQL WorkBench:
- Name the connection
- Select Standard TCP / IP Over SSH as the connection method
- SSH Hostname = public IP address of EC2 Instance
- SSH UserName = ec2-user (default usernawm used to ssh into EC2)
- SSSH Key File = .pem key using dugnj to SSH into EC2
- Copy Writter Endpoind from the RDS Console and paste it into the MySQL Hostname
- Set Port 3306
- Input Username and Password used when creating DB.
- Click Test Connection , if successful, click OK to connect
I will end the RDS setting topic here, see you guys on the following topic about SNS and ELB