In this article, I will introduce you to the first thing you need to work with AWS: your account.
And the most important thing needed to set up an AWS account is a credit card. If you haven’t already, I think you should do a credit card first and then go back to this series. Plus, even though credit card is required, you can use AWS for free with Free Tier. AWS will only collect 1 USD from your credit card to verify it will transfer back to you after verify.
Source: https://www.udemy.com/course/linux-academy-aws-essentials-2019/learn/lecture/13741388#overview
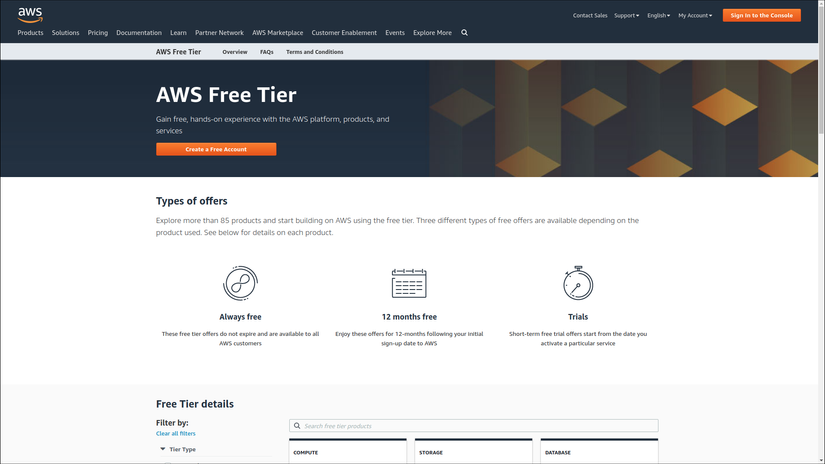
AWS Free Tier
AWS Free Tier gives you the ability to experience AWS products and services for free. Take a look at the details about Free Tier:
As you can see, there are services that will be free for 12 months, some are always free, and there are free services in the form of trials.
Scrolling down a bit, you can see that one of the free services for 12 months is EC2:
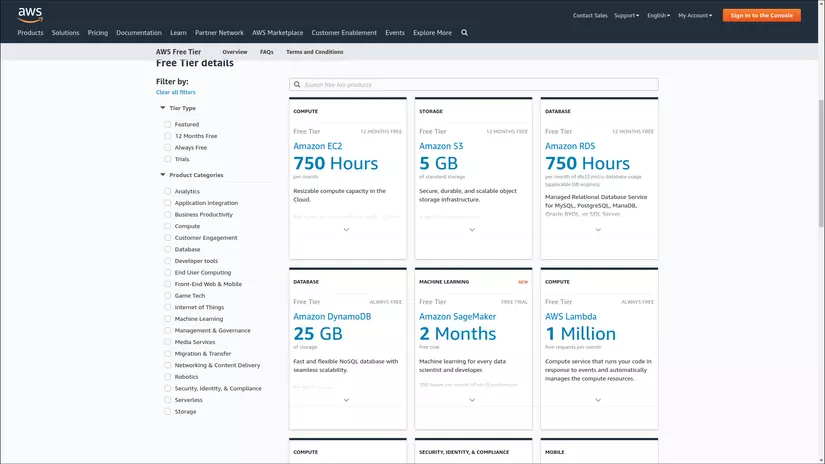
You can use EC2 for free 750 hours / month for 12 months. EC2 has different types of processors you can choose from when creating an instance, but with Free Tier there are processors you can use for free and others you can’t. So when you set up an EC2 instance you need to pay attention to whether that instance type is charged or not.
Not every service you can use for free is charged by the hour. For example, let’s filter by Storage in Product Categories:
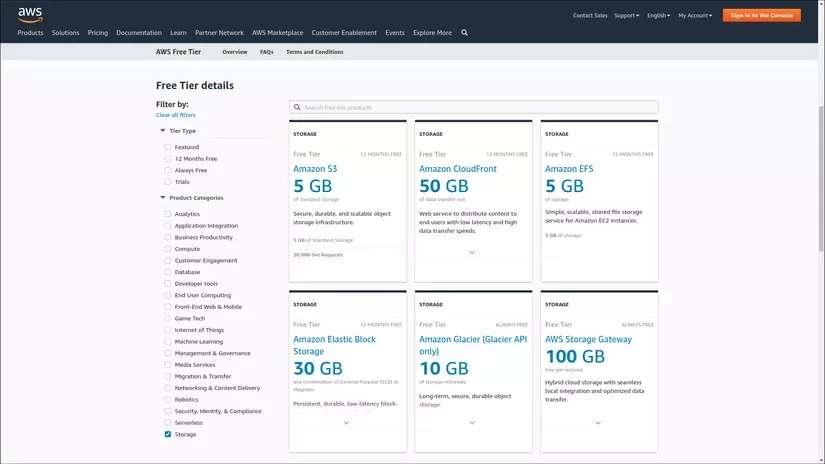
As can be seen, Free Tier AWS will give you 5 GB storage of S3 for free for 12 months.
Perhaps now you will be wondering how to ensure that you will not overuse free or a certain limit of funding that you set. I will use my personal AWS account to show you how to control the usage of the Free Tier as well as how to use a billing alarm to help you control costs to ensure you do not exceed your budget. fabricate.
Here is the Billing Dashboard page:
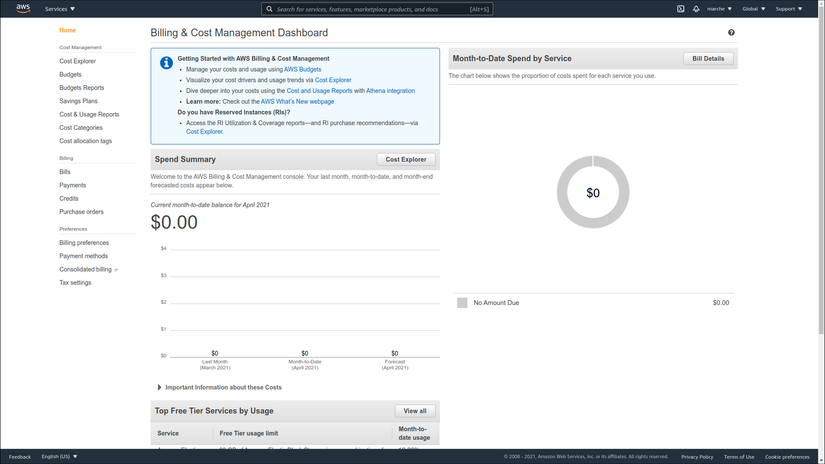
Through this page we can obtain the following information:
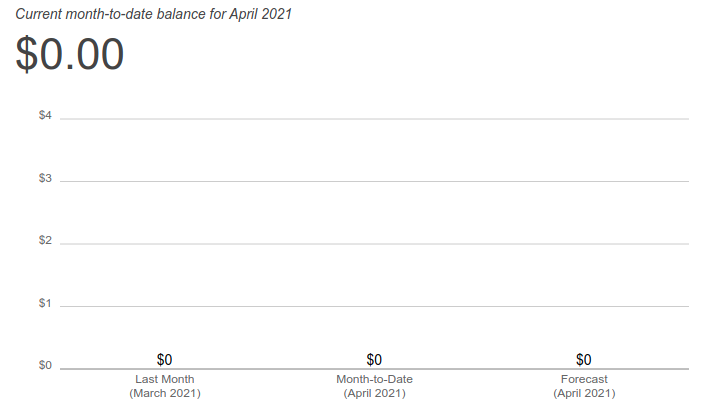
- Total usage in the previous month, this month, and forecast usage for the next month:
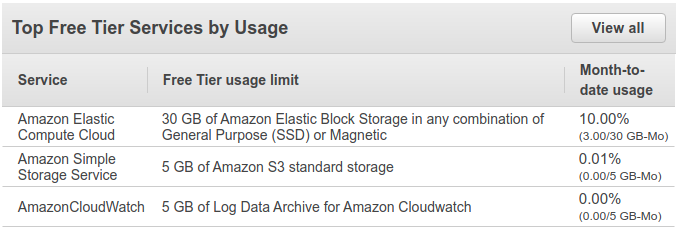
- Free Tier widget – displays which AWS services belong to Free Tier that you use the most in a month. It will also show you briefly how much of these services you’ve used:
If you click on the “View all” button in the Free Tier widget, you will see a list of all the AWS Free Tier services that you have used in the month (my list is a bit short because I have not used many services yet): 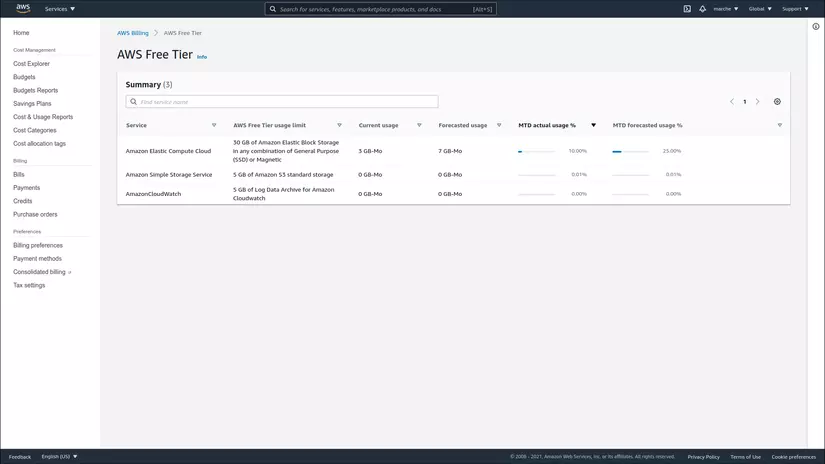
One good thing about Free Tier Widget is that it can proactively send you notifications if your project exceeds the amount of free usage for a month.
Note, however, that if you use a lot of high volume services for an extremely short period of time, you may exceed the free rate before AWS can send you a notice. But in general, AWS will notify you when your project exceeds the free rate for the month. The notification will be an email sent to the email address you registered for your account.
Next or see the Preferences section:
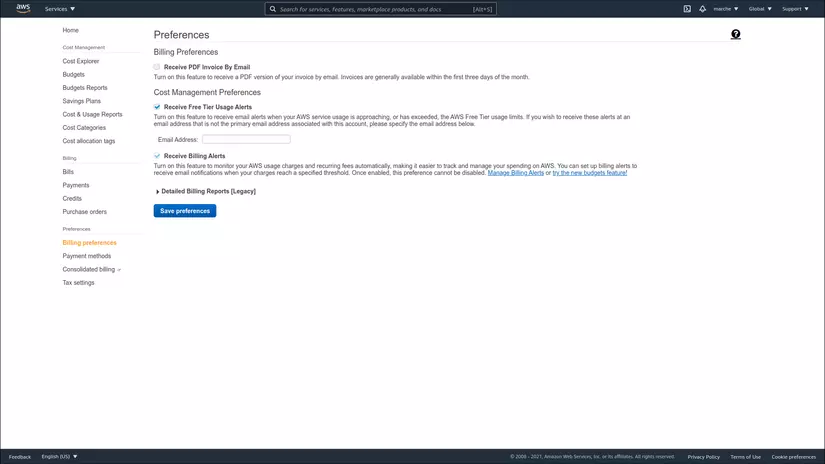
You will see Receive Free Tier Usage Alerts checked, as mentioned above, this notification will be sent to the email you registered for your AWS account. However, if you want to notify another email, you can enter that email in the Email Address box below.
Create an AWS account
You can create an AWS account at the following link: https://portal.aws.amazon.com/billing/signup#/start
Since I have created an account in all of my emails and creating an account is quite simple, I will not write much. Just a few notes:
- As I noted at the beginning of the article, you need a credit card to create an account (and of course it must be valid). AWS will charge $ 1 from the card to verify the validity of the card and then return it to you after the verification is completed. Verify as I remember, the first time I created an account, it took a whole week to receive the email notification successfully. The last time I created an account (still with that card), I can create it immediately.
- remember to choose Basic Plan in Plan selection screen to get Free Tier.
AWS Console
The AWS console is the central area for managing resumes such as EC2, S3 … Proficient use of the management console, its features, and how to access it are quite important for anyone in charge. AWS management role. First, let’s get an overview of what’s in the console.
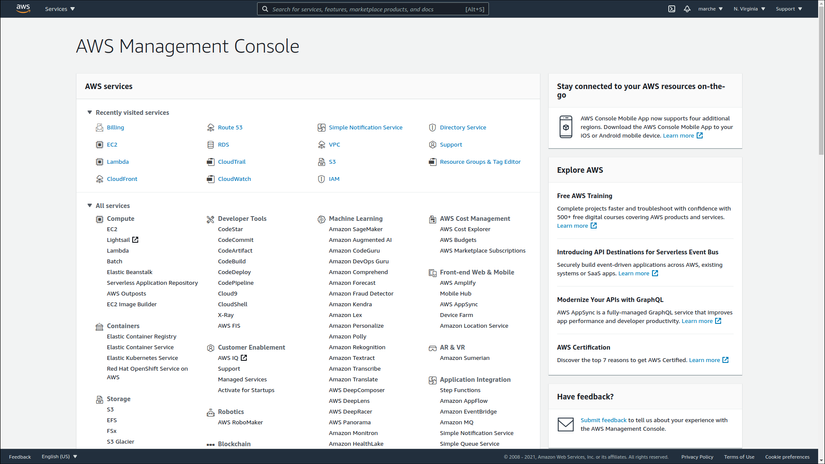
We can see a search box at the top, you can search the link to the dashboard of a particular service or related documents etc. Another way to access the services management screen is to list the services listed. according to the type shown below.
In addition, just above the list of services is a list of “bookmarks”, this list will change depending on whether you or visited the most recent service.
Once you have access to a service management screen, you can quickly switch to another service screen through the “Services” drop-down button in the upper left corner.
Create Billing Alarm
First, we go to the Billing Dashboard (this screen we have seen in the Free Tier section). Then go to Billing Preferences and check Receive Billing Alerts and press save.
Next we need to use the CloudWatch service. I would like to introduce about CloudWatch, this is the monitoring service of AWS, it is used to monitor the activities of your different AWS services, we will go into this service in depth in the following article. Right now we just need to be concerned with using it to set up a billing alarm.
Let’s use one of the ways to access the service screen from the previous section to get to the screen of CloudWatch:
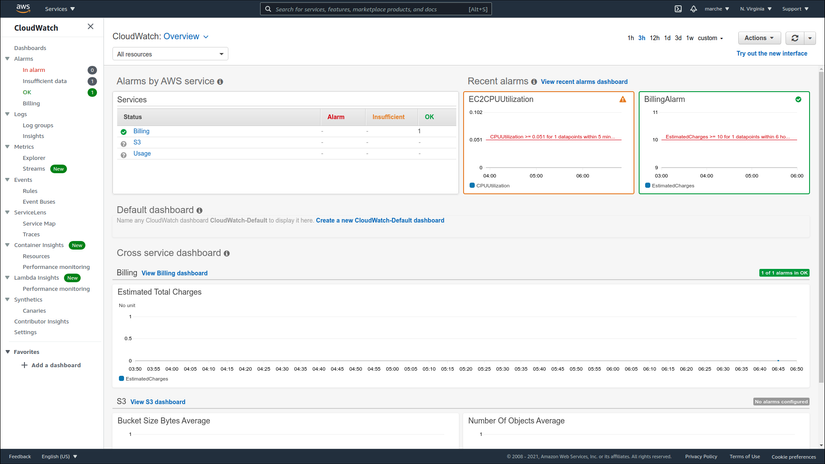
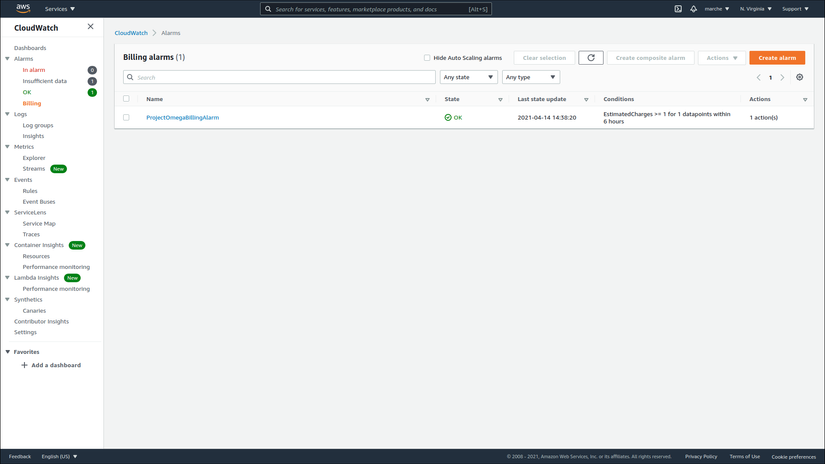
On the left hand side, on the sidebar with the Billing section, click on it to create an Alarm:
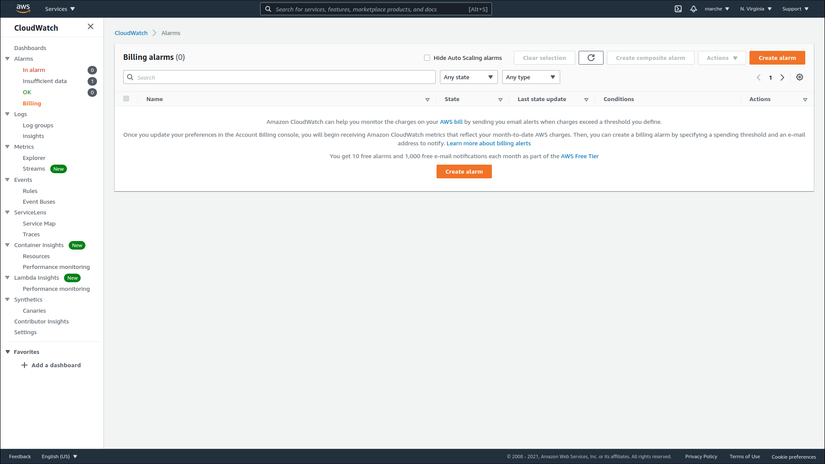
Click the create button, in the condtions section, we will set the limit that will create an alarm, here I will set it to be greater than or equal to 1 USD: 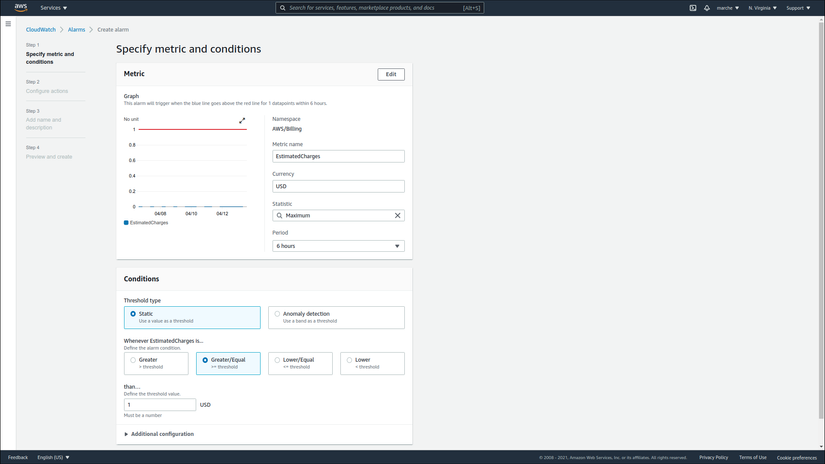
Press next, we will go to the screen to select actions for the alarm (that is, what do you want AWS to do when the alarm occurs):

First, choose which state of the alarm you want trigger actions, there are 3 states:
- In alarm: the state when the alarm is exceeded (I choose this state)
- OK: the state when the alarm level is reached
- Insufficient data: The state does not have enough data to alarm
Next, we will select the list of emails that will receive notification when an alarm (called SNS topic), select create new topic and enter the name of the topic as well as the emails that will receive the notification.
Press next to enter the name, description for the alarm, next to the preview screen and press create. You will need to open the email to confirm the email was added to the topic. So you’ve finished creating the alarm: