First of all, I would like to say hello to everyone, have a good day at work and study. In this article, I will introduce how to use Postman in API Testing. Let’s get into the content of the article!
1. Postman
Postman is a tool that allows API testing and handling of HTTP requests. Postman allows you to make and send HTTP requests and view responses from the server. You can use Postman to send and receive HTTP requests using a variety of methods like GET, POST, PUT, DELETE, PATCH and many more. Postman also provides features that allow you to automate tests and validation, monitor HTTP requests, and export test results.
- GET : Gets information from the server according to the provided URI and returns the result as JSON or XML.
- POST : Create a new resource on the server according to the provided URI and attached body. Returns the information of the newly created resource.
- PUT : Updates an existing resource on the server according to the provided URI and the attached body. Returns the updated resource information.
- DELETE : Deletes a resource on the server according to the provided URI and returns the information of the deleted resource.
NOTE: The site provides API examples https://reqres.in/
2. GET
Use GET method with following URL For URL: https://reqres.in/api/users?page=2
Step 1: Enter the URL then select the GET method as shown 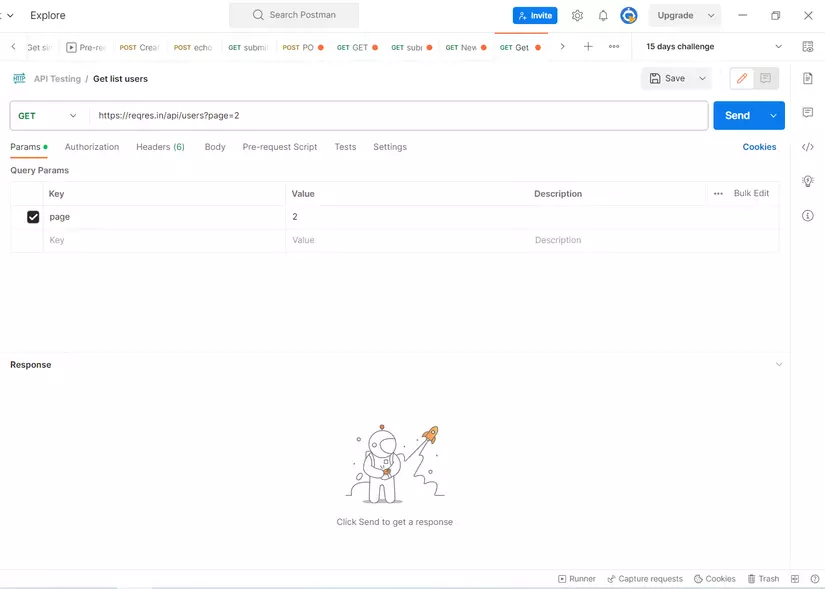
Step 2: Click Send and observe
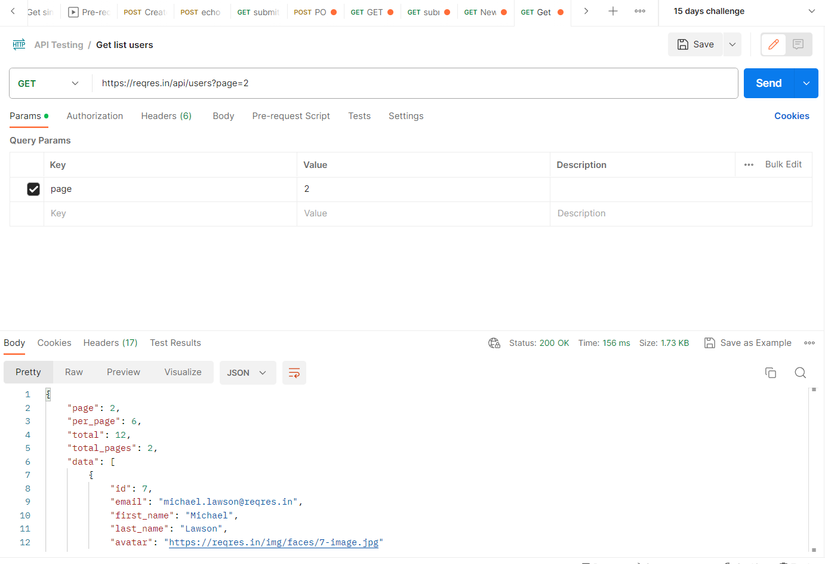
The returned result is a list with page = 2 as requested by the URL. This is the simplest way to use the GET method and you can imagine its use.
3. POST
Use the POST method for the following URL: Given URL: https://reqres.in/api/users/2
Step 1: Enter the URL then select the POST method as shown

Step 2: Select Body 👉️ raw 👉️ choose to JSON
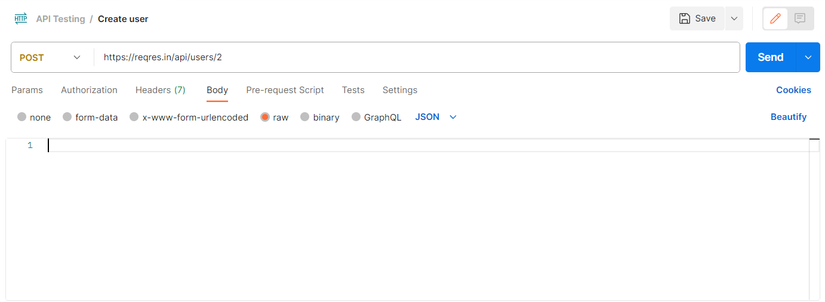
Step 3: Enter the following JSON, with the meaning of creating a user with the name “morpheus” and the job as “zion resident”
1 2 3 4 5 | { "name": "morpheus", "job": "zion resident" } |
Step 4: Select Send and observe the results
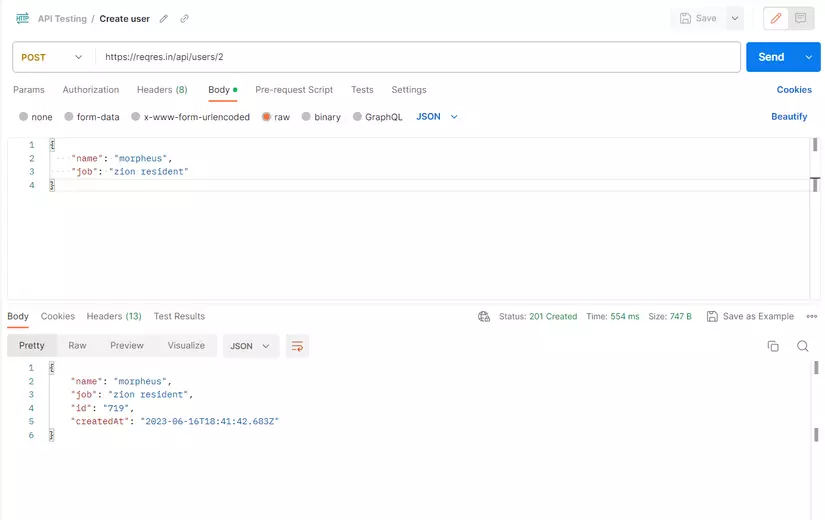
The result returned with user and job is exactly as requested by the JSON fragment, id is the code and createAt is the initialization time, you don’t need to worry too much about the names other than the JSON passed in.
3. PUT
With URL same as POST method request to use that URL for PUT . method
Step 1: Select to PUT 
Step 2: Same as POST . method
Step 3: Enter the following JSON, with the meaning of creating a user with the name “morpheus” and the job updated to “clerk”
1 2 3 4 5 | { "name": "morpheus", "job": "clerk" } |
Step 4: Select Send and observe the results
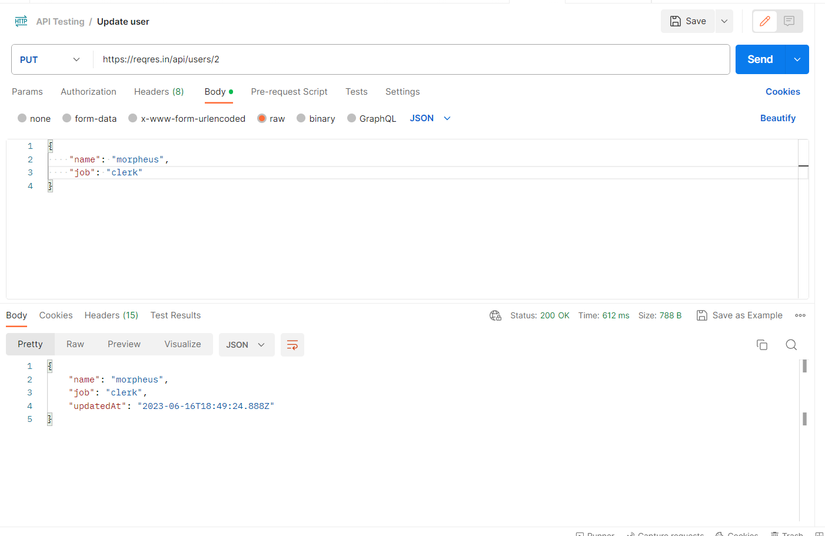
The result returned to the user and job has been updated exactly as the JSON request, updateAt is the update time.
4. DELETE
With URL same as POST method request using that URL for DELETE . method
Step 1: Select to DELETE

Step 2: Select Send and observe the results
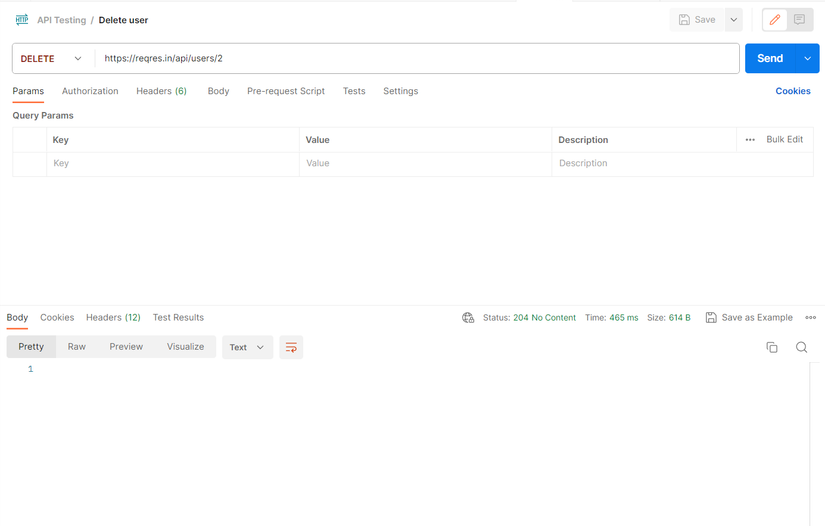
The results showed nothing in the body part. But look closely at the Status Code “204 No Content” which means: indicates that the client request was processed successfully but no response data was sent back. I had an article about Status Codes in the “API Testing with Postman” Series.
5. Summary
This article provides basic instructions on how to use GET, POST, PUT, DELETE methods in Postman. Hope it is useful to you, the following articles will cover other knowledge about Postman more deeply.
Finally, thank you to everyone who read the article!
