For those who are interested in network security or have knowledge of computer networks, it is probably no stranger to Wireshark software. Wireshark is used for network analysis (network packet analyzer). The use of this application is used to catch, analyze and identify network-related problems including: slow connection, dropped packets or unusual access.
I. Install Wireshark
You can download the official release at https://www.wireshark.org/download.html . Here you choose the version corresponding to your device and download.
II. About the interface
Now that you have Wireshark installed, we will next explore the interface of Wireshark. The figure below shows Wireshark’s user interface as you would normally see after some packets are captured or downloaded (how to do this will be described later).
Wireshark main menu
![]()
This menu contains the items open and merge capture files, save, print, export capture files and quit.
![]()
This menu contains items to find a packet, time reference or mark one or more packets, handle configurations and set your preferences.
![]()
This menu contains items to go to a specific package such as: Back, Forward , Go to Packet
![]()
This menu allows you to start and stop packet capture and edit filters.
![]()
This menu contains items for manipulating filters, enabling or disabling protocol analysis, decoding, and stream monitoring.![]()
This menu will display various statistics windows including a summary of the packets that have been collected, display of protocol hierarchical statistics, and many other uses.
![]()
This menu contains items to display network statistics related to the device.
![]()
This menu contains items to display Bluetooth and IEEE 802.11 wireless statistics
![]()
This menu contains the various tools available in Wireshark, such as creating Firewall ACL Rules.
![]()
This menu contains items to help users, such as access to some basic help, manual pages for using various command-line tools, online access to several web pages, and introductory dialogs. usual introduction. The main toolbar provides quick access to frequently used items from the menu.![]() The filter toolbar allows the user to set a display filter to filter which packets are displayed.
The filter toolbar allows the user to set a display filter to filter which packets are displayed.![]() The packet list pane displays a summary of each collected packet. By clicking on the packages in this pane, you control what is displayed in the other two panes. (Packet List)
The packet list pane displays a summary of each collected packet. By clicking on the packages in this pane, you control what is displayed in the other two panes. (Packet List) The details pane shows more details about the package selected in the package list pane. This pane shows the protocols and protocol fields of the selected packet. (Packet Details)
 The byte pane shows data from the packet selected in the Packet List and highlights the selected field in Packet Details and displays it as hexdump. (Packet Bytes)
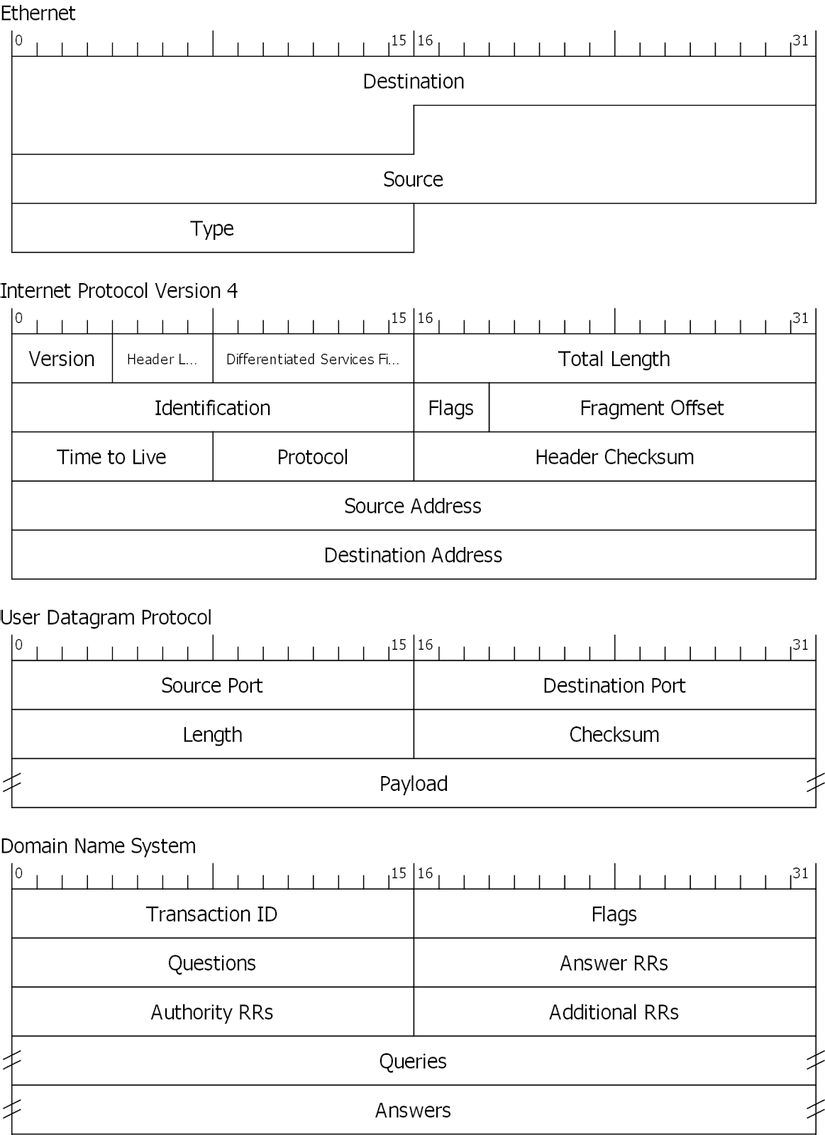
 The Packet Diagram pane displays the package selected in the Packet List as a textbook-style diagram.
 The status bar shows some detailed information about the current program status and collected data. (The Statusbar)
![]()
III. Basic Wireshark Usage
A. How to capture packets directly in Wireshark
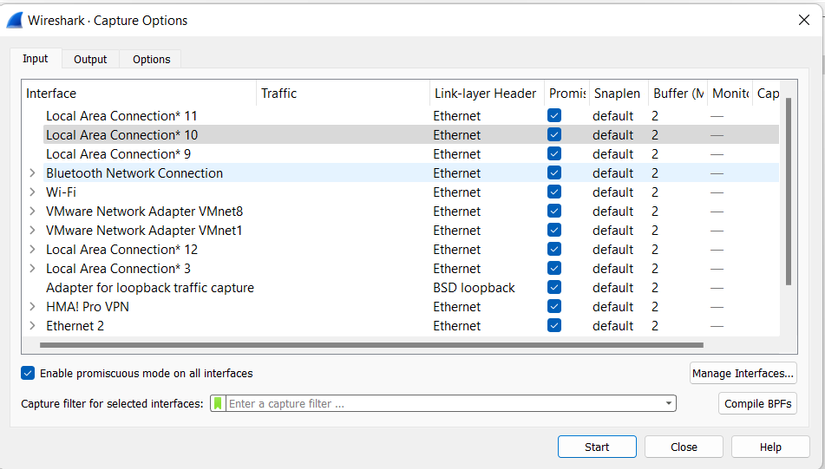
When you open Wireshark without starting packet capture or opening a file, it displays a “Welcome screen”, which lists any recently opened files and available packet capture interfaces. The network activity for each interface is displayed in a dotted line next to the interface name. You can select more than one interface and capture multiple network activities simultaneously. You can click the gear in the main toolbar to set Input, Output of network operations.

To start capturing we have the following ways:
- You can double-click one of the network activities on the screen. welcome image.
- You can select one of the network activities on the welcome screen, and then choose Capture→Start or click the button on the main toolbar.

B. How to view packets in Wireshark
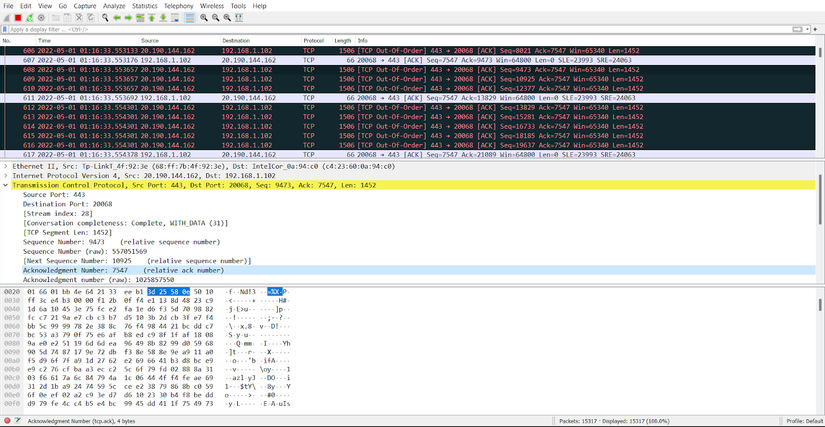
Once you’ve captured some packets or you’ve opened a previously saved capture file, you can view the packets displayed in the Packet List by simply clicking on a packet in the Packet List, which will display the captured packet. Selected in Packet Details and Packet Bytes. You can then expand any section of Packet Details to see detailed information about each protocol in each packet. Clicking an item in Packet Details will highlight the corresponding bytes in byte view. An example of a selected TCP packet is shown in the figure. It also has an Acknowledgment in the selected TCP header, displayed in byte view as the selected bytes.

C. How to filter packets in Wireshark
Wireshark has two types of filters: Capture Filters and Display Filters.
Capture Filter is used to filter when capturing packets from network activities
Display Filters allow you to focus on the packets you are interested in while hiding the ones you don’t. They allow you to display only packages based on:
- Protocol
- The presence of a field
- The values of fields
- A comparison between fields…and more!
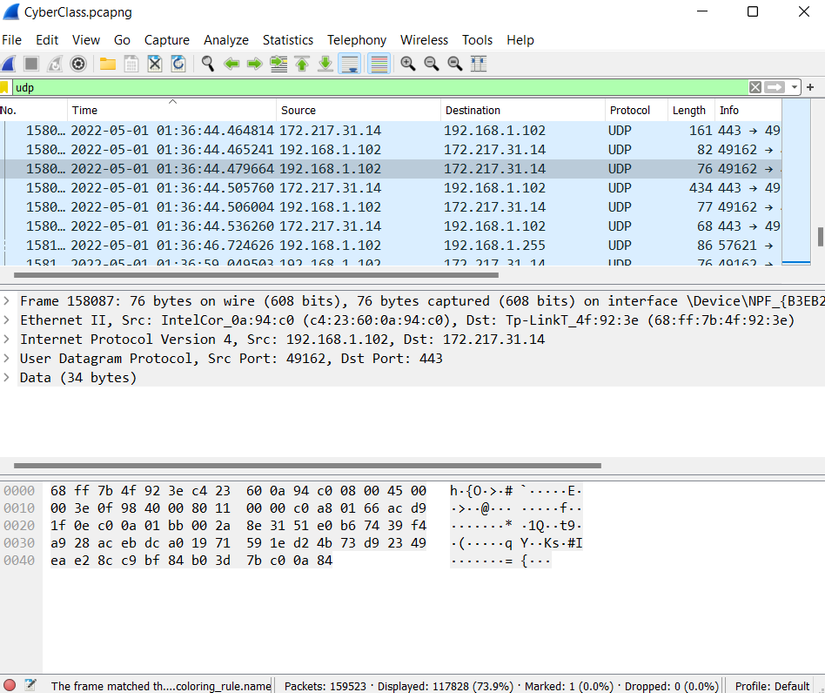
To display only packets containing a specific protocol, enter the protocol name in the display filter toolbar of the Wireshark window and press enter to apply the filter. The figure below shows an example of what happens when you type “udp” into the display filter toolbar.

- Wireshark provides a display filter language that allows you to control exactly which packets are displayed. They can be used to check for the presence of a protocol or field, the value of a field, or even compare two fields. These comparisons can be combined with logical operators, such as “and” and “or”, and parentheses into complex expressions.
- You can create a display filter that compares values using a number of different comparison operators. For example, to show only packets to or from IP address 192.168.1.102, use ip.addr == 192.168.1.102
- You can refer to the syntax to use the display filter more effectively in the cheat sheet below.
