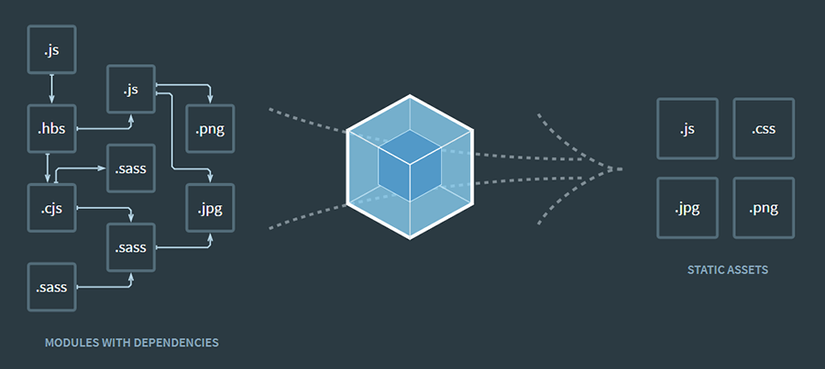
In the previous article, we looked at what webpack is. Today article will learn how to install webpack and practice on Windows 10 operating system (OS), because webpack runs on NodeJS environment, we need to install following steps:
1. Install NodeJS
- Depending on the operating system you are using, download the corresponding version of NodeJS: https://nodejs.org/en/download/
- You can refer to the installation way at: https://vntalking.com/cai-dat-nodejs-tren-window-ubuntu.html
2. Install Webpack
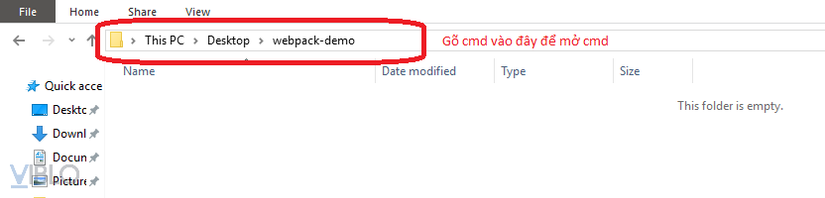
Step 1: Create a practice folder
Create a webpack-demo folder on the desktop for practice
Step 2: Open cmd
Click inside the folder above and open cmd . For Windows OS you can type cmd in the address bar of the folder and press enter to open it
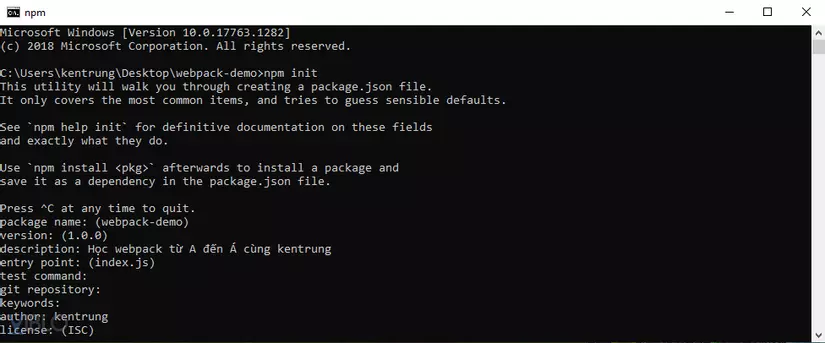
Step 3: Create the package.json file
This is the configuration file of the project that stores the information: project name, project description, version, author, packages used … In the cmd window, type:
1 2 | npm init |
When finished typing in cmd will ask some of the following information:
1 2 | package name: (webpack-demo) |
package name : the default value is the name of your folder. You can press enter to select this name or give it another name.
1 2 | version: (1.0.0) |
version : the default value is 1.0.0, the version numbering rule you should find out more on the web is currently just enter enter
1 2 | description: |
description : description for the project, should be brief, simple, concise, non-fiction, if you don’t know what to say then enter now
1 2 | entry point: (index.js) |
entry point : the default value is index.js It asks which file is the main js file of the project, just enter next
1 2 | test command: |
test command : when running npm run test it will show what you write here, generally should not write anything just enter
1 2 | git repository: |
git repository : this is the git repository corresponding to your project, now there is no just enter
1 2 | keywords: |
keywords : project keywords, if you don’t know how to write keywords, then just enter enter
1 2 | author: |
author : the author of the project, enter a name like kentrung, for example, otherwise enter enter
1 2 | license: (ISC) |
license : default value is ISC. This is the copyright license of the project with ISC with MIT, generally I do not find out so I do not know, just enter next next information only.
1 2 3 4 5 6 7 8 9 10 11 12 13 14 15 16 17 | About to write to C:UserskentrungDesktopwebpack-demopackage.json: { "name": "webpack-demo", "version": "1.0.0", "description": "", "main": "index.js", "scripts": { "test": "echo "Error: no test specified" && exit 1" }, "author": "", "license": "ISC" } Is this OK? (yes) |
After the license key is completed, it shows me a sketch with the information I have provided. Honestly, I did not provide anything ***, just press enter. At the end of the essay, he asked if this sketch was OK and left the default value to yes. If you enter and accept the falcon, type no to disagree and try again. When you type no and press enter it will tell Aborted. means has been canceled. This is a reference of the values I enter
There is a saying: life is too short to draw USB properly . You get tired of typing npm init and entering a bunch of information, there’s a command that helps you create the package.json file quickly and set all the default values:
1 2 | npm init -y |
Go back to the webpack-demo folder on your computer and you’ll see there is an additional package.json file inside it, oh magic vl.
Step 4. Install webpack and webpack-cli
Still in the above cmd window after creating the package.json file, write this command to install the two guys above.
1 2 | npm install webpack webpack-cli --save-dev |
The --save-dev parameter --save-dev package.json to install this library only while coding the project, and when it is actually marketed, it is not needed. That is why the dependencies of package.json are divided into 2 parts: “dependencies” and “devDependencies”
After waiting for the above command to run, return to the webpack-demo folder and you will see the node_modules, package.json and package-lock.json folders in the following structure
1 2 3 4 5 | webpack-demo |- node_modules/ |- package-lock.json |- package.json |
I just need to care about the package.json file and the code inside will be like this.
1 2 3 4 5 6 7 8 9 10 11 12 13 14 15 16 17 | { "name": "webpack-demo", "version": "1.0.0", "description": "", "main": "index.js", "scripts": { "test": "echo "Error: no test specified" && exit 1" }, "keywords": [], "author": "", "license": "ISC", "devDependencies": { "webpack": "^4.43.0", "webpack-cli": "^3.3.11" } } |
That’s it, installing webpack is not too complicated, is it bro? The article here is over. See you in the next article.
- Reference article: https://webpack.js.org/guides/getting-started/#basic-setup
- Sourcode github: https://github.com/kentrung/webpack-tutorial