TestNG is a test framework – manages the creation of test suite / test cases, the sequence of running tests and the report after the run test is completed. TestNG is built from the inspiration of 2 xUnit frameworks: JUnit (Java) and NUnit (C #) (NG stands for Next Generation). TestNG can be used for Unit, Integration, and End-to-end testing. It was developed by Cedric Beust. TestNG is called Next Generation because it has some advantages over JUnit.
Although JUnit is a simple and easy to use framework, it has its own limitations; and TestNG was born to overcome these limitations. TestNG is an open source framework distributed by the Apache Software License and available for download (free). It provides the most effective result format possible, in other words, it can be shared with stakeholders to get an overview of the status of the product / application to eliminate the disadvantages of WebDriver when creating test reports. TestNG has a built-in exception handling mechanism that allows the program to run without stopping unexpectedly.
Both TestNG and JUnit belong to one Unit framework family, in which Test NG is an extended version of JUnit and is more widely used in the modern testing era.
Features of TestNG
- Caption support
- Parameterization support
- The advanced implementation method does not require the creation of a test suite
- Support for Data Driven Testing by Data provider (Data provider)
- Allows users to set execution priority for test methods
- Supporting a safe environment to avoid risks when implementing multiple threads
- Ready to support integration with various tools and plug-ins, such as build tools (Ant, Maven, etc.), Integrated development environment (Eclipse).
- Convenient for users with efficient reporting facilities using ReportNG
Compare TestNG and JUnit
There are many different advantages that help TestNG outperform JUnit. Some of them are:
- Advanced annotations and easy to use
- Can set the execution pattern
- Can execute test scripts simultaneously
- It is possible to set up dependent test scenarios
In both TestNG and JUnit, comments follow the “@” prefix. Here’s how to install and execute TestNG.
Install TestNG in Eclipse
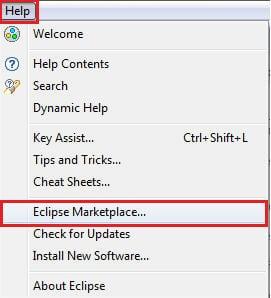
Step 1: Open the eclipse IDE -> Click the menu’s Help option -> Select “Eclipse Marketplace ..”:
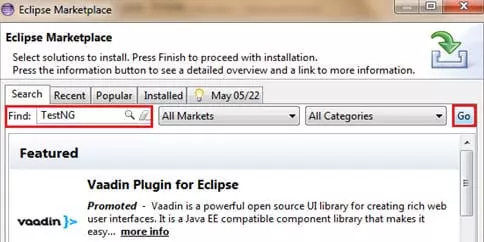
Step 2: Enter the keyword “TestNG” into the search textbox and click the “Go” button:
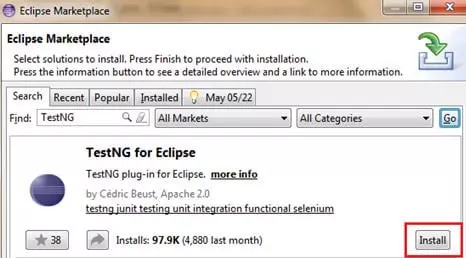
Step 3: After the user clicks the “Go” button, the results matching the search term will be displayed. Please select the corresponding TestNG and click “Install” to start the installation:
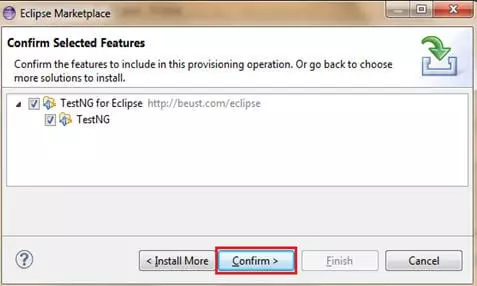
Step 4: During the installation process, there will be a confirmation popup, click the “Confirm” button on this popup to continue the installation process:
Step 5: In the next step, the application will prompt you to accept the license and then click the “Finish” button.
Step 6: The installation is started now and displays the following process:
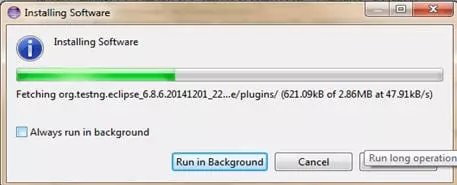
After installation is complete, you should restart Eclipse to reflect the changes made.
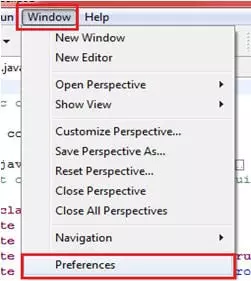
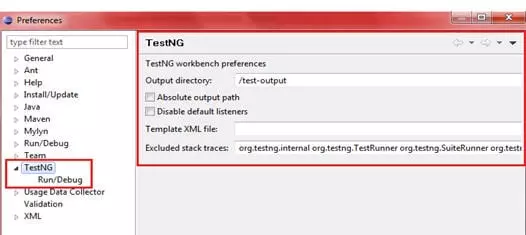
Upon rebooting, users can verify the TestNG setting by navigating to “Preferences” from the “Window” option on the menu bar. Refer to the image below:
Create a sample TestNG project
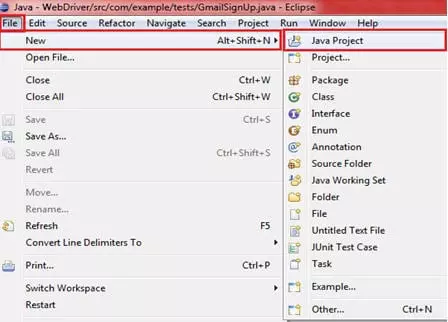
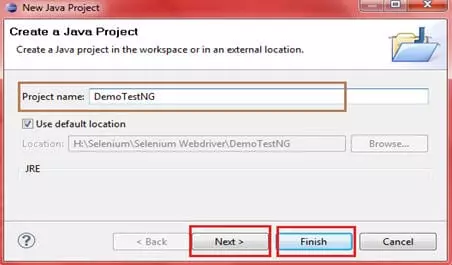
Step 1: Click File -> New -> Select Java Project:
Step 2: Enter the project name as “Demo TestNG” -> Next button -> button Finish, and your Java project is ready.
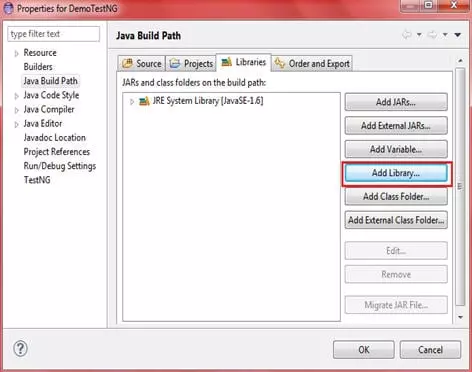
Step 3: The next step is to configure the TestNG library for the newly created java project. Click tap “Libraries” in the Configure Build Path section. Click the “Add library” button:
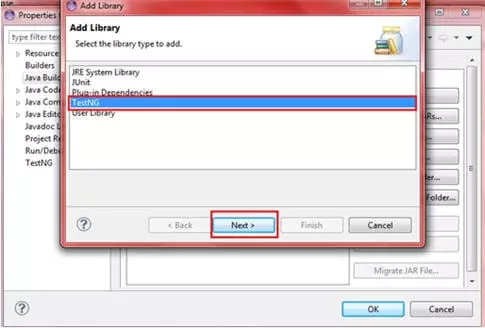
Step 4: The user will be dependent on the broadcast dialog to select the configuration library. Select TestNG and click and “Next” button as shown in the image below. At the end of the process, click the “Finish” button.
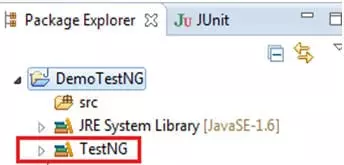
OK, so TestNG has been added to the Java project and the necessary libraries can be found in the package when extending the diagram tree:
You can add any library you want in the above way.
Create TestNG class
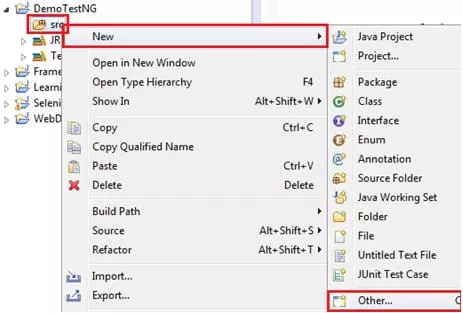
Step 1: Expand the “DemoTestNG” project -> right click on “src” folder -> “New” -> “Other”:
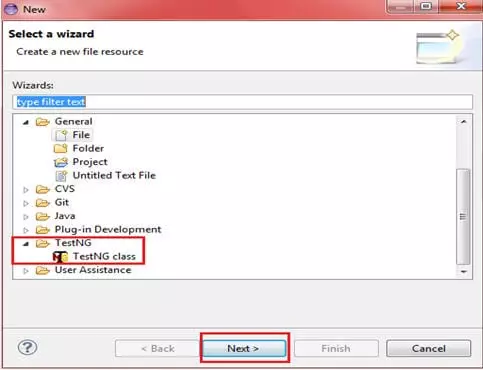
Step 2: Expand the “TestNG” section and select the “TestNG class” option and click the “Next” button:
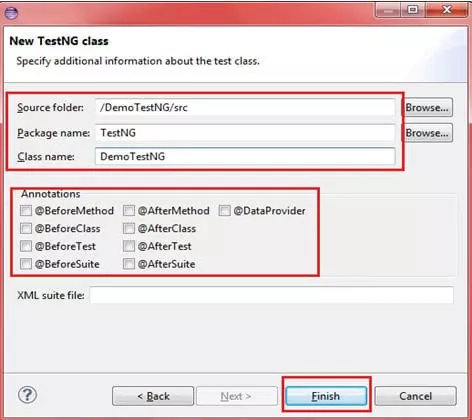
Provide the necessary information as below image. Specify the Source folder, the Package name and the Class name and click the “Finish” button:
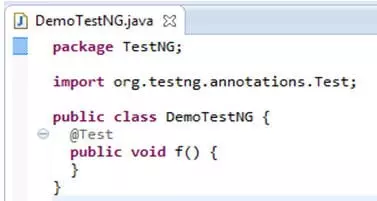
The TestNG class mentioned above will be created with the default schema:
Having got the basic ground for the TestNG test script, we will now add the actual test code according to the scenario below.
Scenario:
- Launch browser and open gmail.com page.
- Confirm the title of the page and print the verification result.
- Enter the username and password.
- Click the Login button.
- Close the web browser.
Code:
1 2 3 4 5 6 7 8 9 10 11 12 13 14 15 16 17 18 19 20 21 22 23 24 25 26 27 28 29 30 31 32 33 34 35 36 37 38 39 40 41 42 43 44 45 46 | package TestNG; import org.openqa.selenium.By; import org.openqa.selenium.WebDriver; import org.openqa.selenium.WebElement; import org.openqa.selenium.firefox.FirefoxDriver; import org.testng.Assert; import org.testng.annotations.Test; public class DemoTestNG { public WebDriver driver = new FirefoxDriver(); String appUrl = "https://accounts.google.com"; @Test public void gmailLogin() { // launch the firefox browser and open the application url driver.get("https://gmail.com"); // maximize the browser window driver.manage().window().maximize(); // declare and initialize the variable to store the expected title of the webpage. String expectedTitle = " Sign in - Google Accounts "; // fetch the title of the web page and save it into a string variable String actualTitle = driver.getTitle(); Assert.assertEquals(expectedTitle,actualTitle); // enter a valid username in the email textbox WebElement username = driver.findElement(By.id("Email")); username.clear(); username.sendKeys("TestSelenium"); // enter a valid password in the password textbox WebElement password = driver.findElement(By.id("Passwd")); password.clear(); password.sendKeys("password123"); // click on the Sign in button WebElement SignInButton = driver.findElement(By.id("signIn")); SignInButton.click(); // close the web browser driver.close(); } } |
Explain the code related to TestNG
- Test is one of the TestNG annotations ( TestNG annotation ). This comment lets the program executor know that the method annotated is Test as a test method. To be able to use various TestNG annotations, we need to import the annotation package:
import org.testng.annotations.* - No need for
main ()function while creating test script using TestNG. The program implementation is done on the basis of comments. - In the statement, we use the Assert class when comparing expected values and actual values. The Assert class is used to perform various verification commands. To be able to use different assertions, we must import the assert package:
import org.testng.Assert
Execute the TestNG test script
TestNG test script can be executed in the following way:
=> Right-click anywhere in the editor class or java class in the package tree, select the “Run As” option -> “TestNG Test”:

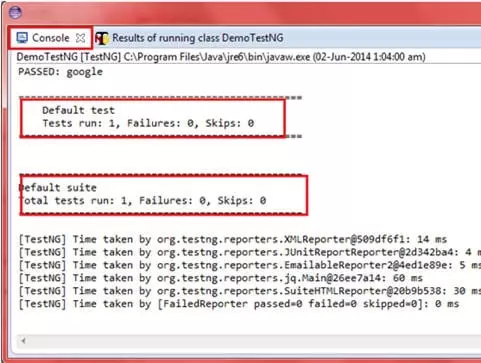
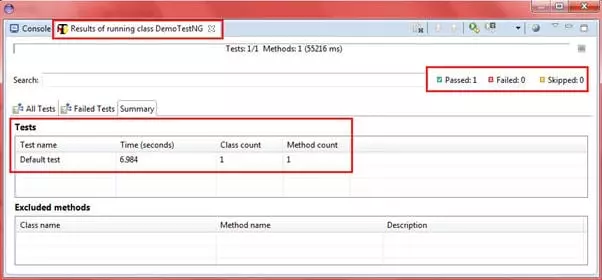
TestNG results are displayed in two windows:
- Control window
- TestNG results window
HTML Reports
TestNG comes with great ability to create easy-to-read and understandable HTML reports for users to perform tests. These reports are viewable in any browser and it can also be viewed using the build browser in Eclipse.
Steps to create HTML report file
Step 1: Execute the newly created TestNG class. Refresh the project containing TestNG by right-clicking the project and selecting the “Refresh” option.
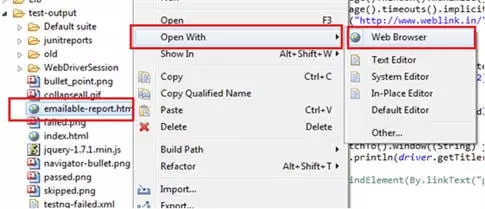
Step 2: A folder named “test-output” will be created in the project at the “src” directory level. Expand the folder “test-output” -> select the file “emailable-report.html” and open this file in Eclipse browser. This HTML file is the result of executing the above test script (TestNG class).

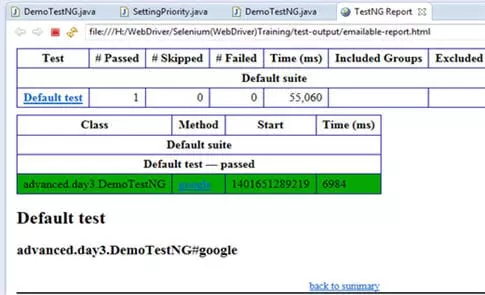
Step 3: The HTML report will be opened in the eclipse environment as shown below:
Set the priority in TestNG
1 2 3 4 5 6 7 8 9 10 11 12 13 14 15 16 17 | package TestNG; import org.testng.annotations.*; public class SettingPriority { @Test(priority=0) //độ ưu tiên đầu tiên -> chạy method1() đầu tiên public void method1() { } @Test(priority=1) public void method2() { } @Test(priority=2) public void method3() { } } |
The priority code snippet will be placed in the @Test annotation, with the syntax Test (priority = {expected_order}) (expected_order: 0 …. N, the smaller the number, the greater the priority). In the above example, the order of execution would be:
- Method1
- Method2
- Method3
Annotations : If you are interested can refer to the original article here: https://www.softwaretestinghelp.com/testng-framework-selenium-tutorial-12/