Today started playing Nodejs, found it quite interesting and interesting, so I would like to share this article, guide for newbies to nodejs like me. The goal is to create a basic web with signup, login and logout functions for users, and of course you need to have basic Nodejs knowledge, as well as basic web.
Environment setup
- Create the project folder:
- Here I will use the Express generator to build the base as well as the folder structure for this demo: 3
- First you need to install npm install -g [email protected]
- And run express passport-demo to initialize the demo.
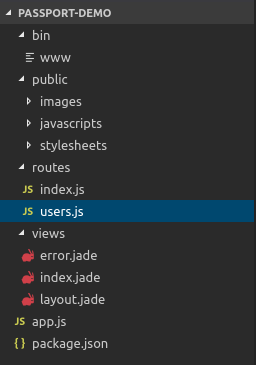
- Take a look at the folder tree, it’s quite basic, slowly I’ll go into detail

- Connect and use Mongodb:
- Here, I will use ORM as Mongoose for Mongo, if you do not have experience or knowledge about it, read more here .
- You need to install mongodb already.
- and install mongoose to use: npm install mongoose.
- Install passport
- npm install passport passport-local
- Passport supports a lot of authen methods like with google, facebook, twiter … here I only use passport-local to authen user, you can refer to http://www.passportjs.org/docs /
Twist up your code and code
- First create the model user first:
- Go straight into the code nhes
- Set up for mongoose:
- app.js
1 2 3 4 | var mongoose = require('mongoose'); //require model require('./models/User'); |
- Create model user
- models / user.js
1 2 3 4 5 6 7 8 9 10 11 12 13 14 15 16 17 18 19 20 21 22 23 24 25 26 27 28 29 30 31 32 33 34 35 36 37 38 39 40 41 42 43 44 45 46 47 48 49 50 51 52 53 54 55 56 57 58 59 60 61 62 63 64 65 66 67 68 69 70 71 72 73 74 75 | var mongoose = require("mongoose"); var crypto = require("crypto"); var jwt = require("jsonwebtoken"); var secret = 'secrect password' //Tạo schema cho user var UserSchema = new mongoose.Schema( { username: { type: String, lowercase: true, required: [true, "can't be blank"], match: [/^[a-zA-Z0-9]+$/, "is invalid"], index: true }, email: { type: String, lowercase: true, required: [true, "can't be blank"], match: [/ <a class="__cf_email__" href="/cdn-cgi/l/email-protection" data-cfemail="60334b20">[email protected]</a> S+.S+/, "is invalid"], index: true }, hash: String, salt: String }, { timestamps: true } ); //Khởi tạo password bằng cách mã hóa password với chuỗi salt được tạo ra ngẫu nhiên. UserSchema.methods.setPassword = function(password) { this.salt = crypto.randomBytes(16).toString("hex"); this.hash = crypto .pbkdf2Sync(password, this.salt, 10000, 512, "sha512") .toString("hex"); }; //Kiểm tra password có đúng hay không bằng cách mã hóa password nhập vào + salt và so sánh với hash của user. UserSchema.methods.validPassword = function(password) { var hash = crypto .pbkdf2Sync(password, this.salt, 10000, 512, "sha512") .toString("hex"); return this.hash === hash; }; //Sử dụng JWT để sinh ra token chứa info của user đã login, với secret là key cho để mã hóa cùng, tất nhiên nên dùng biến môi trường nhé =)) UserSchema.methods.generateJWT = function() { var today = new Date();Cùng giải thích 1 tí nhé: - Ở đây mình sẽ sử dụng crypto để mã hóa password, trong model user sẽ có 2 field: hash (Kết quả của password sau khi đã mã hoá), salt (1 chuỗi ngẫu nhiên sinh ra để mã hóa với password thật của user) - var exp = new Date(today); exp.setDate(today.getDate() + 60); return jwt.sign( { id: this._id, username: this.username, exp: parseInt(exp.getTime() / 1000) }, secret ); }; //Method giúp trả về thông tin của user. UserSchema.methods.toAuthJSON = function(){ return { username: this.username, email: this.email, token: this.generateJWT(), bio: this.bio, image: this.image }; }; mongoose.model("User", UserSchema); |
I have commented in the code to explain quite well then, if you have any questions, please comment, I’ll try to explain if I know. =)) 2. Config for passport:
- This is my passport configuration file: passport.js
1 2 3 4 5 6 7 8 9 10 11 12 13 14 15 16 17 18 19 20 21 | var passport = require('passport'); var LocalStrategy = require('passport-local').Strategy; var mongoose = require('mongoose'); var User = mongoose.model('User'); //Ta sẽ khởi tạo Strategy cho passport, đầu tiên là object chứa tên của field username và password mà ta sẽ truyền vào khi gọi api trong req.body (options, mặc định là // // username và password) //Tiếp theo làm hàm callback để verify, hàm này nhận vào 3 đối số là username, password, verified, với verified là callback để trả về sau khi verify passport.use(new LocalStrategy({ usernameField: 'user[email]', passwordField: 'user[password]' }, function(email, password, done) { User.findOne({email: email}).then(function(user){ if(!user || !user.validPassword(password)){ return done(null, false, {errors: {'email or password': 'is invalid'}}); } return done(null, user); }).catch(done); })); |
- Above if you do not understand how I use the verifed (done) function, please look at this code of passport local, have questions that can be answered below I will try to answer.
1 2 3 4 5 6 | function verified(err, user, info) { if (err) { return self.error(err); } if (!user) { return self.fail(info); } self.success(user, info); } |
-Link github for anyone who wants to read and understand how it works https://github.com/jaredhanson/passport-local/blob/master/lib/strategy.js 3. Create routes:
- Signup
1 2 3 4 5 6 7 8 9 10 11 12 13 | //Handle khi user signup, ở đây chỉ demo nên mình sẽ không thực hiện validate nhé. router.post('/signup', function(req, res){ var user = new User(); user.username = req.body.username; user.email = req.body.email; user.setPassword(req.body.password); user.save().then(function(){ return res.json({user: user.toAuthJSON()}); }).catch(next); }); |
- Login:
1 2 3 4 5 6 7 8 9 10 11 12 13 14 15 | router.post('/login', function(req, res, next){ // passport.authenticate sẽ nhận vào callback cho method successs ở phần config passport passport.authenticate('local', {session: false}, function(err, user, info){ if(err){ return next(err); } //Nếu thông tin user là đúng thực hiện tạo JWT và trả dữ liệu về. if(user){ user.token = user.generateJWT(); return res.json({user: user.toAuthJSON()}); } else { return res.status(422).json(info); } })(req, res, next); }); |
- Logout: This probably does not need api anymore, in the client we just delete the token obtained when logging in is complete.
- The last step is also quite important to check the user is logged in, usually the client will use the token after login to send the cream in the header I will have the Auth.js file as follows
1 2 3 4 5 6 7 8 9 10 11 12 13 14 15 16 17 18 19 20 21 22 23 | var jwt = require('express-jwt'); var secret = require('../config').secret; // Lấy ra biến secret đã dùng để mã hóa function getTokenFromHeader(req){ if (req.headers.authorization && req.headers.authorization.split(' ')[0] === 'Token' || req.headers.authorization && req.headers.authorization.split(' ')[0] === 'Bearer') { return req.headers.authorization.split(' ')[1]; } return null; } var auth = { required: jwt({ secret: secret, userProperty: 'payload', getToken: getTokenFromHeader }) }; module.exports = auth; |
- Express-jwt is a middleware that helps us validate the jwt token and set req.user from the retrieved token, see more at https://github.com/auth0/express-jwt
- And now in the route you need to check which user is logged in just import and add the auth.required callback to check, I use userProperty: ‘payload’ so I want to get the encrypted payload in jwt we just need to: req.payload. id
summary
- Above is the basic api demo app to create a registration and login function for users, the article is quite long, I write a lot of lack of hope for everyone to sympathize, hope in the next article I will try to solve prefer more and write full client side for you to understand.
- If there’s anything wrong, please comment to exchange, thanks