Typically, to receive push notifications, your device needs to be subscribed to the Apple Push Notification (APN) service by receiving a unique device token. Once a device is registered, you can send push notifications to your device by sending a request to the APN using your device’s token. All this communication needs to be done from some sort of web host. You can deploy your own web service to communicate with the APN, but there are easier options. One of them is Firebase Cloud Messaging (FCM). With Firebase Cloud Messaging (FCM) you have an easy-to-use system at hand, FCM handles the jobs of push notifications, allowing you to send and receive push notifications without having to write services. your own web. Today I will guide you through.
Begin
First you need to download the sample project here Project you just downloaded, GoodNew is a news app, but we will only have good news First you need to open the Signing & Capabilities tab, and enter the Bundle ID for your app. .
Config Firebase
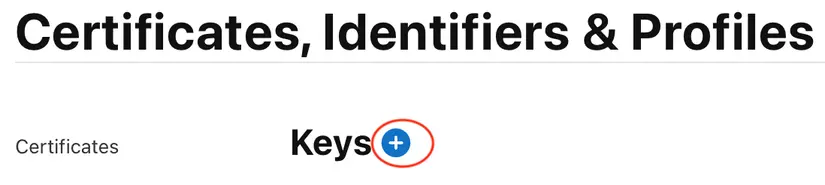
Next you need to configure, add Firebase to our project. Firebase requires you to upload your p8 certificate to your application. This is a special file that contains the private key that allows Firebase to send notifications. To get the p8 certificate, log in to Apple Developer. Select Certificate, Identifiers & Profiles and go to Key. Select the + button to create a new key.
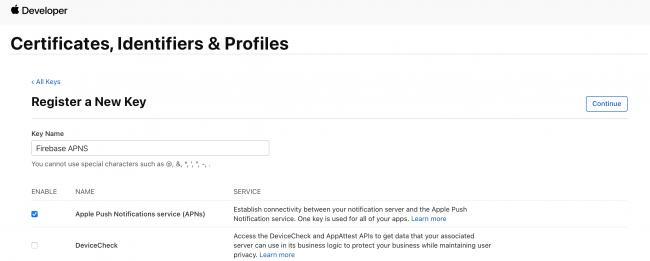
Give it a name and activate the Apple Push Notifications service (APN). Select Continue and on the next screen select Register.
Then download the p8 file you just created
Setting for Firebase
Next, go to your Firebase account and select Go to Dashboard in the upper right corner of the page. Select Add a project and do the following to create your project: Use the name Good News. Turn on Google Analytics. Select a name and country for Google Analytics. Use the default analysis settings.
You will then need to configure Firebase with Apple p8 and your membership information. In your Firebase project, select the gear next to Project Overview and select Project Settings: 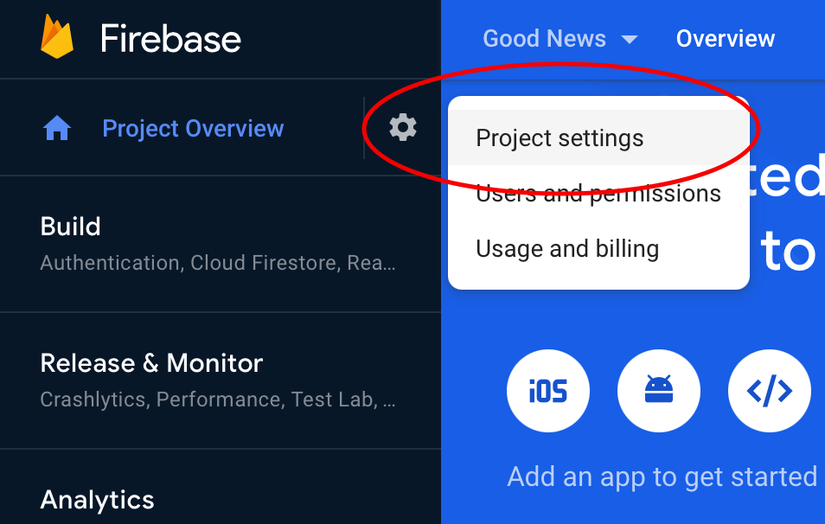
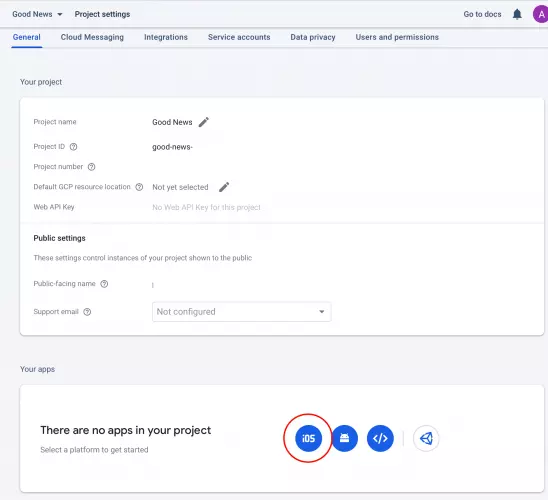
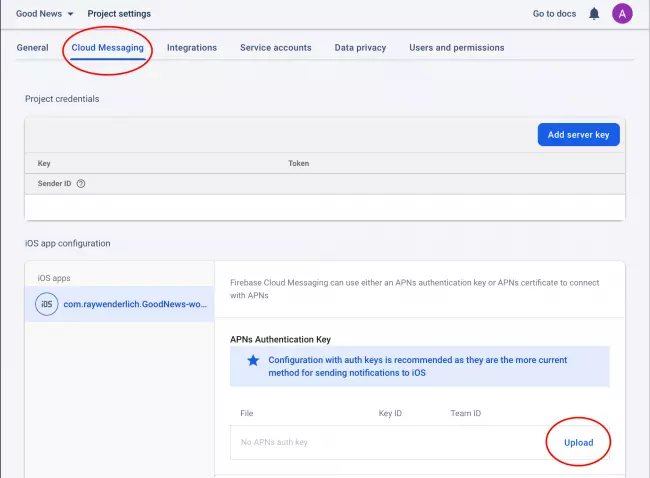
From there, go to the application configuration page: Add the package identifier for your project. You can leave the App nickname and Apple store ID blank. After registering your app, download GoogleServices-Info.plist. You will need this to configure Firebase in your application later. You can choose Next for the remaining steps. You won’t be using CocoaPods, and you can currently skip the steps to add the initialization code to your app. Next, upload your p8 certificate by going to Cloud Message in your Firebase project settings. Under APN Authentication Key, select Upload.
Add the Firebase package
You will now use Swift Package Manager to add Firebase to your project. In Xcode, choose File ▸ Swift Packages ▸ Add Package Dependency…. In the Select Package pop-up, enter https://github.com/firebase/firebase-ios-sdk.git . Select Next, keeping the default options, until you get to a screen with a list of packages. This may take some time while Xcode downloads the required data. Select the following packages from the list: FirebaseAnalytics FirebaseMessaging If you don’t want to collect information about how your users are using push notifications, please uncheck FirebaseAnalytics. After adding these packages, it may take several minutes to add and build dependencies.
Next, drag the file GoogleService-Info.plist into your project
Config App
Start by opening Info.plist and add the following: Key: FirebaseAppDelegateProxyEnabled Type: Boolean Value: NO (Xcode will show this value as 0)

By default, FirebaseMessaging uses a spin method to handle push notifications. You’ll handle all the code yourself, so disable this using the plist entry you just added. Next, you will add an application agent to your project, who will be responsible for setting up push notifications. Create a new file called AppDelegate.swift and replace its code with the following code:
1 2 3 4 5 6 7 8 9 10 11 12 13 14 15 | import UIKit import Firebase import FirebaseMessaging import FirebaseAnalytics class AppDelegate: NSObject, UIApplicationDelegate { func application( _ application: UIApplication, didFinishLaunchingWithOptions launchOptions: [UIApplication.LaunchOptionsKey: Any]? = nil ) -> Bool { return true } } |
Next, add a new property to AppMain inside AppMain.swift:
1 2 | @UIApplicationDelegateAdaptor(AppDelegate.self) var appDelegate |
Start Firebase
Reopening AppDelegate.swift and add the following section to the function application(_: didFinishLaunchingWithOptions 🙂 , just before the return :
1 2 3 4 5 | // 1 FirebaseApp.configure() // 2 FirebaseConfiguration.shared.setLoggerLevel(.min) |
Then add the following code
1 2 3 4 5 6 7 8 9 10 11 12 13 14 15 16 17 18 19 | extension AppDelegate: UNUserNotificationCenterDelegate { func userNotificationCenter( _ center: UNUserNotificationCenter, willPresent notification: UNNotification, withCompletionHandler completionHandler: @escaping (UNNotificationPresentationOptions) -> Void ) { completionHandler([[.banner, .sound]]) } func userNotificationCenter( _ center: UNUserNotificationCenter, didReceive response: UNNotificationResponse, withCompletionHandler completionHandler: @escaping () -> Void ) { completionHandler() } } |
Sign up for notifications
With Firebase configured, you can initiate subscriptions to receive notifications. Add the below method to the UNUserNotificationCenterDelegate extension:
1 2 3 4 5 6 7 | func application( _ application: UIApplication, didRegisterForRemoteNotificationsWithDeviceToken deviceToken: Data ) { Messaging.messaging().apnsToken = deviceToken } |
Then add the application (_: didFinishLaunchingWithOptions :), before return:
1 2 3 4 5 6 7 8 9 | // 1 UNUserNotificationCenter.current().delegate = self // 2 let authOptions: UNAuthorizationOptions = [.alert, .badge, .sound] UNUserNotificationCenter.current().requestAuthorization( options: authOptions) { _, _ in } // 3 application.registerForRemoteNotifications() |
Finally add the following code at the bottom:
1 2 3 4 5 6 7 8 9 10 11 12 13 | extension AppDelegate: MessagingDelegate { func messaging( _ messaging: Messaging, didReceiveRegistrationToken fcmToken: String? ) { let tokenDict = ["token": fcmToken ?? ""] NotificationCenter.default.post( name: Notification.Name("FCMToken"), object: nil, userInfo: tokenDict) } } |
And set delegate of FCM is App Delegate of app:
1 2 | Messaging.messaging().delegate = self |
Test send message
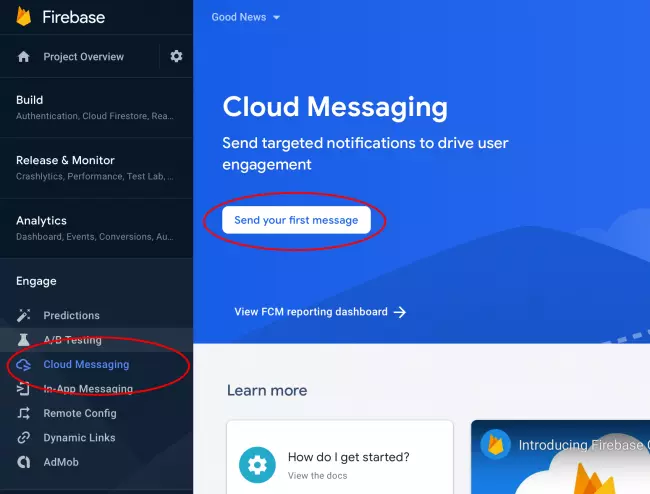
Now go to your Firebase project and select Cloud Messaging found under Interaction. Then choose Send your first message.
In Step 1, enter the following information:
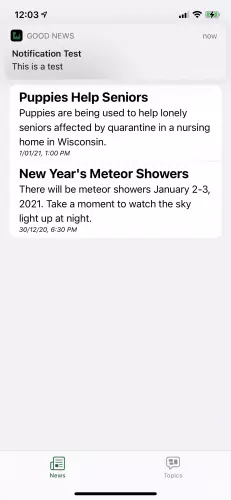
- Notification title: Notification Test
- Notification text: This is a test Next, select your application from the drop-down menu in Step 2:
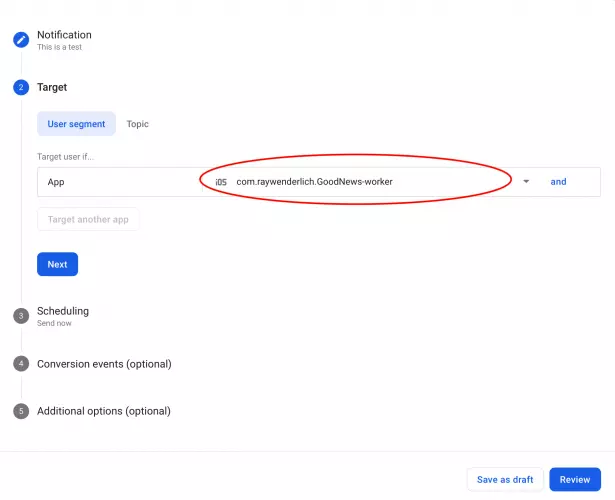
This will target your specific application when using the Cloud Message console. Finally, choose Review and then Publish. On your device, you will see the following message: