In this article I will guide you how to use Charles Proxy software to conduct debugging (debugging) on Android devices.
If you have not installed and configured Charless settings, you can see in the previous article.
In the previous article, I showed how to install and configure Charles on Android and IOS virtual machines.
1. Setting Up Your Project
If your test device is running Android 7.0 or higher, there will be a few more steps to ensure that you fully trust the Charles CA Certification. To ensure Android trusts the certificate, you will need to specify a Network Security Configuration for your application. There are a number of different ways to add your certificate to the application’s trusted configuration, but the easiest way is not to include the Charles certificate in the application code, but simply trust the CA certificate installed by the user. (like previous versions of Android used to do).
Add the android: networkSecurityConfig attribute to the application tag in your AndroidManifest.xml file:
1 2 3 4 5 6 7 8 | <span class="token tag"><span class="token tag"><span class="token punctuation"><</span> application</span> <span class="token attr-name"><span class="token namespace">android:</span> allowBackup</span> <span class="token attr-value"><span class="token punctuation">=</span> ”true”</span> <span class="token attr-name"><span class="token namespace">android:</span> icon</span> <span class="token attr-value"><span class="token punctuation">=</span> ”@mipmap/ic_launcher”</span> <span class="token attr-name"><span class="token namespace">android:</span> label</span> <span class="token attr-value"><span class="token punctuation">=</span> ”@string/app_name”</span> <span class="token attr-name"><span class="token namespace">android:</span> roundIcon</span> <span class="token attr-value"><span class="token punctuation">=</span> ”@mipmap/ic_launcher_round”</span> <span class="token attr-name"><span class="token namespace">android:</span> supportsRtl</span> <span class="token attr-value"><span class="token punctuation">=</span> ”true”</span> <span class="token attr-name"><span class="token namespace">android:</span> theme</span> <span class="token attr-value"><span class="token punctuation">=</span> ”@style/AppTheme”</span> <span class="token attr-name"><span class="token namespace">android:</span> networkSecurityConfig</span> <span class="token attr-value"><span class="token punctuation">=</span> ”@xml/network_security_config”</span> <span class="token punctuation">></span></span> |
Create config networksecurityconfig.xml file:
1 2 3 4 5 6 7 8 9 10 | <span class="token prolog"><?xml version="1.0" encoding="utf-8"?></span> <span class="token tag"><span class="token tag"><span class="token punctuation"><</span> network-security-config</span> <span class="token punctuation">></span></span> <span class="token tag"><span class="token tag"><span class="token punctuation"><</span> debug-overrides</span> <span class="token punctuation">></span></span> <span class="token tag"><span class="token tag"><span class="token punctuation"><</span> trust-anchors</span> <span class="token punctuation">></span></span> <span class="token comment"><!-- Trust user added CAs while debuggable only --></span> <span class="token tag"><span class="token tag"><span class="token punctuation"><</span> certificates</span> <span class="token attr-name">src</span> <span class="token attr-value"><span class="token punctuation">=</span> <span class="token punctuation">"</span> user <span class="token punctuation">"</span></span> <span class="token punctuation">/></span></span> <span class="token tag"><span class="token tag"><span class="token punctuation"></</span> trust-anchors</span> <span class="token punctuation">></span></span> <span class="token tag"><span class="token tag"><span class="token punctuation"></</span> debug-overrides</span> <span class="token punctuation">></span></span> <span class="token tag"><span class="token tag"><span class="token punctuation"></</span> network-security-config</span> <span class="token punctuation">></span></span> |
2. Setting Up Charles
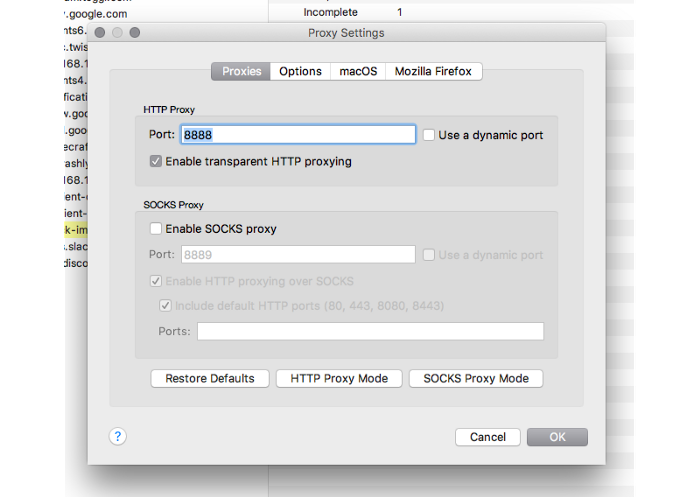
Open Charles and then select * Proxy> Proxy Settings * from the toolbar. You will need to note the specified HTTP Proxy Port.
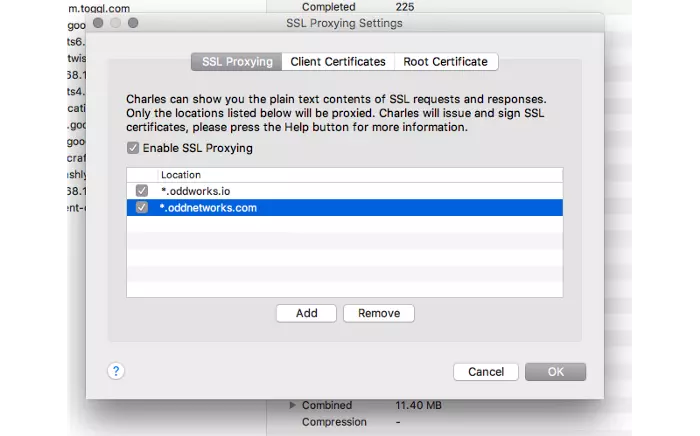
Then open Proxy> SSL Proxying Settings from the toolbar and add the appropriate Server / Port address (server / port) that you want to debug. For example:
3. Setting Up Your Android device
First, note your local IP address in the local network. You will use it in the next step.
Also, make sure Charles is open and your computer is connected to a wifi network with the Android device you are installing.
Go to your device’s settings and wifi configuration. (You can see more details in the previous article )
Press and hold on the network you will use and select Modify network .
Then select Advanced Options and scroll down you will see Proxy .
Select Manual in the Proxy menu.
For Proxy server name enter your IP address that you noted above.
Then, for the Proxy port, use the HTTP Proxy Port that you noted from the Charles Proxy Settings above.
Then press SAVE.

After saving, you may notice a popup on your Mac like this:

Click Allow to allow your Android device to connect to Charles through the proxy it has set up.
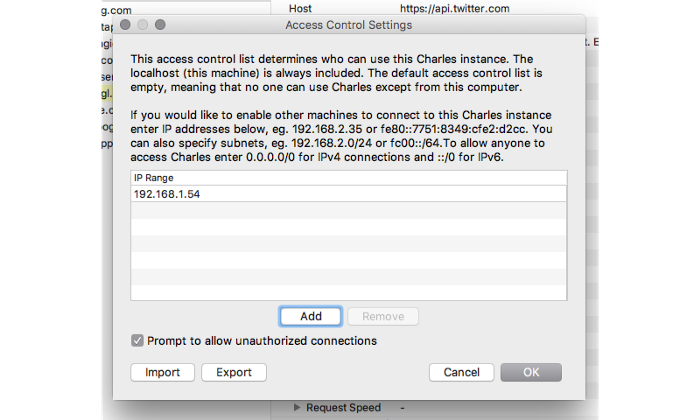
If you don’t see the above message, you can ensure that your device can use a proxy from within Charles by going to Proxy> Access Control Settings and adding the IP address of the Android device on the wifi network.
Go ahead, on your Android device, open your browser and visit the following URL chls.pro/ssl .
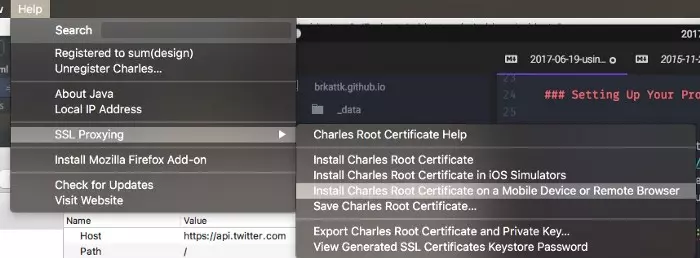
You can also view these instructions from within the Charles application – select Help> SSL Proxying> Install Charles Root Certificate on a Mobile Device or Remote Browser on the toolbar.
Browser downloads the certificate, and once it’s done, tap to open the file. After that, Android will notify you to proceed with the installation of the downloaded file.

After you name the certificate and click OK, you will be prompted to enter your device’s pin / password or be notified of your device’s pin / password settings. Once that process is complete, you can proceed with some debug requests.
Note Until you remove the manual proxy from this device Configure the wifi, whenever you reuse this network, you will need to open Charles and run on the same IP address. You can always configure the network back to Proxy. You can configure the network back to Proxy: None when you’re done debugging.
4. Using An Emulator
Following the instructions from the Charles homepage, you can start the emulator with a flag to use the proxy.
In the Android emulator run configuration add an Additional Emulator Command Line Option:
-http-proxy http: // LOCAL_IP: 8888Where LOCAL_IP is the IP address of your computer, not 127.0.0.1 as that is the IP address of the emulated phone.
Does that mean:
In the configuration of running the Android emulator, add additional command line options:
-http-proxy http: // LOCAL_IP: 8888Where LOCAL_IP is the IP address of your computer, not 127.0.0.1 because it is the IP address of the simulated phone.
The full command will be:
1 2 | emulator -avd EMULATOR_NAME -http-proxy IP_ADDRESS:PORT |
And now, After you’ve completed the setup, you’ll see Charles recording traffic from his device. As long as you’re properly configured, you’ll see those SSL request details from the host addresses you specified in * Charles’ SSL Proxying Settings *.
Thanks for reading!