In many cases, the use of a CDN is required. I have experienced with some CDNs but in the end I choose to use AWS CloudFront. Setting it up is not that simple, but through this tutorial you will learn how to:
- Provide static bucket files from s3 CloudFront.
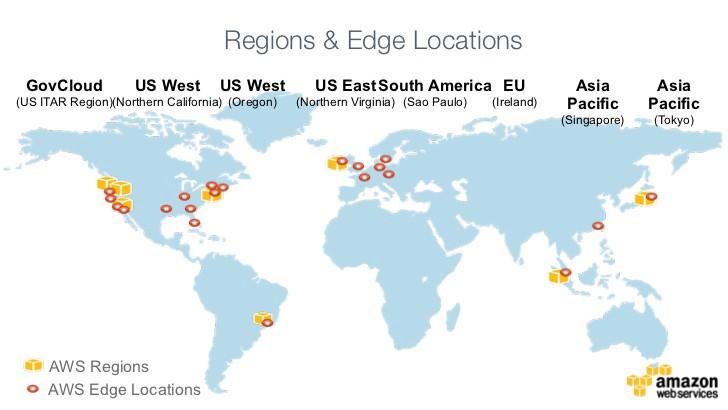
- Deploy static files on CloudFront on multiple regions. (Please see the map below).
- Get signed URLs from CloudFront to use them during development (Python).
CloudFront Features
Amazon CloudFront is a global content delivery network (CDN) service that speeds up the delivery of static files. CloudFront also supports dynamic content.
We can also use them to view cache statistics reports, most commonly used objects, and to track CDNs.
It has advanced security features and some geographic restrictions. They are also integrated with other AWS services such as S3.
Alternatively, they can be integrated with WordPress blogs using the W3 Total Cache plugin.
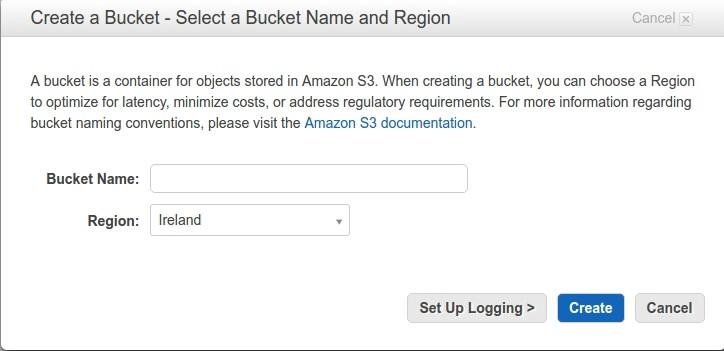
Create Bucket
First of all, we will need to create a bucket: the basic information that will need to be the name of the bucket and Region to be stored.
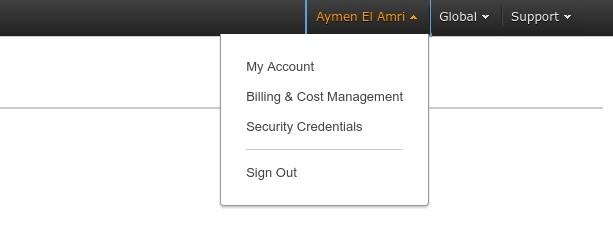
Create CloudFront Key Pairs
Go to menu “Security Credentials”:
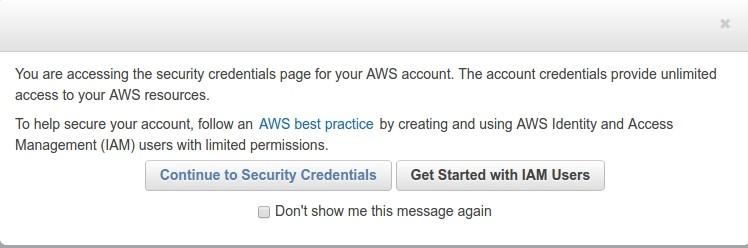
Next, we click on continue:
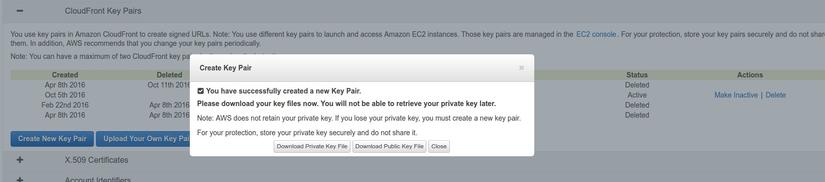
Then, let’s create a pair of keys, let’s keep the private keys safe, we will need to use them:
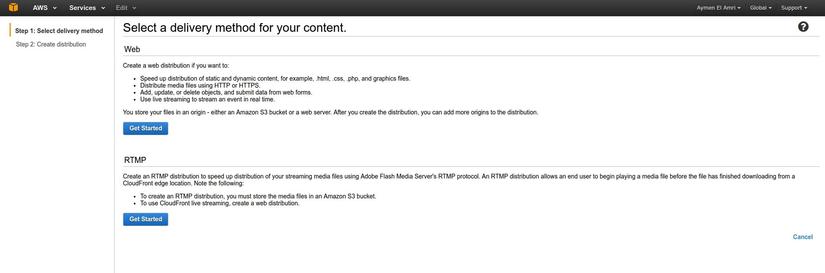
Create CloudFront Distribution
Now we will move to the console screen of CloudFront and proceed to create a new Web Distribution:
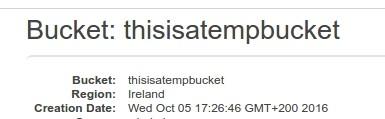
Let’s say we already have a bucket named thisisatempbucket
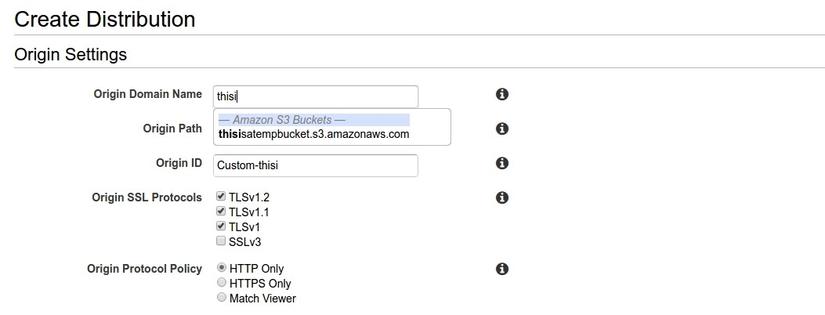
We will set the domain as follows:
1 2 | thisisatempbucket.s3.amazonaws.com |
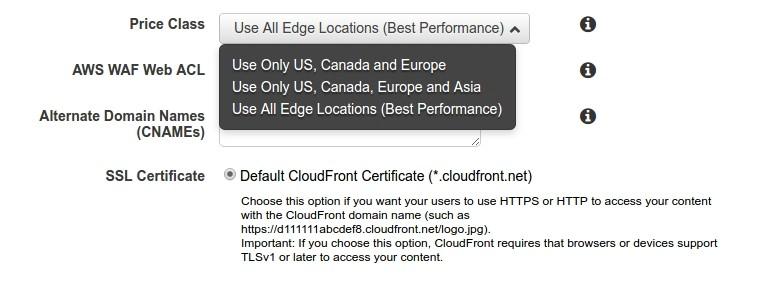
Now we go to the Price Class selection step, and in this function, we will deploy our static files to the regions we want:
With regards to identifiers, I typically create a new identifier for each new distribution so that I can leverage more AWS resource usage:

Finally, we’ll configure settings and test the CloudFront distribution creation:

Keep your content Private
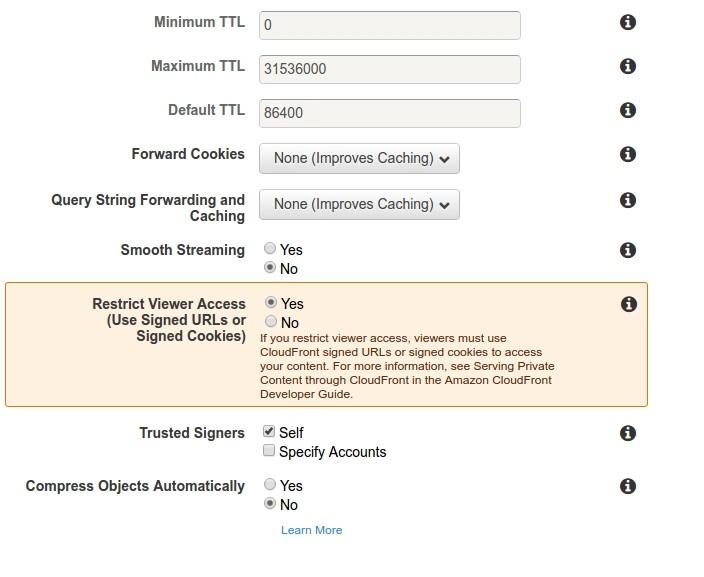
Now, to keep content private and not directly accessible via S3, we will restrict viewers from accessing and using signed URLs.
Go to the Behavior section, click on Default Behavior and choose Edit

Select Yes to restrict access and save.
S3 / CloudFront Policy
Now let’s go back to the bucket to allow CloudFront to access its files.
To do this, we must have the Origin Access Identity of the distribution (we can find it in the origins menu of the CloudFront distribution) and it’s similar:
1 2 | origin-access-identity/cloudfront/EVR8CA2SK123FA |
We should add the following policies to the bucket we are using as origin:
1 2 3 4 5 6 7 8 9 10 11 12 13 14 15 16 | { "Version": "2008-10-17", "Id": "PolicyForCloudFrontPrivateContent", "Statement": [ { "Sid": "1", "Effect": "Allow", "Principal": { "AWS": "arn:aws:iam::cloudfront:user/CloudFront Origin Access Identity EVR8CA2SK123FA" }, "Action": "s3:GetObject", "Resource": "arn:aws:s3:::thisisatempbucket/*" } ] } |
Note that we are using the same id in the bucket policy:
1 2 | EVR8CA2SK123FA |
Create Signed URLs
Do people remember the private key we downloaded?
Now is the time to use it.
Here is a demo script file that allows us to register and generate the URL of the static file in Python:
1 2 3 4 5 6 7 8 9 10 11 12 13 14 15 16 17 18 19 20 21 22 23 24 | import datetime from cryptography.hazmat.backends import default_backend from cryptography.hazmat.primitives import hashes from cryptography.hazmat.primitives import serialization from cryptography.hazmat.primitives.asymmetric import padding from botocore.signers import CloudFrontSigner def rsa_signer(message): with open('The_Path_To_The_Private_Key', 'rb') as key_file: private_key = serialization.load_pem_private_key( key_file.read(), password=None, backend=default_backend() ) signer = private_key.signer(padding.PKCS1v15(), hashes.SHA1()) signer.update(message) return signer.finalize() key_id = 'This_Is_Your_Key_ID' url = 'http://Your_CloudFront_URL_ID.cloudfront.net/css/file.css' expire_date = datetime.datetime(2019, 1, 1) cloudfront_signer = CloudFrontSigner(key_id, rsa_signer) # Create a signed url that will be valid until the specfic expiry date provided using a canned policy. signed_url = cloudfront_signer.generate_presigned_url(url, date_less_than=expire_date) print(signed_url) |
At this point, we can see that the following URL can be used to get our XML resource file:
1 2 | url = 'http://Your_CloudFront_URL_ID.cloudfront.net' |
summary
At this point, you already know the parts that I mentioned from the beginning of the article about CloudFront of AWS already. Hope that my articles will help you as you work with them.
Document source https://docs.aws.amazon.com/AmazonCloudFront/latest/DeveloperGuide/Introduction.html https://medium.com/faun/using-amazon-cloudfront-content-delivery-network-with-s3- e73861dbe060