Things to note when setting up InAppPurchase in Flutter
- Tram Ho
Hello everyone, I’m an ios dev, today I will note some things to help you when doing InAppPurchase for both Android and IOS.
1. Library use
There are many plugins that support you to use in app purchase flutter such as purchases_flutter, in_app_purchase …
I have briefly learned about the purchases_flutter plugin, it has the advantage of using RevenueCat to manage payment transactions quite well, or you can implement it through the following article: https://medium.com/flutter-community/ in-app-purchases-with-flutter-a-comprehensive-step-by-step-tutorial-b96065d79a21. Personally, I use in_app_purchase because I see a lot of it ^_^, the code is easy to understand.
2. Implement In App Purchase.
Plugin in_app_purchase in file README.md it has quite detailed instructions how to implement in app purchase for Android, IOS this I will not repeat again.
I will detail the problems I have when I get items purchased in Google Store and AppStore. For you to understand how to get purchase items from the Store, simply go to google store, the appstore creates purchase item types with productionID (Example: com.RemoveBanner) and under the app you call the correct productionID to get these items. Note that bundleID in AppStore and AppID in Google Store must match under the app to connect.
2. 1 Install on AppStore.
Note 1: To connect items on the AppStore, you must especially note that the Agreements section must be set up and the Paid Apps section must be in status: Active.

This part is very important, remember to declare your bank card and real tax code to be activated by apple. Note, you should read the items carefully, if you set up this part wrong, it takes a long time to contact Apple.
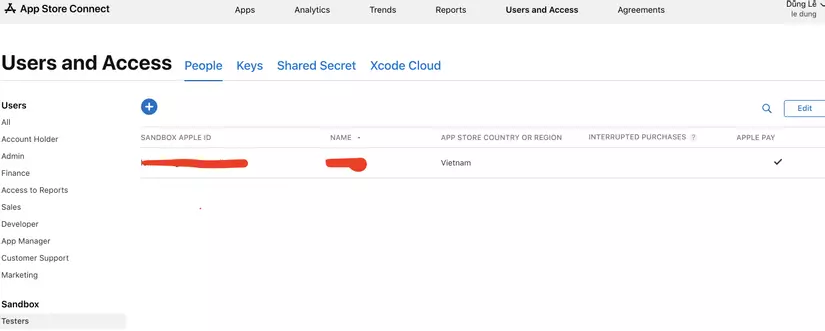
Note 2: To test whether the in app purchase feature is correct, you create a Sanbox environment and add mail to test.
Note 3: This is because it depends on which plugin you choose, I choose the plugin in_app_purchase, I ran its demo and found problems like:
- In IOS, you can get item purchase by creating a file with the extension .storekit in the local to get item purchases. But I run the example plugin in_app_purchase, it doesn’t work. If anyone knows, you can guide me by commenting below the article.
2. 2 Install on Google Store.
I’m an iOS dev, so setting up on google store is quite time consuming.
Note 1:
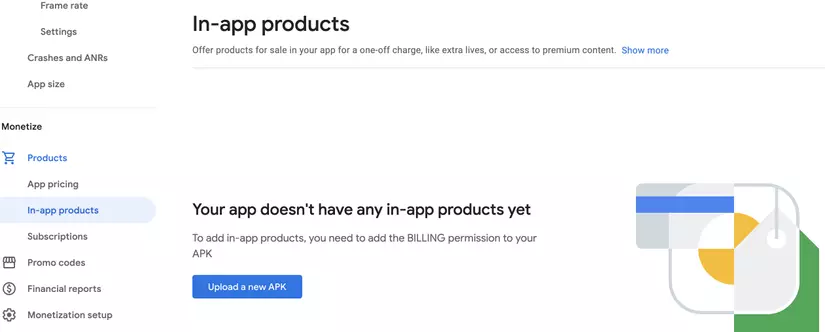
To connect, you have to upload the apk file on google store to create in app purchase. Note that you need to add the following permission to the file: android/app/AndroidManifest.xml to upload to in-app products.
1 2 | <uses-permission android:name="com.android.vending.BILLING" /> |
Here is the instruction to build the release apk file: https://medium.com/@psyanite/how-to-sign-and-release-your-flutter-app-ed5e9531c2ac
Note 2: To test the feature on google store, just like iOS has a Sanbox environment, on Android you add the apk file to the Internal Testing environment, remember to add mail testing to test it.
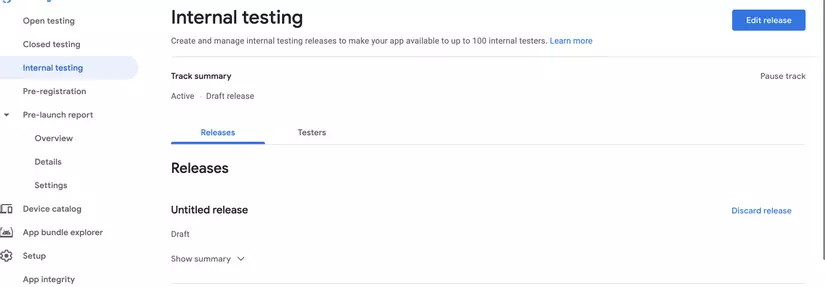
Note 3: After completing note 2, google store will also give you a link to download the apk file to your device. You download this apk file and then you want to test, fix bugs, then you build on the device that has downloaded the apk file and overwrite this file to test the in app purchase feature. Note that the overwrite must have a higher version code than the version code of the apk build downloaded from google store.
OK! Now Implement code only. Hope you will successfully connect the store to get the item purchased.
Above are the experiences that I learned when making the in app purchase feature. Hope my article helps you save time to learn and fix bugs related to the in app purchase feature.