The iOS Developer who goes through each project has more experience for them and the way of looking at the system is also more accurate and complete. I myself have experienced dozens of projects, there are very standard structures (usually projects of large companies, with professional processes) but there are also projects that open the .xcworkspace file. There is a directory, the whole file is in the root directory (usually for novices and the code is risky), quite frightening.
After gaining experience or gaining a new perspective, we begin to gradually improve the standard directory structure for ourselves. And by the time you realize that creating a base project has to be repeated too many times and it is necessary to have consistency, that’s when we need to embark on building a common base.
We often have the thought of creating an existing project, then creating all the necessary folders and files in it, until using for the new project we just need to change the name. But unfortunately, besides your name, you will have to change a bunch of other information such as bundleID, organization, update the outdated configuration (because you leave the base too long to use), refactor the Swift version, update or removed new features by not supporting the old iOS version, … etc and cloud. Honestly, I created a new project even less of a headache.
To avoid the hassle of creating a base project by creating a project as above, we can replace it by just making the directory structure and the necessary files available. Then, when applying to the new project, we just put the structure into the project (but remember you still have to change the header file). However, this method is quite manual in a time when everything is automated like this.
And no more ramble, I will guide you as professionally and exquisitely as possible to create a base project, make sure that you are finished performing and find the badass.
Using Xcode Template .
What is Xcode Template?
Listen to Xcode Template, then surely you are strange, but looking at the pictures below, I think there is no one who makes iOS but strange.

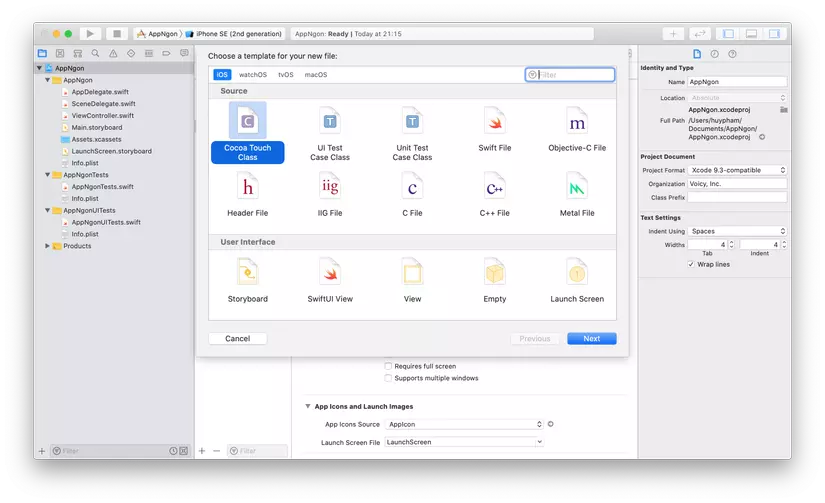
The two images above are examples of two types of templates: Project Template (the top) and File Template (the bottom). One is to generate the whole project and the other is to generate single files … well, the name says it all.
And to know where it is located is very simple, here is a link for you
1 2 | /Applications/Xcode.app/Contents/Developer/Platforms/iPhoneOS.platform/Developer/Library/Xcode/Templates |
On that you can find a code Template always, so know what the specific Xcode Template is!
To deploy a base project, depending on the specific level and level of automation you want, we will have to implement both Project Template and File Template . Usually, the Project Template will define the directory structure and the File Template will be used to generalize the structure of the files in a module according to a certain pattern such as MVP, VIPER, MVVM … However, it is not so simple. I will show you how to create a Project Template , and File Template we will consider later!
Deploy your Template
Clone template template from Apple
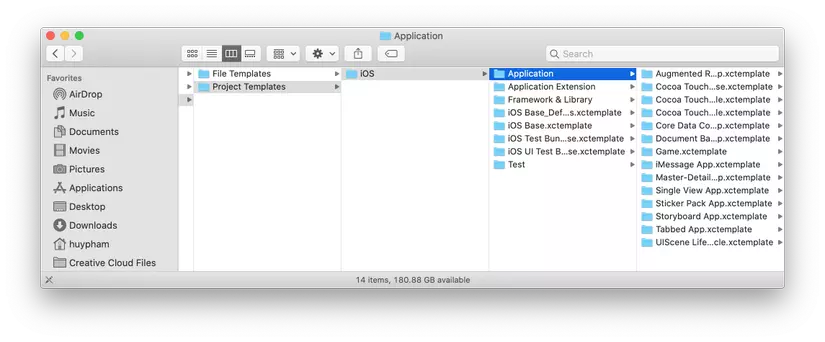
Basically, we do not have a tool to generate a certain original template, so the first thing is to clone one of the iOS templates, we will get the template of the Single View App. Because this is simply a template that when creating new projects we all choose.
1 2 | /Applications/Xcode.app/Contents/Developer/Platforms/iPhoneOS.platform/Developer/Library/Xcode/Templates/Project Templates/iOS/Application/Single View App.xctemplate |
To create a custom template, we first need to create the Templates folder in the directory:
1 2 | ~/Library/Developer/Xcode |
As follows:
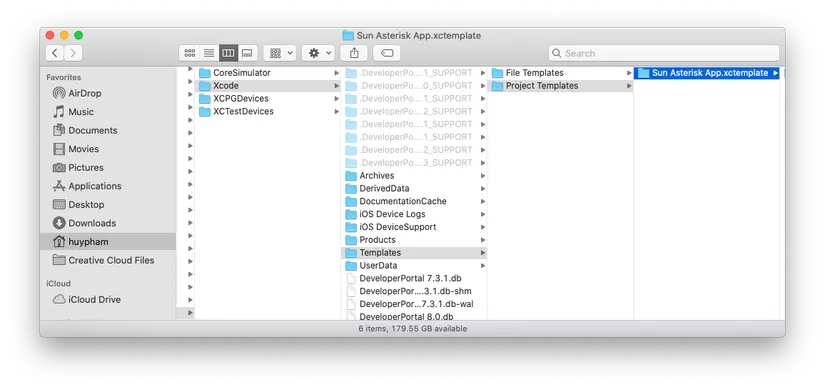
In the Templates folder create two subfolders, File Templates and Project Templates, similar to the format of the Templates folder in the original folder. Then copy the Single View App.xctemplate folder in the original folder to the newly created Project Templates folder and change the name to make it a separate one. Here I changed into the Sun Asterisk App for example.
Open up Xcode and select File -> New -> Project and we will see the miracle as follows:
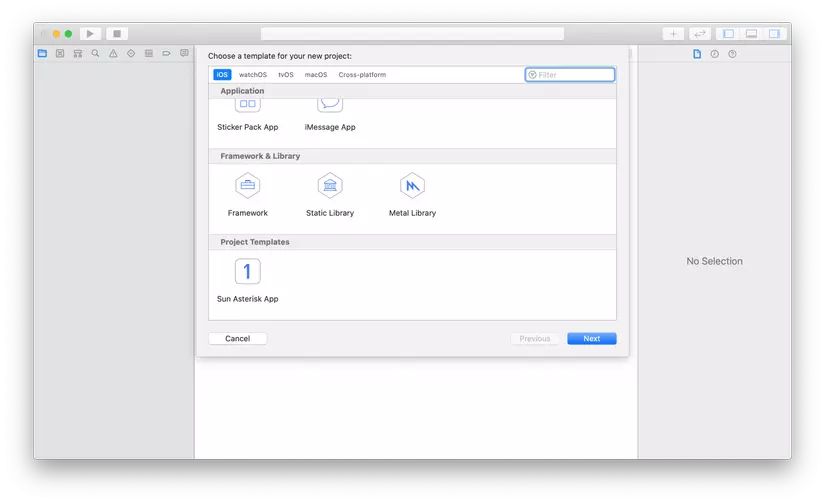
However, if you notice, the Single View App template has disappeared. Don’t worry, we’ll explain this shortly.
Sample template analysis
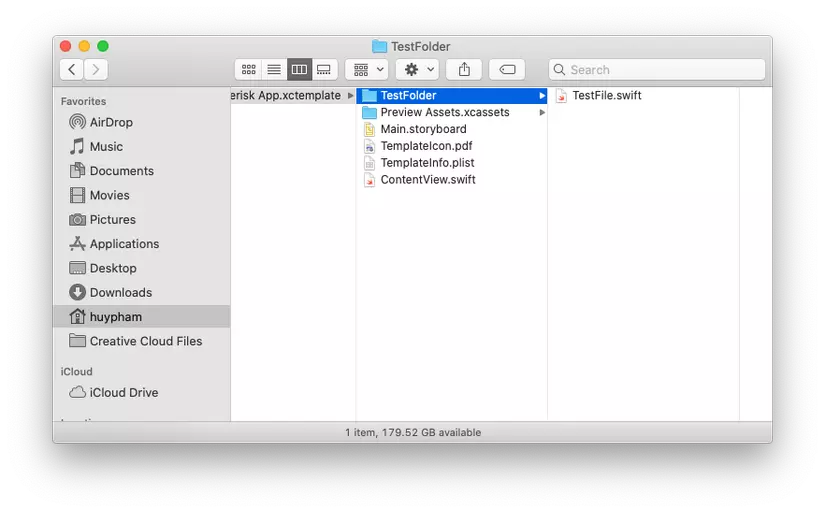
In the folder Sun Asterisk App.xctemplate , we can see the following directory tree:
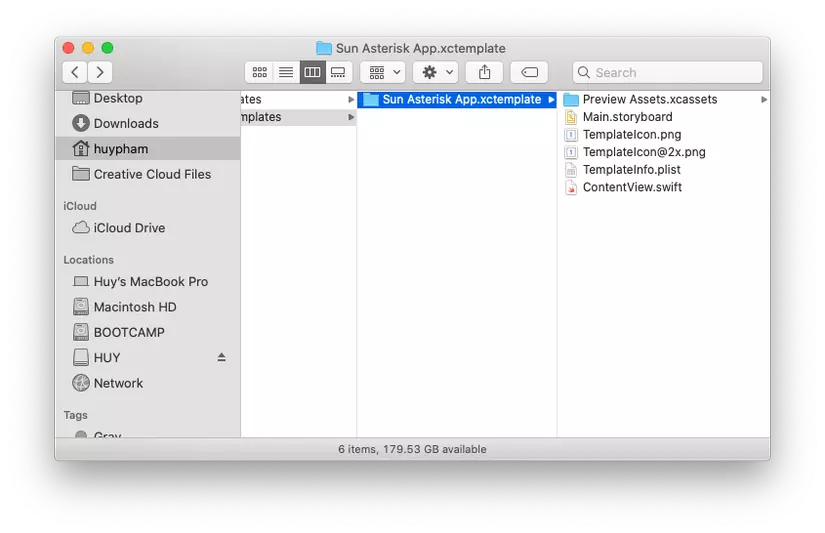
Inside:
- Preview Assets.xcassets , Main.storyboard , ContentView.swift are pre-made template files to include in the project when the project is created.
- TemplateIcon is the icon of the template. You probably know what I mean, which means we can replace the icon
- TemplateInfo.plist is the most important file, which is a property list that defines the entire project template. The template file is placed everywhere also define it.
To edit the template, we will need to work with TemplateInfo.plist
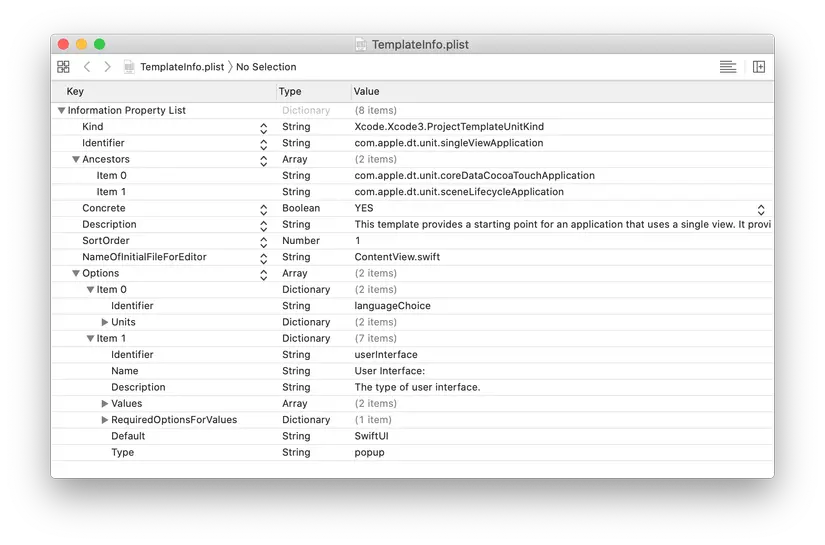
- Kind : To determine whether this is a project template or a file template, we will set this field to the value
Xcode.Xcode3.ProjectTemplateUnitKindbecause this is a project template. - Identifier : As the identifier value of the template, like the BundleID type to distinguish one app from another, this is the value to distinguish this template from another template. That is why we see the Single View App template disappear . Because we clone but have not changed this value, it has been duplicated.
- Ancestors : Basically this is the inheritance mechanism of the template system. Ancestors is an array of template identifiers that the current template inherits. Currently we see the current template inherits:
com.apple.dt.unit.coreDataCocoaTouchApplicationwhich we can find at/Applications/Xcode.app/Contents/Developer/Platforms/iPhoneOS.platform/Developer/Library/Xcode/Templates/Project Templates/iOS/Application/Core Data Cocoa Touch App.xctemplatecom.apple.dt.unit.sceneLifecycleApplicationwhich can be found at/Applications/Xcode.app/Contents/Developer/Platforms/iPhoneOS.platform/Developer/Library/Xcode/Templates/Project Templates/iOS/Application/UIScene Lifecycle.xctemplate
The child template will inherit the options and the definition of the parent template, if you do not want to support UIScene, you can replace com.apple.dt.unit.sceneLifecycleApplication with com.apple.dt.unit.storyboardApplication for example.
- Concrete : If it is equal to NO or does not define this value in the info template, Xcode will understand that this is an abstract template and will not show it when we select the template to create a new project.
- Description : Quite obvious, this is a description for the template.
- SortOrder : Describes the order of templates in the template table, if not set, it will be arranged in alphabetical order.
- NameOfInitialFileForEditor : Ever since SwiftUI it has grown. Reading the contents of the Content.swift file is probably for SwiftUI.
- Options : Where we define the options here, which are the input boxes for the user to select or fill in the desired values when creating the project.
TemplateInfo.plist may look simple but actually inherits a bunch of attributes from the two abstract templates
com.apple.dt.unit.coreDataCocoaTouchApplicationandcom.apple.dt.unit.sceneLifecycleApplicationso if you If you find any options strange, then it is actually in the parent template.
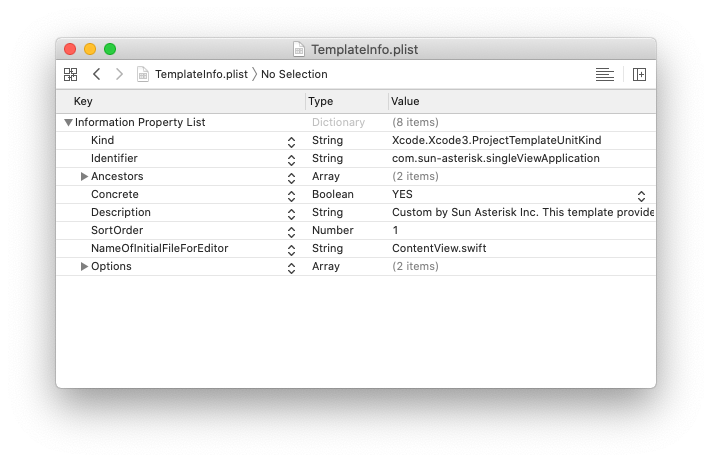
Custom
To start with custom Template, first we need to change the Identifier, here I will change to com.sun-asterisk.singleViewApplication .
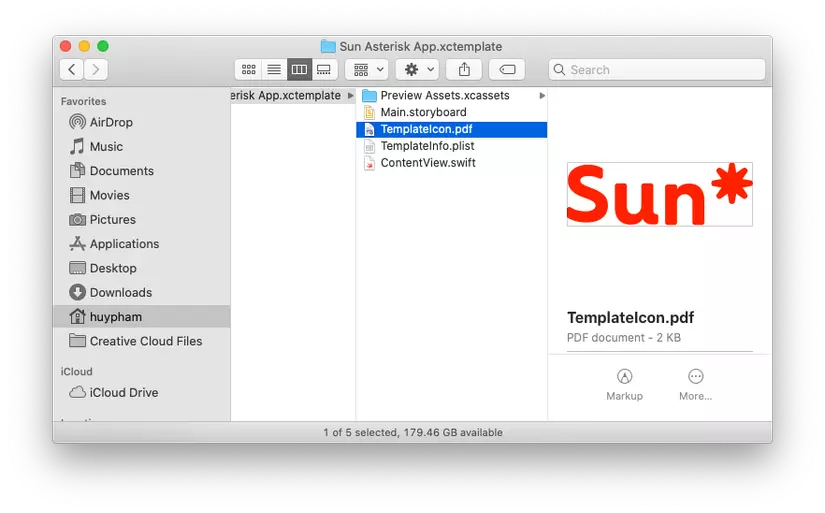
Next is replacing Icon, I will replace 2 files [email protected] and TemplateIcon.png with one of my TemplateIcon.pdf files.
If you do not know, if Android directly reads the .svg file as a vector file, iOS does the same with the .pdf file
After replacement we have:
Next, completely quit Xcode and reopen, try to create a new Project and we will have the results:
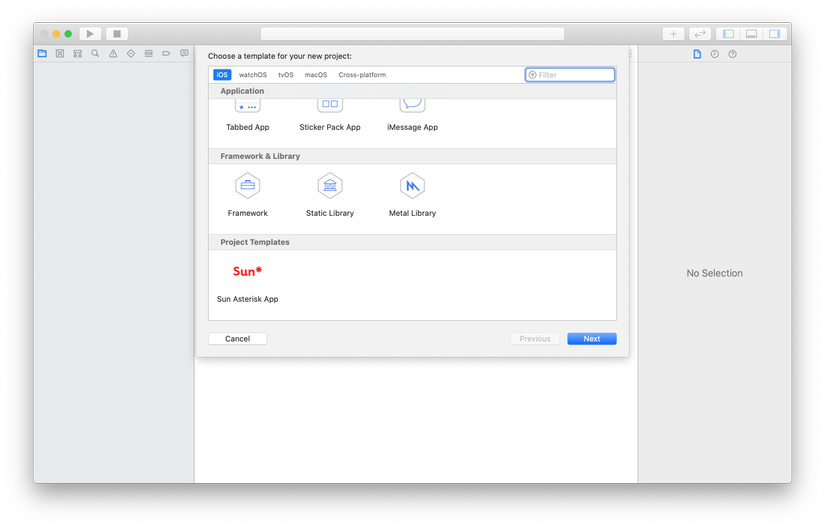
Looks good yet !!!
But that’s just the appearance, now creating the project is no different from a Single View App . Now we will try to add the directory and the file define itself!
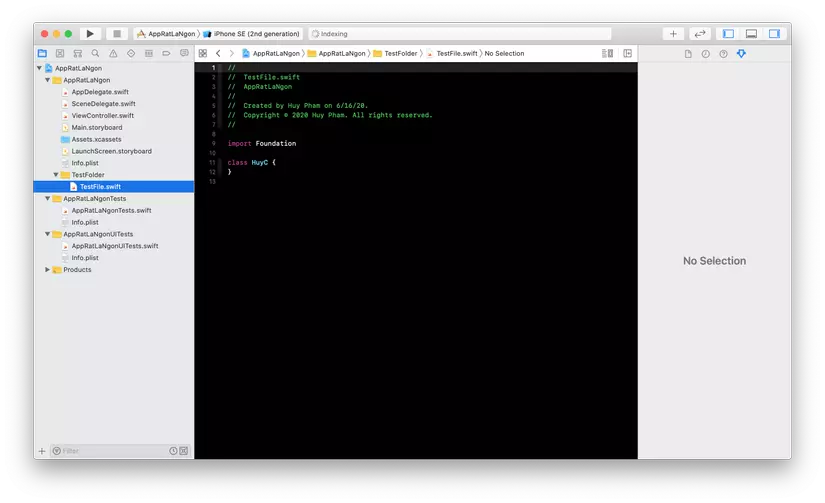
First, we create a test file named TestFile.swift and put in the TestFolder folder. The TestFolder folder will be placed in the template’s directory as follows:
File content:
1 2 3 4 5 6 7 | //___FILEHEADER___ import Foundation class HuyC { } |
Or you can write anything. Our job is to make the project, the directories and files we have created will appear right in your project.
Retrieving information in TemplateInfo.plist , you will see Nodes and Definitions tags appear, these are two tags so we can define the files and folders that will be included in the project. These cards are sometimes outside, but sometimes quite deep in the options, because in fact depending on the language choice of Objective-C or Swift, SwiftUI or Storyboard, then the files and folders are pre-set. will be different.
It is also based on such a card layout that we can flexibly define options, for example, if we define an additional option on the pattern of the code and define 2 values like VIPER, MVVM. We can set the project and file for each option differently. Users when using the template just select and OK, everything is automatically generated out very professionally.
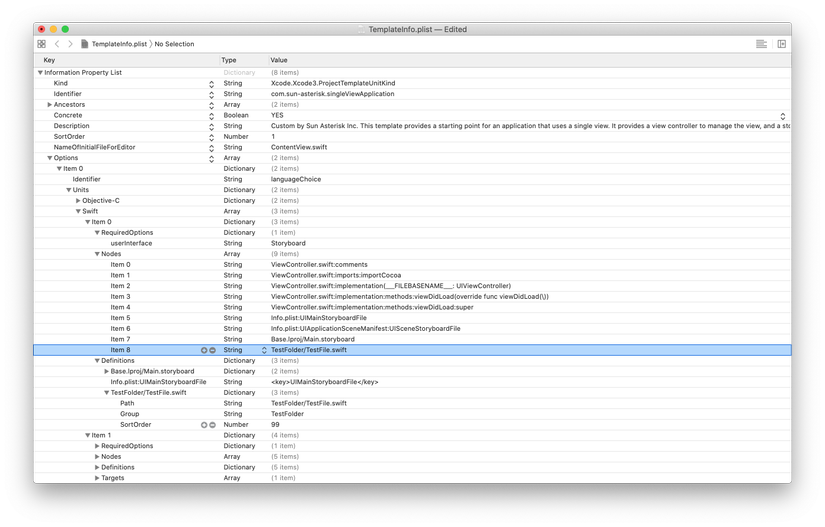
As you can see above, I have defined 1 more Node: TestFolder/TestFile.swift and 1 Definition TestFolder/TestFile.swift in options where the language of choice is Swift and with userInterface is Storyboard. That is if I create a Sun Asterisk App with the following option:
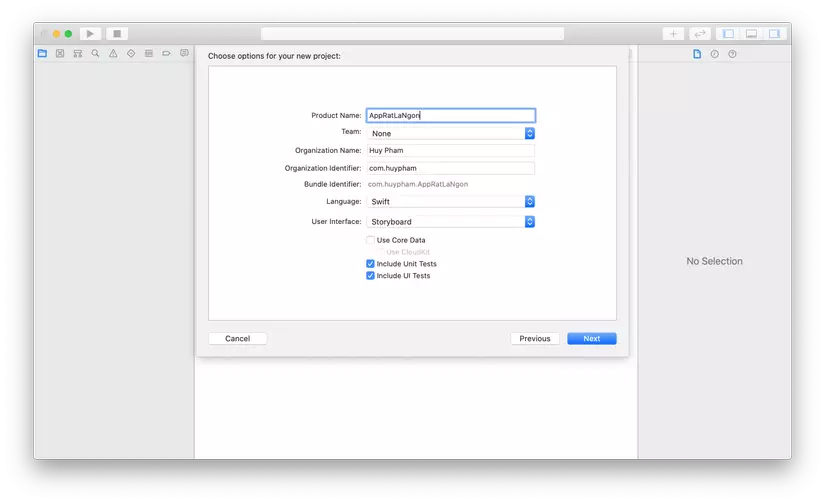
We will have a Project with folder TestFolder with teamplate TestFile.swift file which has been generated as follows:
That’s it, so from here you can create your own project template with a folder and file structure as desired then, turn it up guys
What is next?
The above is just an introduction for you to know and have an overview and automation in creating base projects. However, it is enough for us to create the directory structure and existing files already. The next thing you can do is try something like:
- Dig into Apple’s existing templates and see how they deploy.
- Try defining specific options for your template.
- Research more on string templates to write template files.
Conclusion
Hopefully after this article, you will have more useful knowledge and improve yourself more at work. Have a good day everyone