Hi everyone, today I will share about how to send mail with nodemailer and express in node.js, There are many articles written about this, however, when I followed, there were some errors, so today I will talk about 2 issues, the first is how to use nodemailer and the second is talking about bugs and how to fix it. Ok, let’s get started!
What is a Nodemailer?
The way I understand is simply the module that people wrote to support sending mail!
How to use it, is it complicated?
In this article, I will guide you to send gmail through nodemailer and express .. As for how to create a nodejs express program, how to fix it later (the next day) I will tell you! First, you need to install it on your project
Install nodemailer
1 2 | npm install nodemailer --save |
Use
Create gmail account
To use, sure, that is to create a gmail account (I recommend creating a new account instead of using the original account because this mail I only use to send it, and if there is later No matter what, it doesn’t matter much to your account
Security settings
For gmail, you need to install two main issues to be able to send mail, because if you do not, then you will get an error later
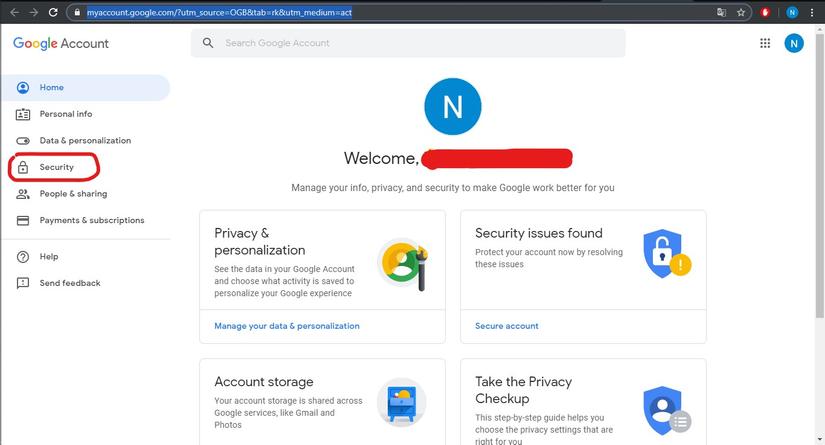
- Allow low-security applications to access: Because of security, gmail will disable this by default! https://myaccount.google.com/?utm_source=OGB&tab=rk&utm_medium=act
 Select security : Go to Less secure app access Turn on Allow access …
 - Set IMAP access: Go to your gmail, select the settings button on the right corner of the screen In the Forwarding and POP / IMAP tab, navigate to the IMAP access Enable IMAP section
 Select security : Go to Less secure app access
  Turn on Allow access …
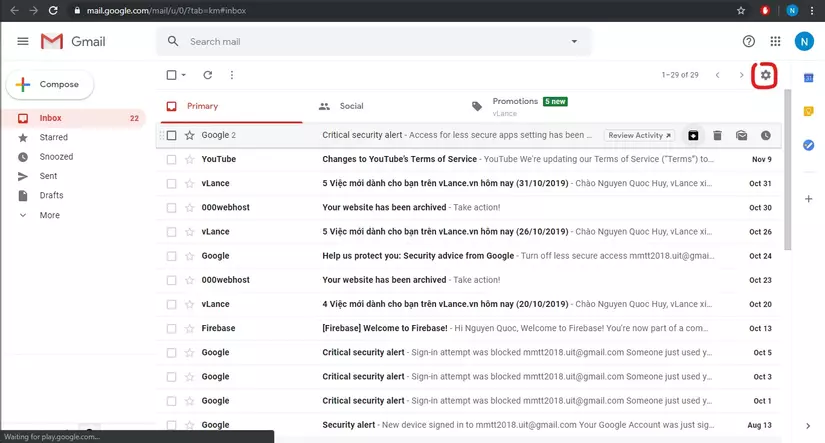 In the Forwarding and POP / IMAP tab, navigate to the IMAP access Enable IMAP section
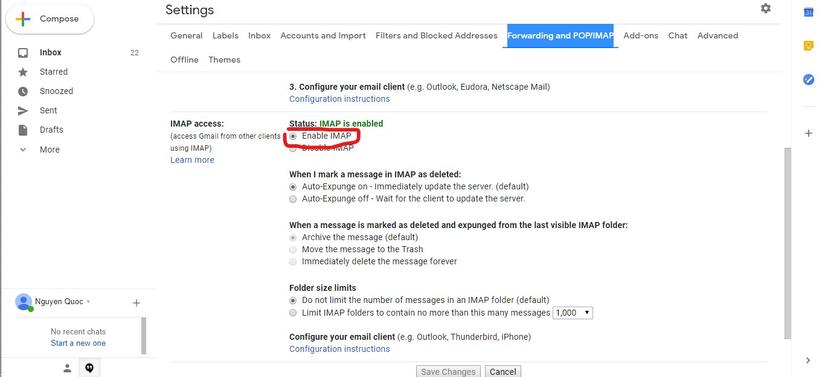
Let’s start the code!
I have the following file diagram, the file name may be different, but the function is similar
1 2 3 4 5 6 | --router: Xử lý hướng backend, router, render view,.... --app ---views: Chứa các file người dùng sẽ nhìn thấy,... ---publics: Thường thì mình sẽ để file css, js, bs trong này --... |
In the router file: Call nodemailer into the application
1 2 | const nodemailer = require('nodemailer'); |
Create 2 more routers: the first is to retrieve data and the second is to process data
1 2 3 4 5 6 7 8 9 10 11 12 13 14 15 16 17 18 19 20 21 22 23 24 25 26 27 28 29 30 31 32 33 34 35 36 37 38 39 40 41 42 43 44 45 46 47 48 49 | app.get('/', function(req, res) { res.render('index.ejs', { mess: req.flash('mess') }); }); app.post('/send-mail', function(req, res) { //Tiến hành gửi mail, nếu có gì đó bạn có thể xử lý trước khi gửi mail var transporter = nodemailer.createTransport({ // config mail server host: 'smtp.gmail.com', port: 465, secure: true, auth: { user: ' <a class="__cf_email__" href="/cdn-cgi/l/email-protection" data-cfemail="9ffae7fef2eff3fadff8f2fef6f3b1fcf0f2">[email protected]</a> ', //Tài khoản gmail vừa tạo pass: 'example' //Mật khẩu tài khoản gmail vừa tạo }, tls: { // do not fail on invalid certs rejectUnauthorized: false } }); var content = ''; content += ` <div style="padding: 10px; background-color: #003375"> <div style="padding: 10px; background-color: white;"> <h4 style="color: #0085ff">Gửi mail với nodemailer và express</h4> <span style="color: black">Đây là mail test</span> </div> </div> `; var mainOptions = { // thiết lập đối tượng, nội dung gửi mail from: 'NQH-Test nodemailer', to: req.body.mail, subject: 'Test Nodemailer', text: 'Your text is here',//Thường thi mình không dùng cái này thay vào đó mình sử dụng html để dễ edit hơn html: content //Nội dung html mình đã tạo trên kia :)) } transporter.sendMail(mainOptions, function(err, info){ if (err) { console.log(err); req.flash('mess', 'Lỗi gửi mail: '+err); //Gửi thông báo đến người dùng res.redirect('/'); } else { console.log('Message sent: ' + info.response); req.flash('mess', 'Một email đã được gửi đến tài khoản của bạn'); //Gửi thông báo đến người dùng res.redirect('/'); } }); }); |
Above I have used flash to transfer information from the server to the user, you can use it but need to install it first! In the views file: I created an index.ejs file as follows:
1 2 3 4 5 6 7 8 9 10 11 12 13 14 15 16 17 18 19 20 21 22 | <!DOCTYPE html> <html> <head> //...Ở đây bạn tự edit nha </head> <body> <% if(typeof(mess) != 'undefined' && mess != '') { %> <div style="padding: 10px; width: 100%; border-radius: 4px; background-color: #98c4ff; color: #006eff"> <%- mess %> </div> <% } %> <form action="/send-mail" method="POST"> <input name="mail" placeholder="Mail của bạn..." required> <button type="submit">Gửi</button> </form> </body> </html> |
Alright then! Can you test it?
Your message!
Usually I often use this function for security or to inform the necessary information for users, anything too much is not good, I think. As a user, I don’t want to have too many unimportant messages in my mailbox. You can test this function on your heroku web with the forgotten password function, how to create it, I’ll talk later! This song is a bit long  ) my web is: https://nqh.herokuapp.com/