Selenium WebDriver Locators – locate HTML element
When we want to locate elements in Selenium WebDriver, we have to do it with the help of the findElement () and findElements () methods provided by the WebDriver and WebElement classes.
- findElement (): returns a WebElement object based on a specific search criteria or throws an exception if it does not find any elements that match the search criteria.
- findElements (): returns a list of WebElements that match the search criteria. If no element is found, it returns an empty list.
The following table lists all Java syntax for locating elements in Selenium WebDriver
| Method | Syntax | Description |
|---|---|---|
| By ID | driver.findElement ( By.id (<element ID>)) | Locate an element with the ID attribute |
| According to Name | driver.findElement ( By.name (<element name>)) | Locate an element using the Name attribute |
| By class name | driver.findElement (By.className (<element class>)) | Locate an element with the Class attribute |
| In writing link | driver.findElement (By.linkText (<linktext>)) | Find the link by link text |
| Partially written links | driver.findElement (By.partialLinkText (<linktext>))) | Locate the link in writing part of the link |
| According to CSS | driver.findElement (By.cssSelector (<css selector>)) | Locate an element using the CSS selector |
| According to XPath | driver.findElement (By.xpath (<xpath>)) | Locate an element using an XPath query |
Now let us understand the practical use of each positioning method, applicable on https://facebook.com and https://www.freeformatter.com/ .
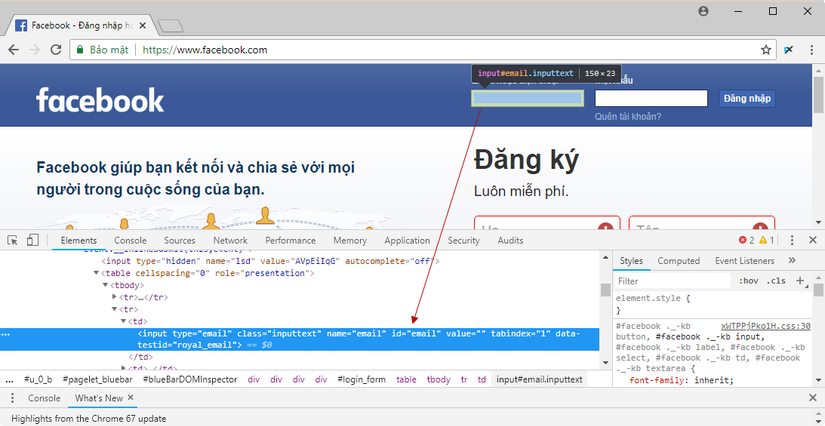
1. By ID
Here an object is accessed with the help of IDs. In this case, it is the ID of the text box. The value is entered into the text box using the sendkeys method with the help of ID.
1 2 | driver.findElement(By.id("email")).sendKeys(" <a class="__cf_email__" href="/cdn-cgi/l/email-protection">[email protected]</a> "); |
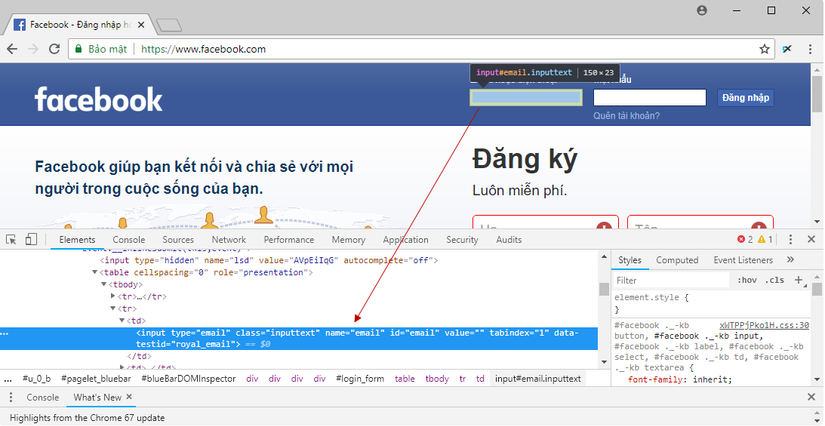
2. According to Name
Here an object is accessed with the help of IDs. In this case, it is the name of the text box. The value is entered into the text box using the sendkeys method with the help of name.
1 2 | driver.findElement(By.name("email")).sendKeys(" <a class="__cf_email__" href="/cdn-cgi/l/email-protection">[email protected]</a> "); |
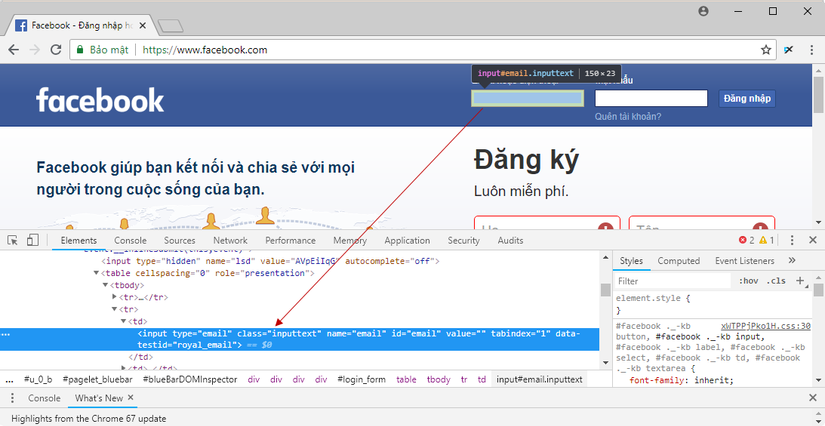
3. By class name
Here an object is accessed with the help of Class Names. In this case, it is the class name of WebElement. Values can be accessed with the help of the gettext method.
1 2 | List<WebElement> byclass = driver.findElements(By.className("inputtext"))); |
4. Follow the tag name
The DOM tag name of an element can be used to locate that particular element in WebDriver. It is very easy to handle tables with the help of this method. Take a look at the following code.
1 2 3 4 | WebElement table = driver.findElement(By.id("content")); List<WebElement> row = table.findElements(By.tagName("tr")); int rowcount = row.size(); |
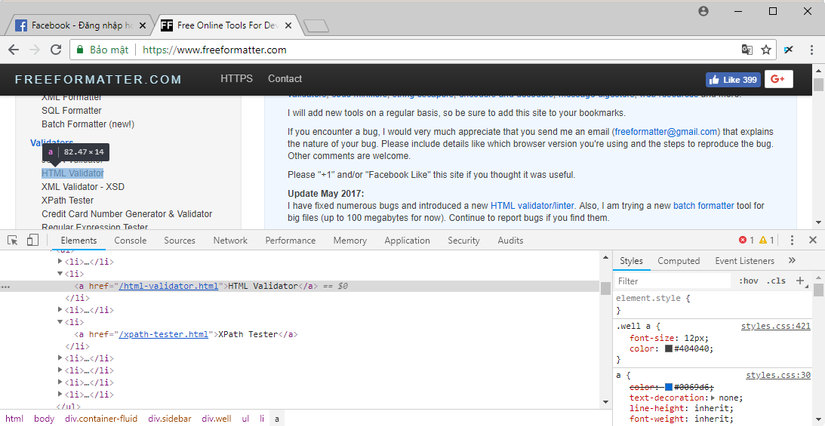
5. Written links
This method helps identify the link element with the appropriate display text.
1 2 | driver.findElement(By.linkText("JSON Formatter")).click(); |
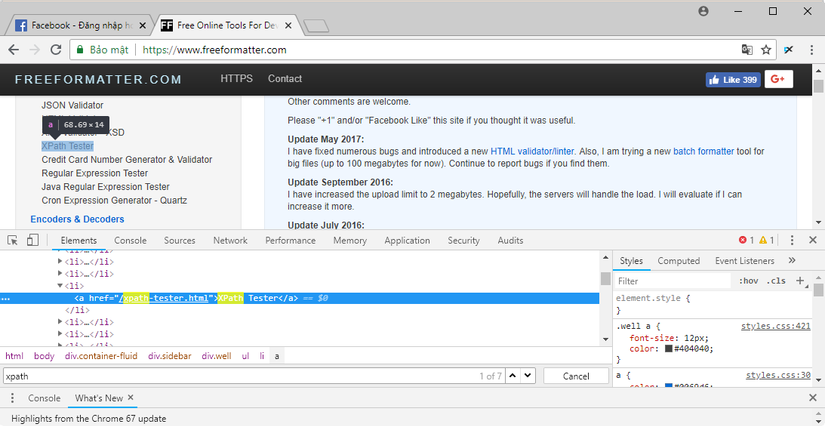
6. Written partial links
This method helps to position the element associated with the visible part of the text.
1 2 | List<WebElement> listLinks = driver.findElements(By.partialLinkText("XPath")); |
7. According to CSS
CSS is used as a method to identify webobjects, but NOT all browsers support CSS recognition.
1 2 | WebElement loginButton = driver.findElement(By.cssSelector("input.login")); |
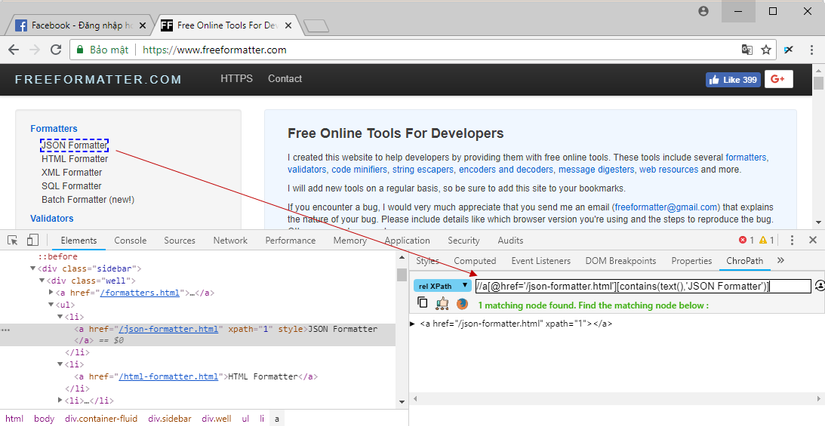
8. XPath
XPath stands for XML path language. It is a query language to select nodes from an XML document. The XPath is based on a tree representation of XML documents and provides the ability to navigate around the tree by selecting nodes using a variety of criteria. This is a popular choice because of its flexibility.
You can use the ChroPath plugin on Firefox or Chrome to define XPath strings for HTML elements.
1 2 | driver.findElement(By.xpath("//a[@href='/json-formatter.html']" + "[contains(text(),'JSON Formatter')]")).click(); |
Write the first simple Webdriver script for testNG
When learning Selenium Webdriver, you will not be familiar with these types of test writing. I also started a simple script writing tutorial, but instead of going to handle each Element on the website like Alert, selectbox, iframe … then I will guide directly into the test case and explain each part of the code. .
This is the code we have:
1 2 3 4 5 6 7 8 9 10 11 12 13 14 15 16 17 | import org.openqa.selenium.By; import org.openqa.selenium.WebDriver; import org.openqa.selenium.firefox.FirefoxDriver; import org.testng.annotations.Test; public class LoginTest { @Test public void loginByAdmin() { WebDriver driver = new FirefoxDriver(); driver.get("http://localhost/wp/wp-login.php"); driver.findElement(By.id("user_login")).sendKeys("thaodp"); driver.findElement(By.id("user_pass")).sendKeys("123456789"); driver.findElement(By.id("wp-submit")).click(); } } |
Part 1: these are necessary libraries
1 2 3 4 5 | import org.openqa.selenium.By; import org.openqa.selenium.WebDriver; import org.openqa.selenium.firefox.FirefoxDriver; import org.testng.annotations.Test; |
When writing code, if the IDE reports a code error, it may be because you add a missing library.
Can press Ctrl + Shift + O to automatically add eclipse missing library. Or put your mouse on the error message, press F2 button to display the suggest of fixing the error, if it lacks the library, it will suggest adding missing libraries.
Part 2: Annotation inform TestNG this is a test method
@Test
Without this annotation, TestNG will not run the test
Part 3: Initialize an object
WebDriver driver = new FirefoxDriver();
Because WebDriver is an interface, when initializing, we must create a new Object of a class that implements the Interface WebDriver, in this case, FirefoxDriver.
The above driver is just naming, we can name other also. For example:
WebDriver instance = new FirefoxDriver();
Part 4: Open the login page URL
driver.get("http://localhost/wp/wp-login.php");
The above object driver can use many different methods to control the browser
Part 5: Fill out the information and click the submit button
1 2 3 4 | driver.findElement(By.id("user_login")).sendKeys("thaodp"); driver.findElement(By.id("user_pass")).sendKeys("123456789"); driver.findElement(By.id("wp-submit")).click(); |
In particular, sendKeys () and click () are methods of the WebElement interface.
Test
After run, you will get a green result from the result of TestNG.
Refer: