Introduce
Working with forms is one of the most difficult things when developing React applications. React is a minimalist UI library focused on controlling interface behavior, ensuring that the UI changes appropriately for each user behavior.
It does not provide a complete solution to meet user input needs, but it does provide a way to save form values into local state with controlled components.
The processing forms in React require you to code the actions for it to work:
- Manage and validate user input with state
- Keep track of invalid errors
- Processing the form when submitting
To make it easier to build forms and process them, developers have created libraries to build forms with React. One of the best solutions is to use a library called Formik
But recently, there has been a new library called React Hook form.
In this article I will help you see the benefits of using React Hook Form with Formik.
How to handle form with React
This is an example of a React form built without any libraries supported. We will use Bootstrap to make the form prettier
1 2 3 4 5 6 7 8 9 10 11 12 13 14 15 16 17 18 19 20 21 22 23 24 25 26 27 28 29 30 31 32 33 34 35 36 37 38 39 40 41 42 43 44 45 46 47 48 49 50 51 52 53 54 55 56 57 58 59 60 61 62 63 64 65 66 67 68 69 70 71 72 73 74 75 76 77 78 79 80 81 82 83 84 85 86 87 88 89 90 91 92 93 94 95 96 97 98 99 100 101 102 103 104 105 106 107 108 109 110 111 112 113 114 115 116 117 118 119 120 121 122 123 124 125 126 127 128 129 130 131 | import React, { useState } from "react"; import "bootstrap/dist/css/bootstrap.css"; export default () => { const [formState, setFormState] = useState({ formValues: { email: "", password: "" }, formErrors: { email: "", password: "" }, formValidity: { email: false, password: false } }); const handleChange = ({ target }) => { const { formValues } = formState; formValues[target.name] = target.value; setFormState({ formValues }); handleValidation(target); }; const handleValidation = target => { const { name, value } = target; const fieldValidationErrors = formState.formErrors; const validity = formState.formValidity; const isEmail = name === "email"; const isPassword = name === "password"; const emailTest = /^[^ <a class="__cf_email__" href="/cdn-cgi/l/email-protection">[email protected]</a> ] <a class="__cf_email__" href="/cdn-cgi/l/email-protection">[email protected]</a> [^ <a class="__cf_email__" href="/cdn-cgi/l/email-protection">[email protected]</a> ]+.[^ <a class="__cf_email__" href="/cdn-cgi/l/email-protection">[email protected]</a> ]{2,}$/i; validity[name] = value.length > 0; fieldValidationErrors[name] = validity[name] ? "" : `${name} is required and cannot be empty`; if (validity[name]) { if (isEmail) { validity[name] = emailTest.test(value); fieldValidationErrors[name] = validity[name] ? "" : `${name} should be a valid email address`; } if (isPassword) { validity[name] = value.length >= 3; fieldValidationErrors[name] = validity[name] ? "" : `${name} should be 3 characters minimum`; } } setFormState({ ...formState, formErrors: fieldValidationErrors, formValidity: validity }); }; const handleSubmit = event => { event.preventDefault(); const { formValues, formValidity } = formState; if (Object.values(formValidity).every(Boolean)) { // Form is valid console.log(formValues); } else { for (let key in formValues) { let target = { name: key, value: formValues[key] }; handleValidation(target); } } }; return ( <div className="container"> <div className="row mb-5"> <div className="col-lg-12 text-center"> <h1 className="mt-5">React regular form</h1> </div> </div> <div className="row"> <div className="col-lg-12"> <form onSubmit={handleSubmit}> <div className="form-group"> <label>Email address</label> <input type="email" name="email" className={`form-control ${ formState.formErrors.email ? "is-invalid" : "" }`} placeholder="Enter email" onChange={handleChange} value={formState.formValues.email} /> <div className="invalid-feedback"> {formState.formErrors.email} </div> </div> <div className="form-group"> <label>Password</label> <input type="password" name="password" className={`form-control ${ formState.formErrors.password ? "is-invalid" : "" }`} placeholder="Password" onChange={handleChange} value={formState.formValues.password} /> <div className="invalid-feedback"> {formState.formErrors.password} </div> </div> <button type="submit" className="btn btn-primary btn-block"> Submit </button> </form> </div> </div> </div> ); }; |
We will get the following form:
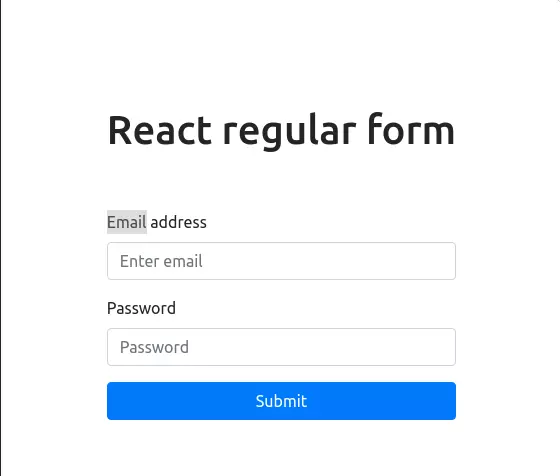
In the example above, we first created a function component with a state named formState, where to store the input states, the validity of the input values and errors. The form has two inputs, the email and the password, so we’ll need to initialize the input values for each input box:
1 2 3 4 5 6 7 8 9 10 11 12 13 14 15 16 | export default () => { const [formState, setFormState] = useState({ formValues: { email: "", password: "" }, formErrors: { email: "", password: "" }, formValidity: { email: false, password: false } }); |
Next, we write the function to render the UI in the return state:
1 2 3 4 5 6 7 8 9 10 11 12 13 14 15 16 17 18 19 20 21 22 23 24 25 26 27 28 29 30 31 32 33 34 35 36 37 38 39 40 41 42 43 44 45 46 47 48 49 50 51 | return ( <div className="container"> <div className="row mb-5"> <div className="col-lg-12 text-center"> <h1 className="mt-5">React regular form</h1> </div> </div> <div className="row"> <div className="col-lg-12"> <form onSubmit={handleSubmit}> <div className="form-group"> <label>Email address</label> <input type="email" name="email" className={`form-control ${ formState.formErrors.email ? "is-invalid" : "" }`} placeholder="Enter email" onChange={handleChange} value={formState.formValues.email} /> <div className="invalid-feedback"> {formState.formErrors.email} </div> </div> <div className="form-group"> <label>Password</label> <input type="password" name="password" className={`form-control ${ formState.formErrors.password ? "is-invalid" : "" }`} placeholder="Password" onChange={handleChange} value={formState.formValues.password} /> <div className="invalid-feedback"> {formState.formErrors.password} </div> </div> <button type="submit" className="btn btn-primary btn-block"> Submit </button> </form> </div> </div> </div> ); |
We use formValues to display inputs values, while formErrors are used to indicate invalid form values,
Next, we write the function handleChange as follows:
1 2 3 4 5 6 7 | const handleChange = ({ target }) => { const { formValues } = formState; formValues[target.name] = target.value; setFormState({ formValues }); handleValidation(target); }; |
The function will update the state’s value and run the handleValidation function to check if the value is valid:
1 2 3 4 5 6 7 8 9 10 11 12 13 14 15 16 17 18 19 20 21 22 23 24 25 26 27 28 29 30 31 32 | const handleValidation = target => { const { name, value } = target; const fieldValidationErrors = formState.formErrors; const validity = formState.formValidity; const isEmail = name === "email"; const isPassword = name === "password"; const emailTest = /^[^ <a class="__cf_email__" href="/cdn-cgi/l/email-protection">[email protected]</a> ] <a class="__cf_email__" href="/cdn-cgi/l/email-protection">[email protected]</a> [^ <a class="__cf_email__" href="/cdn-cgi/l/email-protection">[email protected]</a> ]+.[^ <a class="__cf_email__" href="/cdn-cgi/l/email-protection">[email protected]</a> ]{2,}$/i; validity[name] = value.length > 0; fieldValidationErrors[name] = validity[name] ? "" : `${name} is required and cannot be empty`; if (validity[name]) { if (isEmail) { validity[name] = emailTest.test(value); fieldValidationErrors[name] = validity[name] ? "" : `${name} should be a valid email address`; } if (isPassword) { validity[name] = value.length >= 3; fieldValidationErrors[name] = validity[name] ? "" : `${name} should be 3 characters minimum`; } } setFormState({ ...formState, formErrors: fieldValidationErrors, formValidity: validity }); }; |
The handleValidation function is where things get complicated. It first checks to see which input value has been validated, and then proceeds to validate.
Finally we need the function handleSubmit:
1 2 3 4 5 6 7 8 9 10 11 12 13 14 15 16 17 | const handleSubmit = event => { event.preventDefault(); const { formValues, formValidity } = formState; if (Object.values(formValidity).every(Boolean)) { // Form is valid console.log(formValues); } else { for (let key in formValues) { let target = { name: key, value: formValues[key] }; handleValidation(target); } } }; |
And that’s how you build a form with React. As we have seen, a form with only two input values is verbose. Are you ready to find the Formik display to make everything simpler?
This is what Formik will help you with
Formik is a popular form building solution because it provides you with a reusable form where you only need to use its API to handle the three most difficult parts of the form:
- Get internal and external values of form state
- Validate input and error messages
- Handle form submit
To get started with Formik, you need to install it already npm install formik . Here, the same form has 2 input values, when built with Formik will be as follows:
1 2 3 4 5 6 7 8 9 10 11 12 13 14 15 16 17 18 19 20 21 22 23 24 25 26 27 28 29 30 31 32 33 34 35 36 37 38 39 40 41 42 43 44 45 46 47 48 49 50 51 52 53 54 55 56 57 58 59 60 61 62 63 64 65 66 67 68 69 70 71 72 73 74 75 76 77 78 79 80 81 82 83 84 85 86 87 88 89 | import React from "react"; import { Formik, Form, Field, ErrorMessage } from "formik"; import "bootstrap/dist/css/bootstrap.css"; function validateEmail(value) { let error; if (!value) { error = "Email is required"; } else if (!/^[A-Z0-9._%+-] <a class="__cf_email__" href="/cdn-cgi/l/email-protection">[email protected]</a> [A-Z0-9.-]+.[A-Z]{2,4}$/i.test(value)) { error = "Invalid email address format"; } return error; } function validatePassword(value) { let error; if (!value) { error = "Password is required"; } else if (value.length < 3) { error = "Password must be 3 characters at minimum"; } return error; } export default () => { const onSubmit = values => { // form is valid console.log(values); } return ( <div className="container"> <div className="row mb-5"> <div className="col-lg-12 text-center"> <h1 className="mt-5">Login form with Formik</h1> </div> </div> <Formik initialValues={{ email: "", password: "" }} onSubmit={onSubmit} > {({ errors, touched }) => ( <Form> <div className="form-group"> <label htmlFor="email">Email</label> <Field name="email" placeholder="Enter email" className={`form-control ${ touched.email && errors.email ? "is-invalid" : "" }`} validate={validateEmail} /> <ErrorMessage component="div" name="email" className="invalid-feedback" /> </div> <div className="form-group"> <label htmlFor="password">Password</label> <Field name="password" type="password" placeholder="Enter password" className={`form-control ${ touched.password && errors.password ? "is-invalid" : "" }`} validate={validatePassword} /> <ErrorMessage component="div" name="password" className="invalid-feedback" /> </div> <button className="btn btn-primary btn-block" type="submit">Submit</button> </Form> )} </Formik> </div> ); }; |
This new form uses 4 components provided by Formik: Formik, Form, Field and ErrorMessage. To use Formik, we need to wrap the Form component inside the Formik component:
1 2 3 4 5 6 | <Formik> <Form> {/* the rest of the code here */} </Form> </Formik> |
Like regular forms, we will initialize the value of the form, but instead of writing the entire state for values, writing validate and error, we only need to use the built-in functions of Formik:
1 2 3 4 5 6 7 8 | <Formik initialValues={{ email: "", password: "" }} onSubmit={onSubmit} > |
The Formik component also accepts prop functions that run in the event submit, take a look at the submit function, which will only run when the input value is valid:
1 2 3 4 5 6 | // Put this inside your component before the return statement const onSubmit = values => { // form is valid console.log(values); } |
Next, we will use the Form. First, we will use the API passed from Formik to Form. We will handle the error if any input value is entered incorrectly:
1 2 3 4 5 6 7 8 9 10 11 12 13 14 15 16 17 18 19 20 21 22 23 24 25 26 27 28 29 30 31 32 33 34 35 36 37 38 39 40 41 | {({errors, touched}) => ( <Form> <div className='form-group'> <label htmlFor='email'>Email</label> <Field name='email' placeholder='Enter email' className={`form-control ${ touched.email && errors.email ? 'is-invalid' : '' }`} validate={validateEmail} /> <ErrorMessage component='div' name='email' className='invalid-feedback' /> </div> <div className='form-group'> <label htmlFor='password'>Password</label> <Field name='password' type='password' placeholder='Enter password' className={`form-control ${ touched.password && errors.password ? 'is-invalid' : '' }`} validate={validatePassword} /> <ErrorMessage component='div' name='password' className='invalid-feedback' /> </div> <button className='btn btn-primary btn-block' type='submit'> Submit </button> </Form> )} |
The ErrorMessage element will automatically display the error as a div element. Let’s write the function to perfect our form:
1 2 3 4 5 6 7 8 9 10 11 12 13 14 15 16 17 18 19 20 21 | function validateEmail(value) { let error; if (!value) { error = "Email is required"; } else if (!/^[A-Z0-9._%+-] <a class="__cf_email__" href="/cdn-cgi/l/email-protection">[email protected]</a> [A-Z0-9.-]+.[A-Z]{2,4}$/i.test(value)) { error = "Invalid email address format"; } return error; } function validatePassword(value) { let error; if (!value) { error = "Password is required"; } else if (value.length < 3) { error = "Password must be 3 characters at minimum"; } return error; } |
And now the form built by Formik is complete. And next I will show you React Hook Form, even better than Formik
Get started with React Hook Form
Like Formik, it was built to make it easier for developers to develop with the form in React. The biggest difference between the two is that the React Hook Form is designed to avoid re-rendering caused by user input.
This is how you would do it with a form similar to the example in Formik. Note here that the lines of code are less than those of Formik:
1 2 3 4 5 6 7 8 9 10 11 12 13 14 15 16 17 18 19 20 21 22 23 24 25 26 27 28 29 30 31 32 33 34 35 36 37 38 39 40 41 42 43 44 45 46 47 48 49 50 51 52 53 54 55 56 57 58 59 60 | import React from "react"; import { useForm, ErrorMessage } from "react-hook-form"; import "bootstrap/dist/css/bootstrap.css"; export default () => { const { register, errors, handleSubmit } = useForm(); const onSubmit = values => { // form is valid console.log(values); } return ( <div className="container"> <div className="row mb-5"> <div className="col-lg-12 text-center"> <h1 className="mt-5">Login form with React Hook Form</h1> </div> </div> <form onSubmit={handleSubmit(onSubmit)}> <div className="form-group"> <label htmlFor="email">Email</label> <input name="email" placeholder="Enter email" className={`form-control ${ errors.email ? "is-invalid" : "" }`} ref={register({ required: "Email is required", pattern: { value: /^[A-Z0-9._%+-] <a class="__cf_email__" href="/cdn-cgi/l/email-protection">[email protected]</a> [A-Z0-9.-]+.[A-Z]{2,4}$/i, message: "Invalid email address format" } })} /> <ErrorMessage className="invalid-feedback" name="email" as="div" errors={errors} /> </div> <div className="form-group"> <label htmlFor="password">Password</label> <input name="password" placeholder="Enter password" className={`form-control ${ errors.password ? "is-invalid" : "" }`} ref={register({ required: "Password is required", validate: value => value.length < 3 || "Password must be 3 characters at minimum" })} /> <ErrorMessage className="invalid-feedback" name="password" as="div" errors={errors} /> </div> <button className="btn btn-primary btn-block" type="submit">Submit</button> </form> </div> ); }; |
To use React Form Hook, we install it using the npm install react-hook-form command. Then import it into:
1 2 | import { useForm, ErrorMessage } from "react-hook-form"; |
First, we’ll call the useForm method, which returns an object with the function set so we can build the form:
1 2 3 | export default () => { const { register, errors, handleSubmit } = useForm(); |
The core concept of React Hook Form is to use unregulated components on Hook by prop:
1 2 3 4 5 6 7 8 9 10 11 12 13 | <input name='email' placeholder='Enter email' className={`form-control ${errors.email ? 'is-invalid' : ''}`} ref={register({ required: 'Email is required', pattern: { value: /^[A-Z0-9._%+-] <a class="__cf_email__" href="/cdn-cgi/l/email-protection">[email protected]</a> [A-Z0-9.-]+.[A-Z]{2,4}$/i, message: 'Invalid email address format', }, })} />; |
The function register also serves to generate validations for current inputs. The validate rule of React Hook Form is very similar to the html validate.
We will then pass errors to the ErrorMessage component, and it will display as a div:
1 2 | <ErrorMessage className="invalid-feedback" name="email" as="div" errors={errors} /> |
Finally, we only need to pass the submit handling function to the form via onSubmit:
1 2 3 4 5 6 7 8 9 10 11 | export default () => { const { register, errors, handleSubmit } = useForm(); const onSubmit = values => { // form is valid console.log(values); } return ( <div className="container"> {/* .. other code */} <form onSubmit={handleSubmit(onSubmit)}> |
Here is a brief comparison between React Hook Form and Formik:

The article is referenced at: https://blog.bitsrc.io/react-hook-form-vs-formik-form-builder-library-for-react-23ed559fdae