Preamble
To understand this article you need to have some basic knowledge about K8S, you can refer to the article Learn the basics of Kubernetes – K8s .
Launching a K8S system on a machine is a lot of inconvenience and doesn’t see all the features of the K8S. In reality teams and organizations need a single manipulation and control tool. Rancher 2.0 was born to meet this need. In this article, I would like to introduce the use of Rancher again.
The environment I use will be AWS EC2. This server has a relatively stable network connection with Vietnam and most of all, it has a pay-as-you-go feature that allows you to pay according to usage time in minutes. Very convenient demo without any monthly package rental costs.
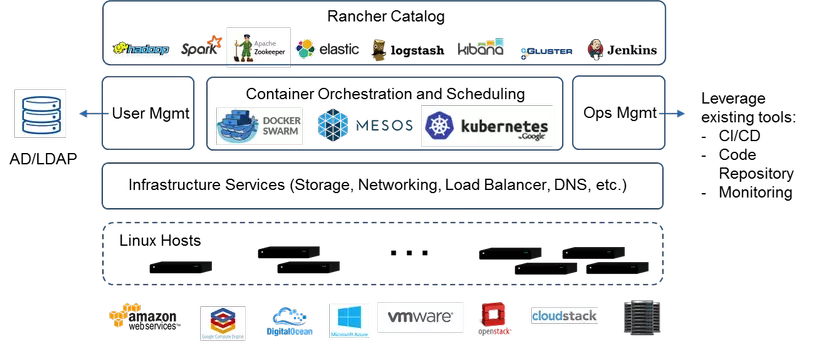
What is Rancher?
Rancher helps manage Docker containers by a handy interface, all operations are on the website’s interface. Rancher also integrates some utility tools for System Admin such as Shell, App Catalog … Rancher is a free project, started to develop in 2014. With the initial goal is to develop software to Manage and build containerized system structures in every company, running with all infrastructure architectures. Through many versions, Rancher gradually becomes a tool to support many container orchestration such as: Docker Swarm, Mesos or Kubernetes. Manage resources at AWS EC2, Digital Ocean … with API. Manage intranet connections between containers or the internet.
Cluster Architecture
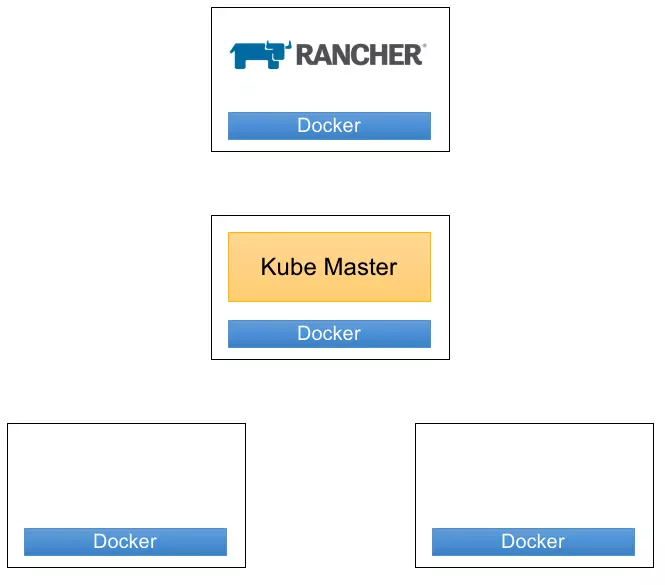
The model is as follows: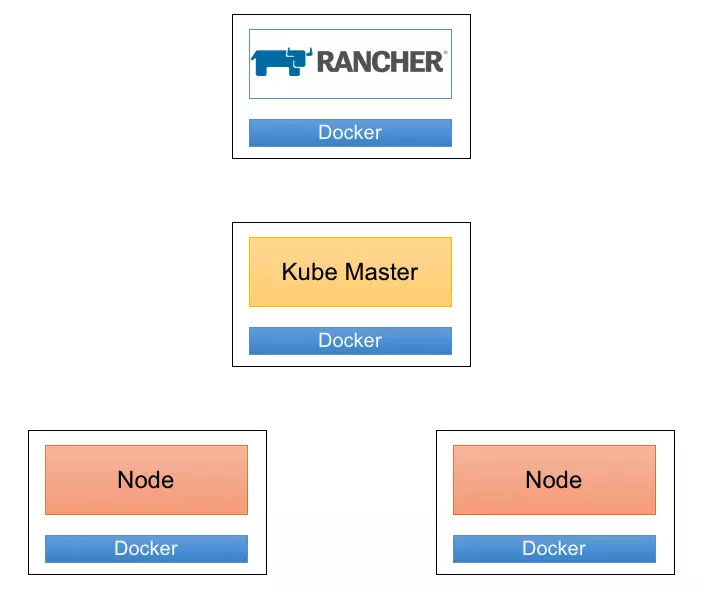
The list of servers that will build:
- Rancher: 1 server
- Master: 1 server
- Node: 2 servers
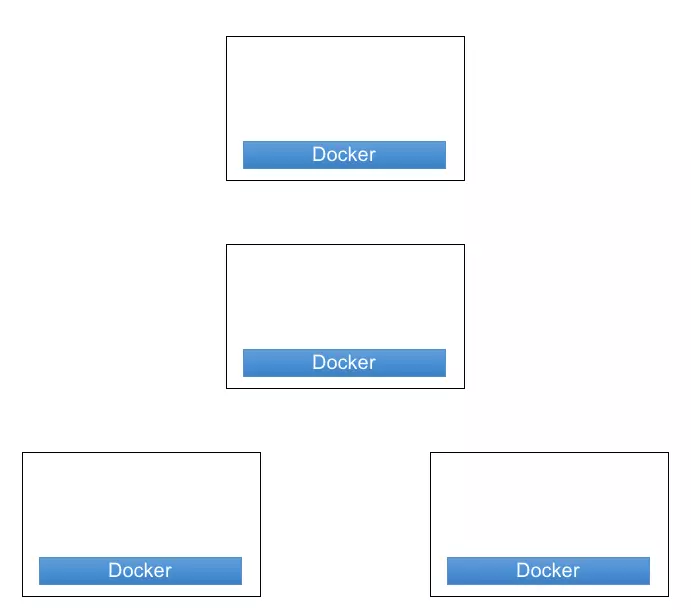
Prepare the environment
As shown above, we need to prepare:
- 4 VPSs
- I choose OS: CentOS 7.4
- Each server has installed docker
1 2 3 4 5 6 | <span class="token comment">#Docker install</span> $ <span class="token function">sudo</span> yum update -y $ <span class="token function">sudo</span> yum <span class="token function">install</span> docker -y $ <span class="token function">sudo</span> systemctl <span class="token builtin class-name">enable</span> docker $ <span class="token function">sudo</span> systemctl start docker |
Basic configuration starts Docker
1 2 3 4 | $ <span class="token function">sudo</span> <span class="token function">groupadd</span> docker $ <span class="token function">sudo</span> <span class="token function">service</span> docker restart $ <span class="token function">sudo</span> <span class="token function">usermod</span> -a -G docker <span class="token punctuation">{</span> user_name <span class="token punctuation">}</span> |
After the installation is complete, we are shown below:
Rancher Install
I use the latest version of Rancher
1 2 | $ <span class="token function">sudo</span> docker run -d --name rancher_server --restart <span class="token operator">=</span> unless-stopped -p <span class="token number">80</span> :80 -p <span class="token number">443</span> :443 rancher/rancher |
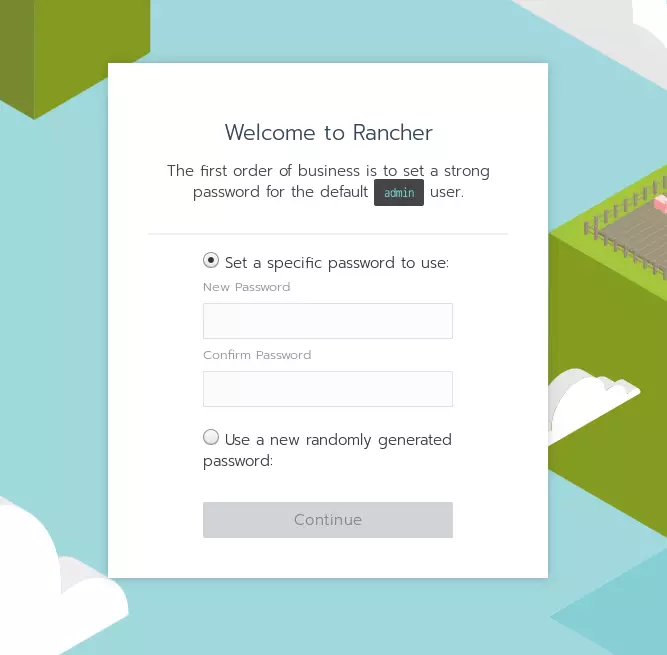
Login Rancher
Access the Rancher under the path: https: // {IP server install Rancher}
Set up arbitrary Password:
Once the password is set up, the next step is to set up the URL. In this step, the server that installs Rancher needs to provide a public IP, or a public domain. Because when joining the Server to the Cluster, it is necessary to access this server.
Create Cluster
- Click the Add Cluster Button
- Select Custom
- Enter Cluster name.
- Click Next
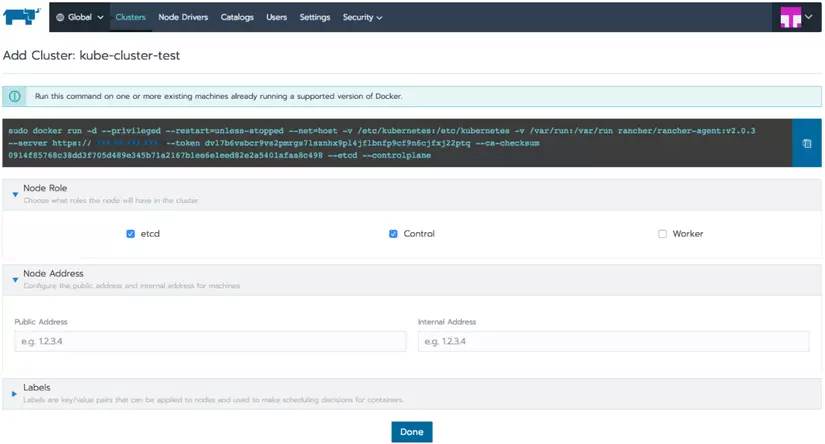
- Select checkbox etcd and Control
- Copy command and run it on the machine that installs Master
- Click Done.
The running process may take some time, you wait until the state of the Cluster is completed, then add the next Node.
Click on the Cluster menu on the menu bar to get the picture as done.
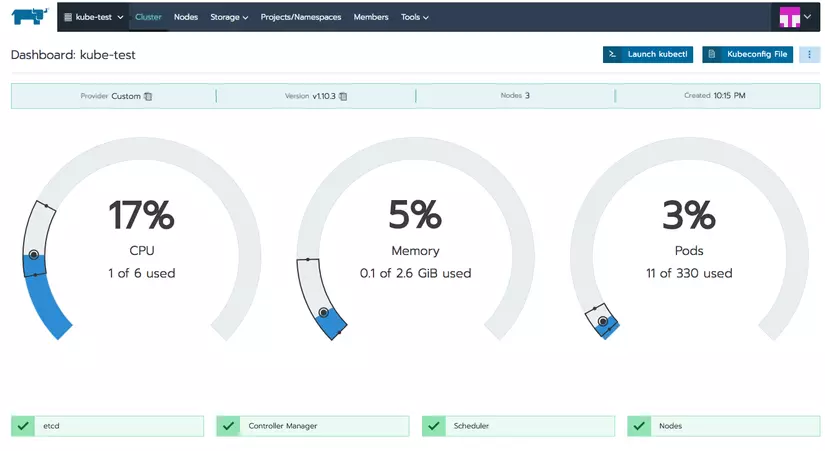
At this point, our Cluster is as follows:
Add Node
- Also at mune Cluster, click the icon “3 vertical dots” in the upper right corner, select edit.
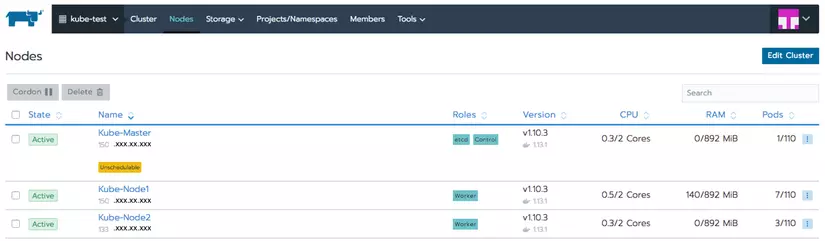
- Here we click on the checkbox Worker, copy command in the box running on 2 servers for Nodes.
- Click Save After the run is complete (the Server has joined the Cluster), we can check it by accessing the Node menu.

If you have full control over your AWS account, an even easier way is to use EC2’s API to create a node through the API key.
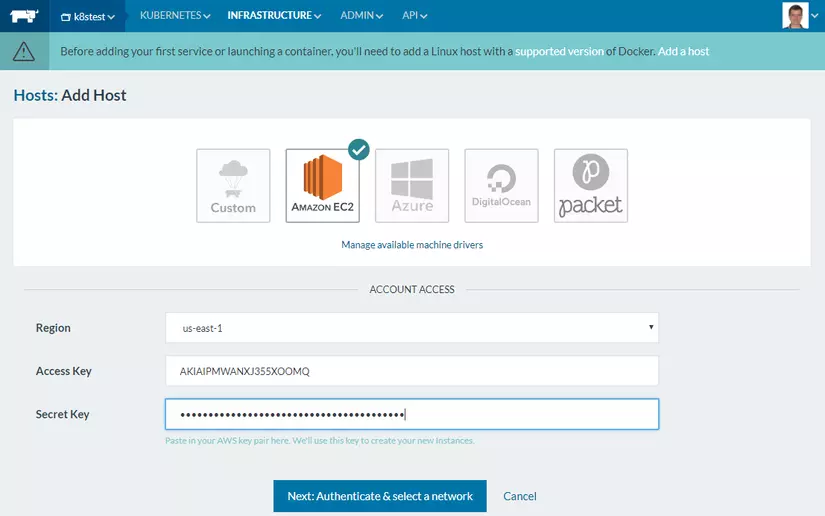
Instructions to get Access key: AWS Blog
You can customize the configuration that Rancher will use for your new node: Rancher Document
summary
Instead of using paid K8S management tools like GKE and EKS, the team can use Rancher – a free tool with great features to help us build Kubernetes Cluster quickly. Rancher also provides many useful features for much larger management, in the next article I will share production environment tips.