The article comes with its Youtube Video . I hope you Subcribe and Share to help me be more motivated
Original article on my Blog (English) : https://www.trendfx-dojo.com/tech/kubernetes/gke-cluster/
Today, I will guide you to install a simple Kubernetes Cluster on Google Cloud Platform – Google Kubernetes Engine ( GKE ). After that, I will deploy NGINX Web Server on this cluster.
The commands I use in this video are run in the Vagrant Ubuntu 18 virtual machine environment. However, you can completely refer to the installation on environments other than Macbook and Windows.
Okay so let’s get started !!!
Before start
To use GKE, you will need to prepare a few things:
- GCP account (with Gmail account): When registering, you will need to enter your international debit card information. However, GCP free $ 300 for a new account so you can feel free to learn GCP, do not worry too much.
- Create a new GCP Project
- Activate using 2 services: Compute Engine and Kubernetes Engine (open Google Cloud Console interface and open each management interface of each service in turn)
1. Install Google Cloud SDK and kubectl
To install Google Cloud SDK, I will follow the instructions on the homepage of GCP .
Because Cloud SDK needs Python to run, first you need to check whether your computer has Python installed:
1 2 | python --version |
Next, we will add the Cloud SDK source package:
1 2 | echo "deb [signed-by=/usr/share/keyrings/cloud.google.gpg] https://packages.cloud.google.com/apt cloud-sdk main" | sudo tee -a /etc/apt/sources.list.d/google-cloud-sdk.list |
Next, we install the necessary packages: apt-transport-https
1 2 | sudo apt-get install apt-transport-https ca-certificates gnupg |
Import Google Cloud Public Key:
1 2 | curl https://packages.cloud.google.com/apt/doc/apt-key.gpg | sudo apt-key --keyring /usr/share/keyrings/cloud.google.gpg add - |
Finally, install Cloud SDK and kubectl:
1 2 3 | sudo apt-get update && sudo apt-get install google-cloud-sdk sudo apt-get install kubectl |
After the installation is complete, to check, I will run it
1 2 | gcloud version |
and
1 2 | kubectl version --short --client |
Once you’re ready, if you will be able to run as follows, you can continue to the next step:

2. Configure Google Cloud SDK
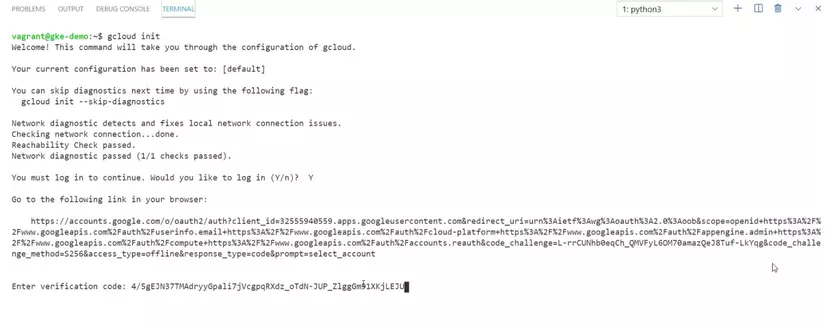
After the installation is complete, we will have to configure the Cloud SDK with the gcloud init command:
1 2 | gcloud init |
Terminal will display a link and ask you to enter the verification code . You need to copy and open the URL in the browser. After opening the link, the browser will redirect to the Gmail login screen. Sign in with your Gmail, you will receive a verification code as follows.
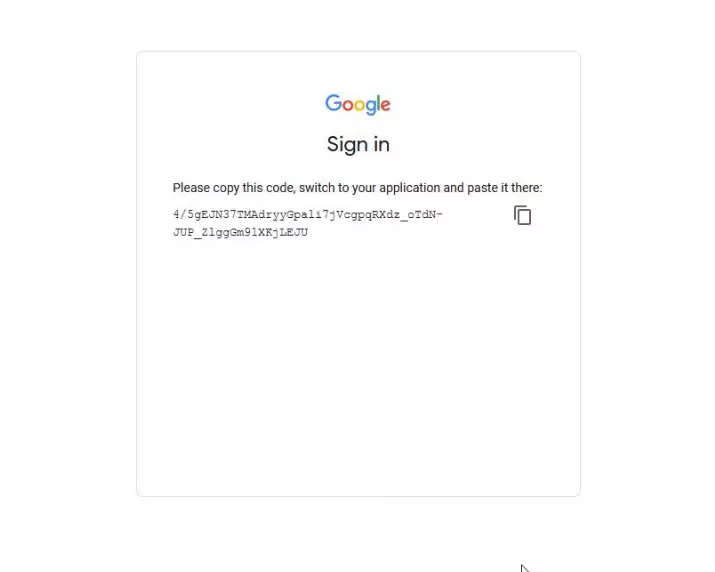
Copy and Paste into Terminal
Next, Terminal will ask you to choose or create a new GCP project. And then it will ask you to select default region and zone .
Since I am in Japan, I will choose zone: asia-northeast1-a. (Is number 34)

After configuring the Cloud SDK successfully, I will try to check with the command gcloud auth list
1 2 | gcloud auth list |

OK so I have finished configuring Google Cloud CLI .
3. Create GKE Cluster
In the next step, we will create the GKE Cluster . To create a GKE cluster is extremely simple, we just need to run the command: gcloud container clusters create . I will create a cluster called k8s-demo
1 2 | gcloud container clusters create k8s-demo |
When you run the command: gcloud container cluster without any parameters. By default, GCP will use the following parameters:
- Machine type: n1-standard-1
- Nodes: 3 That means 3 Instances n1-standard-1 will be created to run the GKE cluster. In fact, this command will take a few minutes to complete.
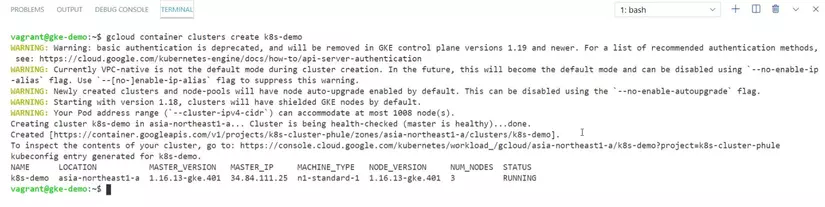
After this command finishes running, I will open the Google Cloud Console interface for a quick check. The first is the Compute Engine management interface, you will see there are 3 VM instances running. When you click on any instance you will see the instance type is n1-standard-1 .
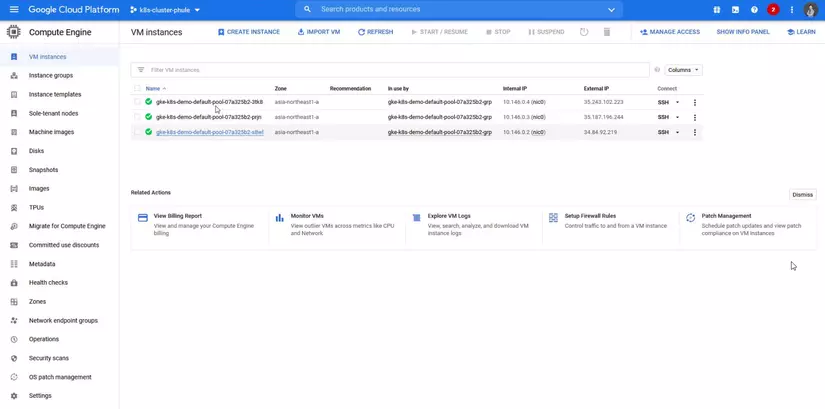
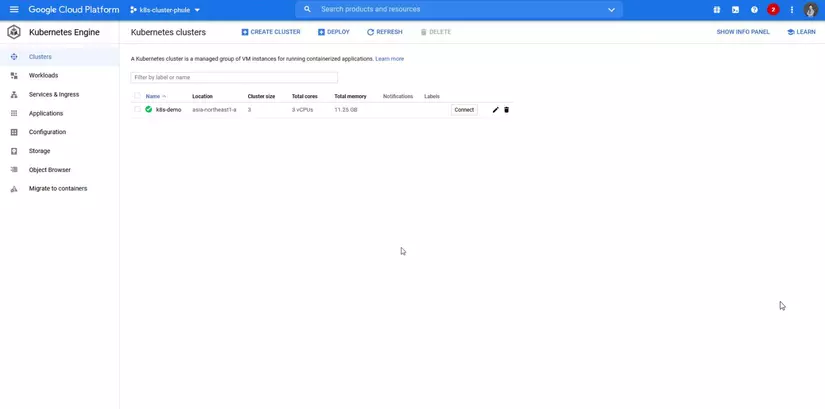
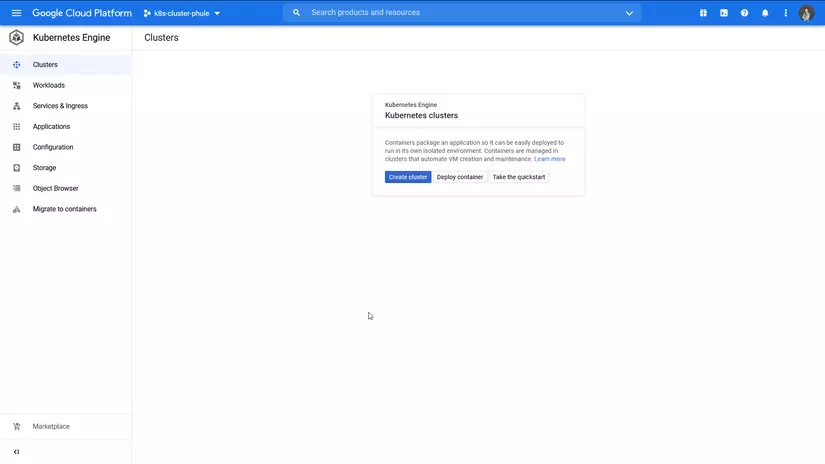
Next is the Kubernetes Engine management interface , you will see the cluster name is k8s-demo , cluster size = 3 (ie the number of nodes in the cluster is 3)
You can also use gcloud to check. For example you want to check the number of VM instance running.
1 2 | gcloud compute instances list |

So I have successfully created a GKE cluster !!!
4. Deploy NGINX Web Server
Next, I will deploy NGINX into GKE Cluster just created. I will create the Deployment Object with the command:
1 2 | kubectl create deployment nginx --image=nginx --replicas=3 |
This deployment will run 3 replicas of the NGINX Container. Next, I run the kubectl get pods command to check
1 2 | kubectl get pods |
Next, I will create a Service object to be able to access Pod from outside the Cluster. In this case, we will use the LoadBalancer Service . To create a LoadBalancer Service, I will use the command:
1 2 | kubectl expose deployment nginx --name=nginx --type=LoadBalancer --port=80 --target-port=80 |
To see the information on LoadBalancer above, I will run the following command:
1 2 | kubectl get svc nginx |
If you run this command too soon, you will see that the column EXTERNAL-IP is now <pending> . You will have to wait a few minutes. You will then see an IP at External IP
Okay, you will open a browser and try to access that IP:
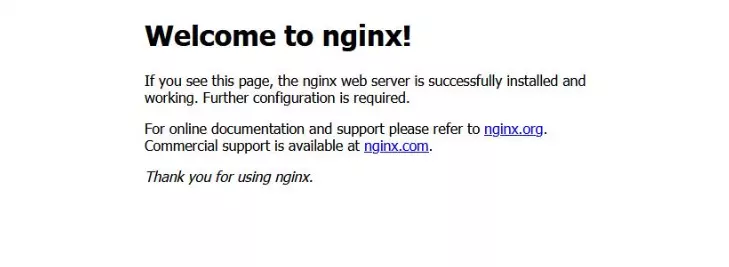
The browser will display: <title> Welcome to Nginx! </title> . Okay, so I have successfully deployed NGINX Web Server into GKE Cluster.
5. Clean up Resources
As a final step, We will delete the resources we used in this tutorial. First we will delete the LoadBalancer Service, using the following command:
1 2 | kubectl delete service nginx |
After the command has finished running, you can reopen the Google Cloud Console interface and check the Load Balancing interface, you will see the Load Balancer has been removed.
Next, we will delete the GKE Cluster with the command:
1 2 | gcloud container clusters delete k8s-demo |
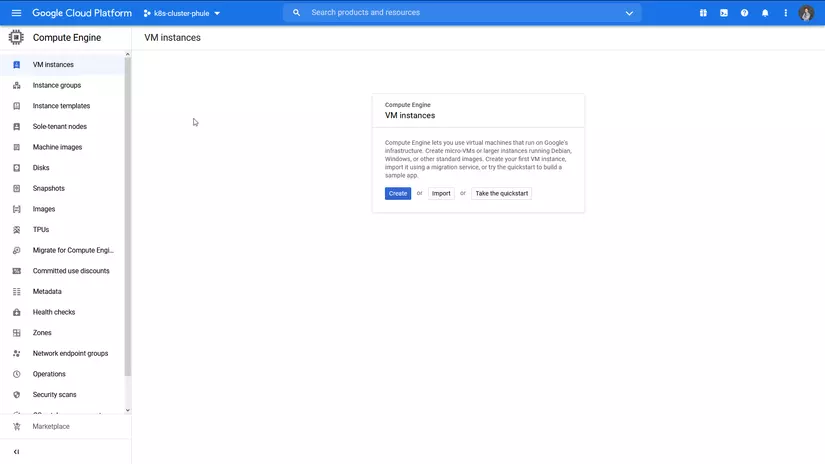
Finally, you can open the Google Cloud Console interface to check: The first is the GCP Compute interface:
Then there is the Kubernetes Engine interface:
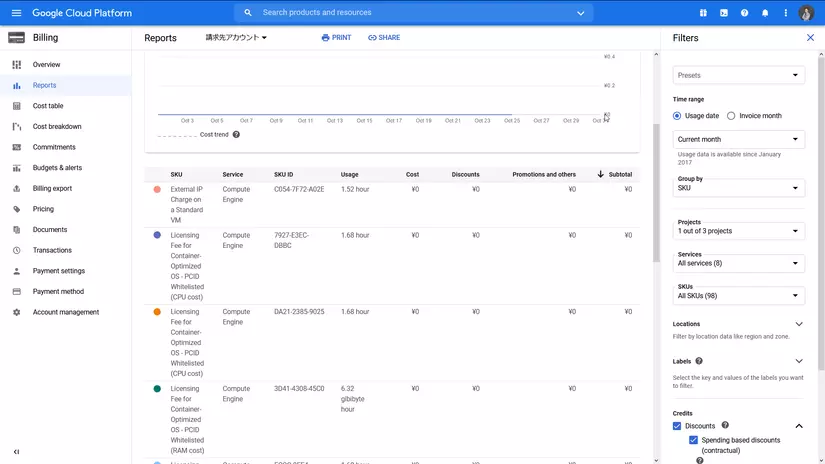
Finally, Project Billing (If you have a Free Tier 300 $, feel free)
End
Okay, so we have successfully installed a Kubernetes Cluster on Google Kubernetes Engine .
Compared to AWS EKS , I found the setup process with gcloud much faster and the document written was much easier to understand.
In the next article, I will install on Azure Kubernetes Service .
Please subscribe my Youtube Channel and Share to support me!
If you want me to do more content about Kubernetes, please leave a comment, I will try to do as soon as possible.


