Postman must be no stranger to anyone working in the field of information technology. There have also been a lot of posts related to postman, as a software quality tester, I will share about the knowledge I have accumulated about postman.
To be able to perform data visualization through the API, in addition to setting the environment, postman we need to have API information to be tested for a specific object. Let’s say, test a good Web API in a Project A. For beginners to learn, the ability to generate API information will be quite difficult. So, I will introduce to you about Redmine API, completely free to use and extremely helpful.
I. Information about API required
1. What is redmine?
Redmine is a task management tool, written in open source so completely free for users. So anyone can use it without paying for it. Link: https://www.redmine.org/
2. How is the Redmine API?
Because it is open source, Redmine provides Redmine API in order to provide access and basic operations from which users can learn about API testing with Postman tool. Link: https://www.redmine.org/projects/redmine/wiki/Rest_api
II. Learn the basic definitions in the API
2.1. Commonly used format
The API provides two types of formats: Json and XML.
- Json definition: https://en.wikipedia.org/wiki/JSON
Example:
1 2 3 4 5 6 7 8 9 10 11 12 13 14 15 16 17 18 19 20 21 22 23 24 25 | { "firstName": "John", "lastName": "Smith", "isAlive": true, "age": 27, "address": { "streetAddress": "21 2nd Street", "city": "New York", "state": "NY", "postalCode": "10021-3100" }, "phoneNumbers": [ { "type": "home", "number": "212 555-1234" }, { "type": "office", "number": "646 555-4567" } ], "children": [], "spouse": null } |
- Definition of XML. Link: https://en.wikipedia.org/wiki/XML
Example:
1 2 3 | <?xml version="1.0" encoding="ISO-8859-1" ?> <xs:schema xmlns:xs="http://www.w3.org/2001/XMLSchema"></xs:schema> |
2.2. Basic information a request to Redmine is required
Important : Because Redmine is open source, a company can pull the source code and build it on the company’s server. To use the Redmine API, you must enable this feature. After you login with your Redmine admin account, follow Administration -> Settings -> API . Then check the checkbox Enable REST API .
URL : URL address. The request will be forwarded to the address. The response returned will be in either json or xml format. You must actively add this format to the url. For example:
1 2 | http://demo.redmine.org/projects.json |
Method : Some methods of request.
- GET: Get data from Redmine
- POST: Create data on Redmine. Be it creating projects, creating issues, …
- PUT: Update data on Redmine. For example, update subject issue, change dual date …
- ….
Header : Information about the headers of a request.
Status : The result returned by the request.
Authentication : Redmine has 2 main authen mechanisms: basic auth, api access key. You can refer to the documentation here .
III. Make the request
After downloading and installing and successfully login to Postman. Please do the following:
3.1. Create Collection
Purpose: To store all small requests inside that can be related to each other in the same function for easy management.
On the left, select + New Collection will display like the image below. Please enter the collection name and include a description if applicable. Here, I will create a collection called Testing. 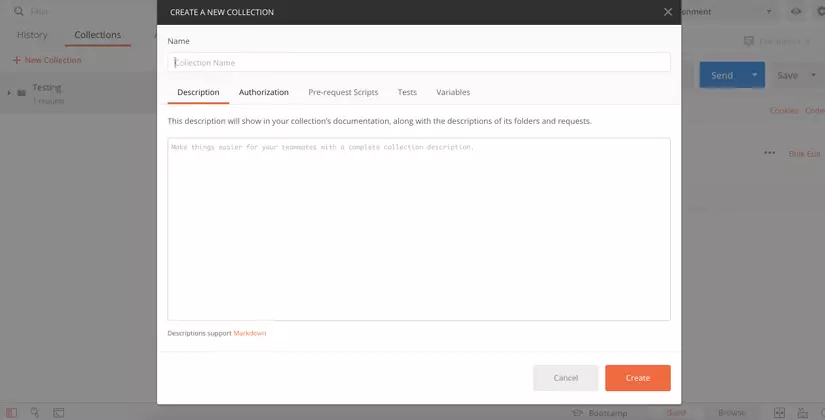
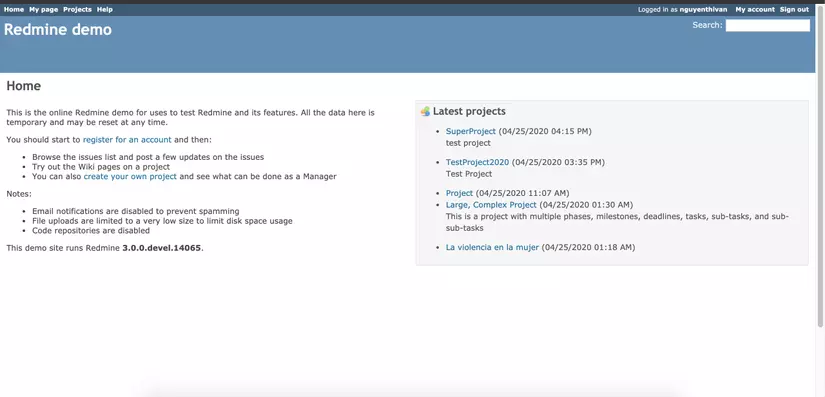
3.2. Create a project
On redmine, provide you with a page to test this API. Link: demo.redmine.org
Please go here to register the information. This is my screen after I have successfully completed the operation. The implementation is quite simple.
3.3. Create a request
Above has logged into the account on the demo page of Redmine. Logging in following this link, Redmine will guide you in detail how to check using the API.
Link: https://www.redmine.org/projects/redmine/wiki/Rest_Projects
3.3.1. Check how many projects are currently created. On the Postman side, make a request to retrieve data as follows:
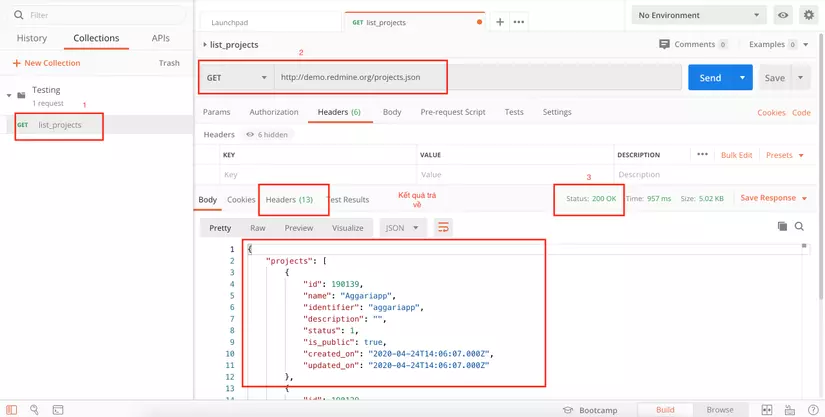
- In the left corner, create a new naming request with the purpose this request needs to do.
- Go to builder => Enter method, URL and Send request. After receiving the results, please check the following:
- Status: 200 OK to send the request successfully
- Header: Total number of projects currently in existence
- Body: Detailed information about the project