Introduce
TableView is one of the components commonly used in iOS applications. In this article, we will analyze and step by step organize the Table View effectively to easily maintain and apply a variety of data requirements.
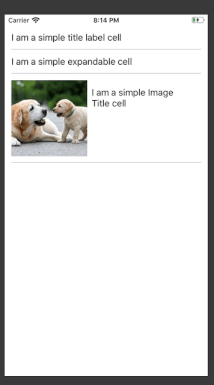
Suppose we need to build a TableView with many different types of cells, as shown below:

With the following requirements:
- The displayed data will be retrieved through the API call
- Sections without data are not displayed
We will choose the MVVM model for the example of this article. With MVVM, it will be easy to separate the View and the profession of the problem. In this example we will create a TableView with 3 different types of cells:
- Cell only has labels
- Cell contains pictures and labels
- Cell has an extension function


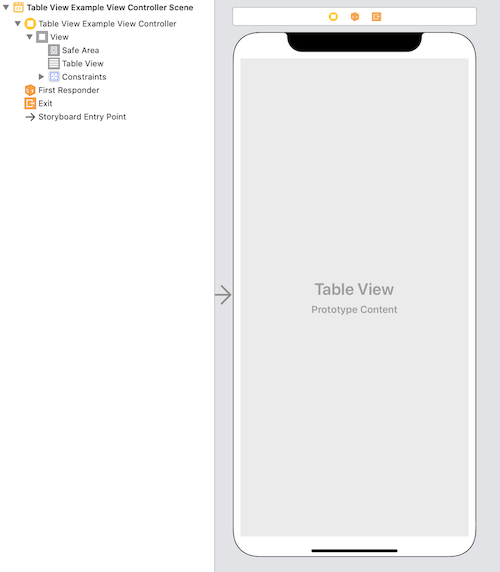
Step 1: Create a new ViewController and Storyboard
We will first create a Storyboard for the dynamic TableView, and add a TableView into the UIViewController.
Then the code of ViewController will look like this:
1 2 3 4 5 6 7 8 | class TableViewExampleViewController: UIViewController { @IBOutlet weak var tableView: UITableView? override func viewDidLoad() { super.viewDidLoad() } } |
Step 2: Create protocol for TableViewCell and TableViewCellModel
We will create 2 protocols for:
- For the TableView cell
- For TableView cell ViewModel
We will create the TableViewCellViewModelProtocol protocol for the ViewCell model. The variable cellIdentifier will be used to distinguish between cell types.
1 2 3 4 | protocol TableViewCellModelProtocol { var cellIdentifier: String { get } } |
Next we create the TableViewCellProtocol protocol for ViewCell. This protocol has a populate method that is used to get the data inside TableViewCell
1 2 3 4 | protocol TableViewCellProtocol { func populate(with data: TableViewCellModelProtocol) } |
Step 3: Create TableViewCell and TableViewCellViewModel
We will proceed to create 3 TableView cells and display data based on ViewModel.
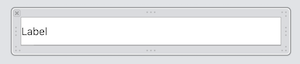
Type 1: TableView cell has only label
The ViewModel will have the following property:
- cellIdentifier
- title
1 2 3 4 5 6 7 8 9 | struct TableViewCellWithLabelModel: TableViewCellModelProtocol { var cellIdentifier: String = "TableViewCellWithLabel" var title: String init(title: String) { self.title = title } } |
The ViewCell would look like this:
1 2 3 4 5 6 7 8 9 10 11 | class TableViewCellWithLabel: UITableViewCell { @IBOutlet weak var titleLabel: UILabel! } extension TableViewCellWithLabel: TableViewCellProtocol { func populate(with data: TableViewCellModelProtocol) { if let data = data as? TableViewCellWithLabelModel { titleLabel.text = data.title } } } |
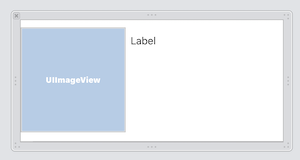
Type 2: TableViewCell includes image and label
In the cell will include 1 image and 1 label as shown below.
The cell model would look like this:
1 2 3 4 5 6 7 8 9 10 | struct TableViewCellWithImageAndLabelModel: TableViewCellModelProtocol { var cellIdentifier: String = "TableViewCellWithImageAndLabel" var imageName: String var title: String init(title: String, imageName: String) { self.title = title self.imageName = imageName } } |
Cell View will look like this:
1 2 3 4 5 6 7 8 9 10 11 12 13 | class TableViewCellWithImageAndLabel: UITableViewCell { @IBOutlet weak var titleLabelView: UILabel! @IBOutlet weak var leadingImageView: UIImageView! } extension TableViewCellWithImageAndLabel: TableViewCellProtocol { func populate(with data: TableViewCellModelProtocol) { if let data = data as? TableViewCellWithImageAndLabelModel { titleLabelView.text = data.title leadingImageView.image = UIImage(named: data.imageName) } } } |
Type 3: Cell with extension functions

The cell model would look like this:
1 2 3 4 5 6 7 8 9 10 11 12 | struct TableViewExpandableCellModel: TableViewCellModelProtocol { var cellIdentifier: String = "TableViewExpandableCell" var title: String var description: String var isExpanded: Bool init(with title: String, description: String, isExpanded: Bool = false) { self.title = title self.description = description self.isExpanded = isExpanded } } |
Cell View will look like this:
1 2 3 4 5 6 7 8 9 10 11 12 13 14 | class TableViewExpandableCell: UITableViewCell { @IBOutlet weak var descriptionLabel: UILabel! @IBOutlet weak var titleLabel: UILabel! } extension TableViewExpandableCell: TableViewCellProtocol { func populate(with data: TableViewCellModelProtocol) { if let data = data as? TableViewExpandableCellModel { descriptionLabel.text = data.description titleLabel.text = data.title descriptionLabel.isHidden = !data.isExpanded } } } |
Step 4: Create ViewModel for UIViewController
ViewModel for UIViewController will include 2 main functions:
- Update data for TableView
- Update data for one line
1 2 3 4 5 6 7 8 9 10 11 12 | typealias TableViewModelOutput = (TableViewExampleViewModel.Output) -> () struct TableViewExampleViewModel { var output: TableViewModelOutput? mutating func viewModelDidLoad() { output?(.reloadData) } enum Output { case reloadData case reloadRowAt(index: Int) } } |
We will use an array of TableViewCellModelProtocol object to store the content and processing of each row in the table.
1 2 3 4 5 6 7 8 9 10 11 12 13 14 15 | var items: [TableViewCellModelProtocol] = [//Set data based on your need] var numberOfItems: Int { return items.count } func getItem(at index: Int) -> TableViewCellModelProtocol { return items[index] } mutating func didTapItem(at index: Int) { if var viewModel = getItem(at: index) as?TableViewExpandableCellModel { viewModel.isExpanded = !viewModel.isExpanded items[index] = viewModel } output?(.reloadRowAt(index: index)) } |
Then the data in the table will be initialized as follows:
1 2 3 4 5 6 7 8 9 10 | mutating func viewModelDidLoad() { items = [ TableViewCellWithLabelModel(title: "I am a simple title label cell"), TableViewExpandableCellModel(with: "I am a simple expandable cell", description: "Lorem Ipsum is simply dummy text of the printing and typesetting industry."), TableViewCellWithImageAndLabelModel(title: "I am a simple Image Title cell", imageName: "sampleImage") ] ... //We can call output to reload TableView Data } |
Step 5: Combine the TableView delegate and the DataSource
In this step we will progress the Delegate and DataSource initialization for the table.
1 2 3 4 5 6 7 8 9 10 11 12 13 14 15 16 17 | @IBOutlet weak var tableView: UITableView? { didSet { setupTableView() } } private func setupTableView() { tableView.delegate = self tableView.dataSource = self func registerNib() { tableView.register(nibName: "TableViewExpandableCell") tableView.register(nibName: "TableViewCellWithImageAndLabel") tableView.register(nibName: "TableViewCellWithLabel") } registerNib() } |
We will then write implementations for the closures in the ViewModel defined in step 4:
1 2 3 4 5 6 7 8 9 10 11 12 13 14 | //Bind ViewController with ViewModel extension TableViewExampleViewController { func bindViewModel() { viewModel.output = { output in switch output { case .reloadData: self.tableView.reloadData() case .reloadRowAt(let index): self.tableView.reloadRows(at: [IndexPath(row: index, section: 0)], with: .automatic) } } } } |
Finally, we will implement the methods of UITableViewDelegate and DataSource to return the content of the desired cells.
1 2 3 4 5 6 7 8 9 10 11 12 13 14 15 16 | //Tableview delegate and datasource methods extension TableViewExampleViewController: UITableViewDelegate, UITableViewDataSource { func tableView(_ tableView: UITableView, numberOfRowsInSection section: Int) -> Int { return viewModel.numberOfItems } func tableView(_ tableView: UITableView, cellForRowAt indexPath: IndexPath) -> UITableViewCell { let cellModel = viewModel.getItem(at: indexPath.row) let cell = tableView.dequeueReusableCell(withIdentifier: cellModel.cellIdentifier) as? TableViewCellProtocol cell?.populate(with: cellModel) return cell as? UITableViewCell ?? UITableViewCell() } func tableView(_ tableView: UITableView, didSelectRowAt indexPath: IndexPath) { viewModel.didTapItem(at: indexPath.row) } } |
Then our table will behave as shown below