
I’m sure that you’ve used, more or less, one of the cloud storage services like Google Drive, One Drive, or Dropbox , … Thanks to these services, you can access files anywhere Anywhere, on any device, easily share and work with others, or simply a layer of defense in case data stored on the device gets lost.
Nextcloud is also a piece of software that helps create a cloud storage system. The difference is that Nextcloud is completely open source and free . That’s why anyone can use Nextcloud to create their own cloud storage!
So why must choose Nextcloud instead of the “big” like Google Drive? This is mostly up to everyone’s taste, but basically deploying Nextcloud yourself gives you full control over your data, from the pain of privacy issues , and the level of prices will probably be even cheaper.
In this article, I would like to join you to deploy a complete Nextcloud system via Docker, Docker Compose, Mariadb and Caddyserver v2 .
Prepare
First of all, to start installing Nextcloud, you need to have the following available:
- Domain arbitrary
- VPS with temporary configuration and enough capacity to use (or maybe a Raspberry Pi at home)
- Basic knowledge of linux server administration and working with docker, docker-composse.
In the article, I will expect that your server / VPS has all the necessary tools available (docker, docker-compose, …). If you haven’t already, you can see instructions for installing docker here and installing docker-compose here .
Perform setup with docker-compose
Folder tree
Once the installation is complete, your directory tree just created will look like this:
1 2 3 4 5 6 7 | nextcloud-compose/ ├─ caddy/ │ ├─ Caddyfile │ ├─ Dockerfile docker-compose.yml .env |
Create file docker-compose.yml
In this file docker-compose.yml , I will set up 3 services: nextcloud , mariadb and caddy .
I choose to use the nextcloud image file in the FPM format. Because this nextcloud image file does not contain Apache (or any other web server), I choose to install Caddyserver v2 to do reverse proxy. Here, I choose Caddyserver instead of Nginx because Caddy has a short config file and can automatically install and renew SSL.
I choose to use Mariadb as the database for Nextcloud. Some other database types supported by nextcloud that you can choose are SQLite or PostgreSQL.
For the data to be “survived” after each deletion and re-creation of the container, I use the named volume of Docker with the volume names: nextcloud_data, mariadb_data, caddy_data, caddy_config.
The final docker-compose.yml file is written as follows:
1 2 3 4 5 6 7 8 9 10 11 12 13 14 15 16 17 18 19 20 21 22 23 24 25 26 27 28 29 30 31 32 33 34 35 36 37 38 39 40 41 42 43 44 45 46 | <span class="token key atrule">version</span> <span class="token punctuation">:</span> <span class="token string">'3'</span> <span class="token key atrule">services</span> <span class="token punctuation">:</span> <span class="token key atrule">nextcloud</span> <span class="token punctuation">:</span> <span class="token key atrule">image</span> <span class="token punctuation">:</span> nextcloud <span class="token punctuation">:</span> fpm <span class="token key atrule">restart</span> <span class="token punctuation">:</span> on <span class="token punctuation">-</span> failure <span class="token punctuation">:</span> <span class="token number">5</span> <span class="token key atrule">volumes</span> <span class="token punctuation">:</span> <span class="token punctuation">-</span> nextcloud_data <span class="token punctuation">:</span> /var/www/html <span class="token key atrule">environment</span> <span class="token punctuation">:</span> <span class="token punctuation">-</span> MYSQL_DATABASE=$ <span class="token punctuation">{</span> DB_DATABASE <span class="token punctuation">}</span> <span class="token punctuation">-</span> MYSQL_USER=$ <span class="token punctuation">{</span> DB_USER <span class="token punctuation">}</span> <span class="token punctuation">-</span> MYSQL_PASSWORD=$ <span class="token punctuation">{</span> DB_PASSWORD <span class="token punctuation">}</span> <span class="token punctuation">-</span> MYSQL_HOST=mariadb <span class="token key atrule">mariadb</span> <span class="token punctuation">:</span> <span class="token key atrule">image</span> <span class="token punctuation">:</span> mariadb <span class="token key atrule">restart</span> <span class="token punctuation">:</span> on <span class="token punctuation">-</span> failure <span class="token punctuation">:</span> <span class="token number">5</span> <span class="token key atrule">volumes</span> <span class="token punctuation">:</span> <span class="token punctuation">-</span> mariadb_data <span class="token punctuation">:</span> /var/lib/mysql <span class="token key atrule">environment</span> <span class="token punctuation">:</span> <span class="token punctuation">-</span> MYSQL_DATABASE=$ <span class="token punctuation">{</span> DB_DATABASE <span class="token punctuation">}</span> <span class="token punctuation">-</span> MYSQL_USER=$ <span class="token punctuation">{</span> DB_USER <span class="token punctuation">}</span> <span class="token punctuation">-</span> MYSQL_PASSWORD=$ <span class="token punctuation">{</span> DB_PASSWORD <span class="token punctuation">}</span> <span class="token punctuation">-</span> MYSQL_ROOT_PASSWORD=$ <span class="token punctuation">{</span> DB_ROOT_PASSWORD <span class="token punctuation">}</span> <span class="token key atrule">caddy</span> <span class="token punctuation">:</span> <span class="token key atrule">build</span> <span class="token punctuation">:</span> <span class="token key atrule">context</span> <span class="token punctuation">:</span> ./caddy <span class="token key atrule">restart</span> <span class="token punctuation">:</span> on <span class="token punctuation">-</span> failure <span class="token punctuation">:</span> <span class="token number">5</span> <span class="token key atrule">ports</span> <span class="token punctuation">:</span> <span class="token punctuation">-</span> <span class="token datetime number">80:80</span> <span class="token punctuation">-</span> 443 <span class="token punctuation">:</span> <span class="token number">443</span> <span class="token key atrule">volumes</span> <span class="token punctuation">:</span> <span class="token punctuation">-</span> caddy_data <span class="token punctuation">:</span> /data <span class="token punctuation">-</span> caddy_config <span class="token punctuation">:</span> /config <span class="token key atrule">volumes_from</span> <span class="token punctuation">:</span> <span class="token punctuation">-</span> nextcloud <span class="token key atrule">environment</span> <span class="token punctuation">:</span> <span class="token punctuation">-</span> DOMAIN=$ <span class="token punctuation">{</span> DOMAIN <span class="token punctuation">}</span> <span class="token key atrule">volumes</span> <span class="token punctuation">:</span> <span class="token key atrule">mariadb_data</span> <span class="token punctuation">:</span> <span class="token key atrule">nextcloud_data</span> <span class="token punctuation">:</span> <span class="token key atrule">caddy_data</span> <span class="token punctuation">:</span> <span class="token key atrule">caddy_config</span> <span class="token punctuation">:</span> |
Declare environment variables
You then need to declare environment variables. Create the .env file in the same folder as the docker-compose.yml file and add the following data accordingly:
1 2 3 4 5 6 | DB_DATABASE=nextcloud DB_USER=nextcloud DB_PASSWORD=PASSWORD_HERE DB_ROOT_PASSWORD=ROOT_PASSWORD_HERE DOMAIN=example.com |
Caddyserver settings
In the caddy directory, you need to create 2 files named Dockerfile and Caddyfile .
The Dockerfile file is used to create an image file of Caddyserver with its configs:
1 2 3 4 | <span class="token keyword">FROM</span> caddy <span class="token punctuation">:</span> 2.3.0 <span class="token punctuation">-</span> alpine <span class="token keyword">COPY</span> Caddyfile /etc/caddy/Caddyfile |
The Caddyfile file contains configs for Nextcloud:
1 2 3 4 5 6 7 8 9 10 11 12 13 14 15 16 17 18 19 20 21 22 23 24 25 26 | {$DOMAIN:localhost} root * /var/www/html file_server php_fastcgi nextcloud:9000 redir /.well-known/carddav /remote.php/dav 301 redir /.well-known/caldav /remote.php/dav 301 @forbidden { path /.htaccess path /data/* path /config/* path /db_structure path /.xml path /README path /3rdparty/* path /lib/* path /templates/* path /occ path /console.php } respond @forbidden 404 |
Download and install the containers
The job is only to run a single command.
1 2 | docker-compose up --build -d |
Once it’s finished running, (hopefully) Nextcloud has been successfully installed and available at your chosen domain name!
Too long, afraid to do?
If you are afraid to follow the step-by-step instructions, just clone the preconfigured git repo as instructed above:
1 2 3 4 | <span class="token function">git</span> clone <a class="__cf_email__" href="/cdn-cgi/l/email-protection">[email protected]</a> :tranxuanthang/nextcloud-compose.git <span class="token builtin class-name">cd</span> nextcloud-compose <span class="token function">cp</span> .env.example .env |
Then you just need to correct the information in the .env file accordingly and run the command:
1 2 | docker-compose up --build -d |
That’s it!
Use Nextcloud
When you first access Nextcloud, you will be greeted with the admin account settings screen:
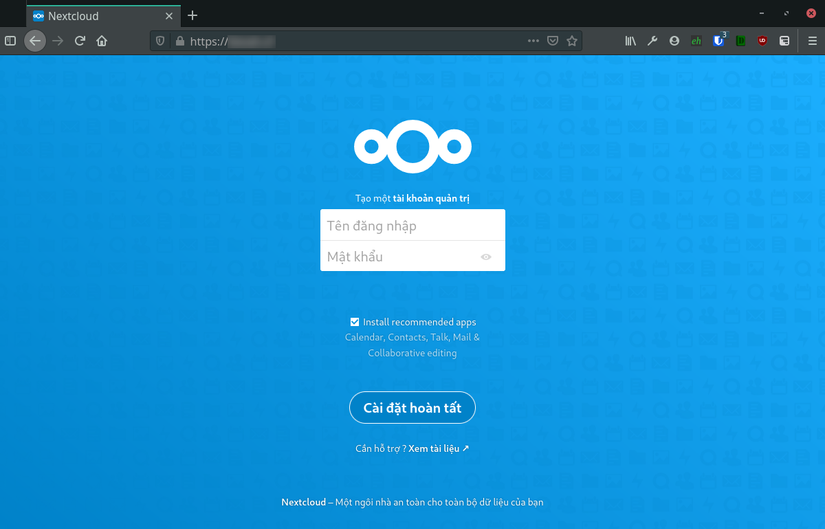
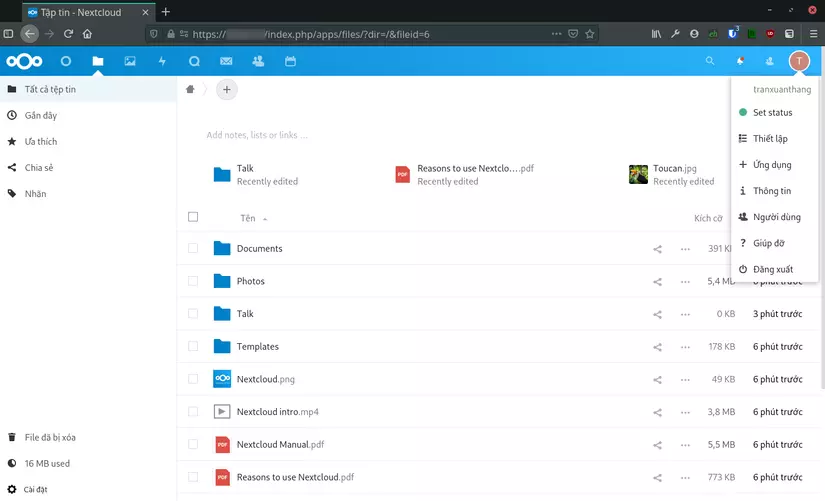
After entering the username and password of the desired admin account, Nextcloud will begin the installation automatically in about 1-2 minutes. Right after that, you can start using Nextcloud:
Nextcloud also has a full range of apps for Windows, Linux, macOS, Android, iOS , … The apps all support folder sync capabilities no different from Google Drive, along with the ability to sync calendar, contacts, … as well as the ability to view many popular file formats and much more. To install the Nextcloud app on your devices, go to https://nextcloud.com/install/# and follow the instructions.