Learn the compatibility of Swift and Objective-C
With the introduction of Swift in 2014, many organizations are trying to convert their source from Objective C to Swift. But with systems that are too large to convert, interoperability is required between Swift and Objective C. For those who are starting a new project, they can directly jump into Swift but many libraries still use Objective. C. Therefore, there is no other option than using both languages in a single library / project. In this article, I will introduce to everyone about Objective-C interactions in Swift | Swift in Objective C in the sample code and some examples.
First, you need to download the example project to get started: https://github.com/mushtaque87/SwiftObjC
Objective C in Swift
Suppose you have created a new SwiftObjC Project. And we need to get an Objective C / TestObjC.h class into the project quickly. Create a new .m file in the project 
Select Create Bridging Header. 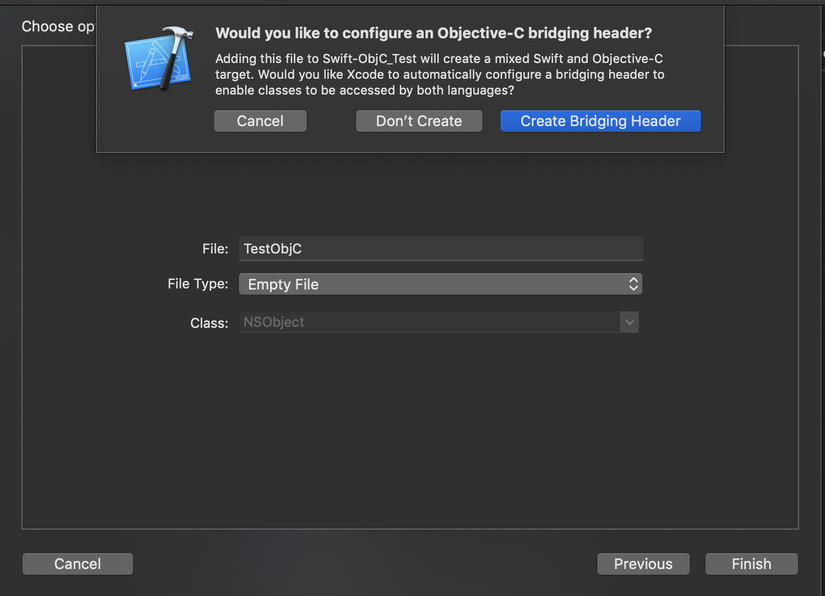
After the previous steps, we can see both TestObjC.m and SwiftObjC-Briging-Header.h files in the directory structure:
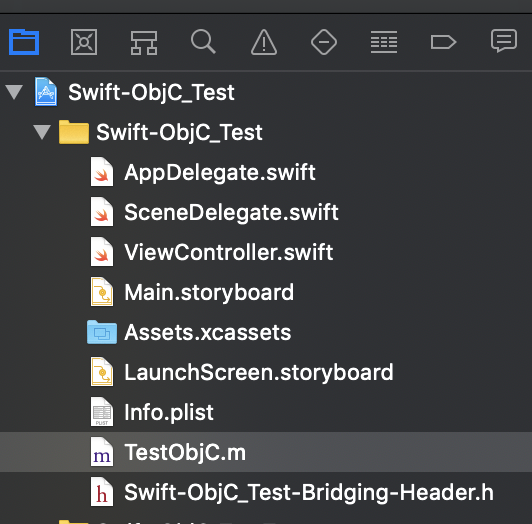
Now add this line of code in the SwiftObjC-Briging-Header.h file.
1 2 | #import "TestObjC.h" |
Now we will add the .h file (Interface File) in the project. Select File -> Select the .h file, name it TestObjC.h and then add the following code:
1 2 3 4 5 6 | #import <Foundation/Foundation.h> @interface TestObjC : NSObject @property (strong, nonatomic) id testProperty; - (void) testMethod; @end |
So now we have all the code and bridges to use Objective C properties and methods in Swift. In any Swift class you want to use Objective C code and access the following properties and methods:
1 2 3 4 5 | let testObjC : TestObjC = TestObjC() testObjC.testProperty = "Hello ObjC" print(testObjC.testProperty!) testObjC.testMethod() |
The Swift compiler will automatically import Objective C classes into swift classes.
Swift in Objective-C
It will be a bit difficult because we’re going backwards, but don’t worry, let’s get started! Create an Objective C profiect (ObjcSwift) and add Swift file (TestSwift.swift). When adding files, you will also be prompted to create a bridging header.h file as above. Select Create a Bridging Header Now the project directory structure will look like this:
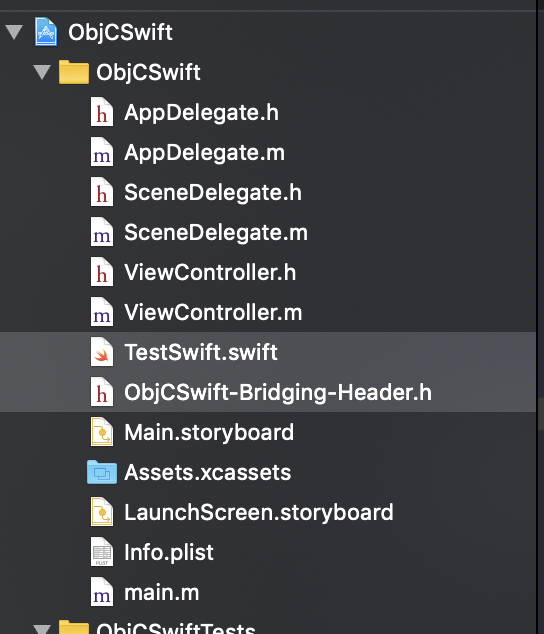
In this case, you don’t need to add any code in the Bridging header.h file. Now, add these lines of code to the newly created Swift file:
1 2 3 4 5 6 7 8 9 10 11 | import Foundation public class TestSwift : NSObject { public var testProperty: Any = "Some Initializer Val" override init() {} @objc(testsFunction:) public func testsFunction(someArg:AnyObject) { let returnVal = "You sent me (someArg)" print(returnVal) } } |
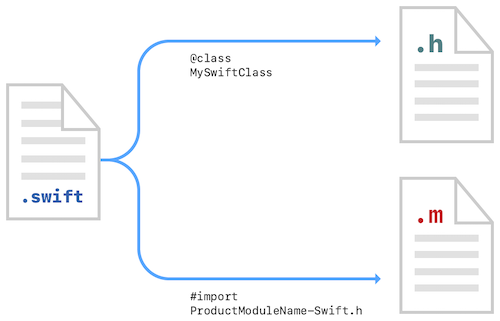
If you want to use any Objective C file, you must enter <ProductModuleName-Swift.h> in the ObjectiveC file (.m). You can find productModuleName in the Build Settings section

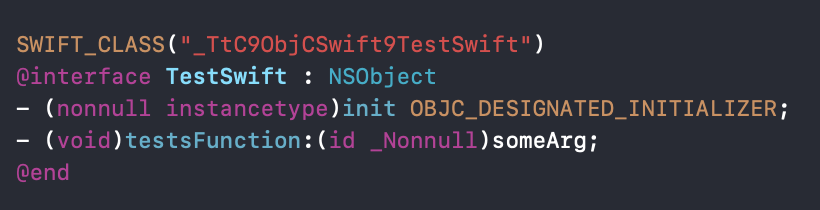
The Swift compiler when building the project created an interface .h file for the swift class not shown. You can see this compliant interface with Command + on this line:
1 2 | #import "ObjCSwift-Swift.h" |
Scroll to the end and you can see the custom and variable class like this:
Now in File Objective C, you can use the Swift file deployment like this:
1 2 3 4 5 6 7 8 9 10 11 | #import "ObjCSwift-Swift.h" @interface ViewController () @end @implementation ViewController - (void)viewDidLoad { [super viewDidLoad]; // Do any additional setup after loading the view. TestSwift* swiftObj = [[TestSwift alloc] init]; [swiftObj testsFunction:@"Hello Swift"]; } |
Back in your TestSwift.swift file, you can see the code through the testFunction method:
1 2 | @objc(testsFunction:) |
This is important because Objective C does not understand advanced Swift classes. This line will create the interface shown in the screenshot above in the pre-compiled swift.h file that Objective C understands and can call. If this line is missing, you may receive the following error.

For more information refer to these Apple documents: https://developer.apple.com/documentation/swift/imported_c_and_objective-c_apis/importing_swift_into_objective-c#overview