Hello everyone, come to see me today, I will upload one more article to share. I hope that my share can help some friends who are inadvertently looking for a solution to the problem. you are having .. Today I want to share with everyone how to upload images in laravel, but a little bit special is that we will use Dropzonejs. Last time on the website, and especially the systems belonging to Japanese users, they enjoyed the experience of dragging and dropping images when they needed to eidt the data, rather than having to select each image file perhaps because this is a spread. The experience is quite smooth and handy, so many users prefer it. So today I want to join you in creating a small function for dragging and dropping images in laravel 6 (other versions are okay) to increase the user experience offline..Let’s Go.
- Follow these few steps and upload image using dropzone in laravel:
- Install Laravel App
- Setup Database Credentials in .env
- Create Route
- Generate a Controller & Model
- Create a View File
- Start Development Server
Laravel Install
The first thing of course will be to install the laravel on our local, you copy your code below to use for convenience.
1 2 | composer create-project --prefer-dist laravel/laravel laravelDropzone |
Setup Database Credentials in .env
You create a database first on phpmysql, and move to the .env file and config the necessary information.
1 2 3 4 5 6 7 | DB_CONNECTION=mysql DB_HOST=127.0.0.1 DB_PORT=3306 DB_DATABASE=databasename DB_USERNAME=db_username DB_PASSWORD=db_password |
Create Route
Next, go to routes / web.php and create 2 routes as shown below.
1 2 3 | Route::get('dropzone/image',' <a class="__cf_email__" href="/cdn-cgi/l/email-protection" data-cfemail="40092d212725032f2e34322f2c2c253200292e242538">[email protected]</a> '); Route::post('dropzone/store',' <a class="__cf_email__" href="/cdn-cgi/l/email-protection" data-cfemail="fbb2969a9c9eb894958f899497979e89bb888f94899e">[email protected]</a> '); |
Generate a Controller & Model
Now we need to initialize more Model, Controller and migration to service the work
1 2 | php artisan make:model Image -mcr |
With this command, we created all 3 files to use, moved to the database / migrations … and placed the following code into the newly created images_table file.
1 2 3 4 5 6 7 8 9 | public function up() { Schema::create('images', function (Blueprint $table) { $table->increments('id'); $table->text('filename'); $table->timestamps(); }); } |
Here, as I said at the beginning, I will share how to upload image files using Dropzonejs so I don’t focus on adding many other columns. If you want more information, please. Next, you run the command to create the table on the database.
1 2 | php artisan migrate |
Next you edit again in the ImageController file we just created.
1 2 3 4 5 6 7 8 9 10 11 12 13 14 15 16 17 18 19 20 21 22 23 24 25 26 27 28 29 30 31 | <?php namespace AppHttpControllers; use IlluminateHttpRequest; use AppImage; class HomeController extends Controller { public function index() { return view('image'); } public function store(Request $request) { $image = $request->file('file'); $avatarName = $image->getClientOriginalName(); $image->move(public_path('images'),$avatarName); $imageUpload = new Image(); $imageUpload->filename = $avatarName; $imageUpload->save(); return response()->json(['success'=>$avatarName]); } } |
Create Blade view
Next, create the view file to make the image upload. Go to app / resources / views and create a file called image.balde.php and add the code below.
1 2 3 4 5 6 7 8 9 10 11 12 13 14 15 16 17 18 19 20 21 22 23 24 25 26 27 28 29 30 31 32 33 34 35 36 37 38 39 40 41 42 43 44 45 | <!DOCTYPE html> <html> <head> <meta charset="utf-8"> <title>Laravel 6 Upload Image Using Dropzone Tutorial</title> <link rel="stylesheet" href="{{asset('css/app.css')}}"> <link rel="stylesheet" href="https://maxcdn.bootstrapcdn.com/bootstrap/4.0.0/css/bootstrap.min.css"> <script src="https://code.jquery.com/jquery-3.2.1.slim.min.js"></script> <script src="https://cdnjs.cloudflare.com/ajax/libs/popper.js/1.12.9/umd/popper.min.js"></script> <script src="https://maxcdn.bootstrapcdn.com/bootstrap/4.0.0/js/bootstrap.min.js"></script> <link rel="stylesheet" href="https://cdnjs.cloudflare.com/ajax/libs/dropzone/5.5.0/min/dropzone.min.css"> <script src="https://cdnjs.cloudflare.com/ajax/libs/dropzone/5.5.0/dropzone.js"></script> </head> <body> <div class="container"> <h2>Laravel 6 Upload Image Using Dropzone Tutorial</h2><br/> <form method="post" action="{{url('dropzone/store')}}" enctype="multipart/form-data" class="dropzone" id="dropzone"> @csrf </form> </div> <script type="text/javascript"> Dropzone.options.dropzone = { maxFilesize: 10, renameFile: function (file) { var dt = new Date(); var time = dt.getTime(); return time + file.name; }, acceptedFiles: ".jpeg,.jpg,.png,.gif", addRemoveLinks: true, timeout: 60000, success: function (file, response) { console.log(response); }, error: function (file, response) { return false; } }; </script> </body> </html> |
1 2 | Ở đây trên phần thể <head> mình có sử dụng các link dẫn là CDN được các thư viện hỗ trợ gọi online, mình sử dụng 1 số thư viện để hỗ trợ cho việc test và quan trọng nhất là thư viện dropzone. |
You can slowly to learn more about the libraries, here I just ran the test should only pull the CDN link to use for convenience, if you use it for the real project, you should download and put in the project to avoid js file error during transmission when calling CDN and can work even when internet is not available.
Start Development Server
Finally, start the server and test the results.
1 2 3 4 | php artisan serve Nếu các bạn đang chạy dự án trên port khác 80, thì các bạn có thể chạy câu lệnh như bên dưới nhé và thay port tương ứng php artisan serve --port=8080 |

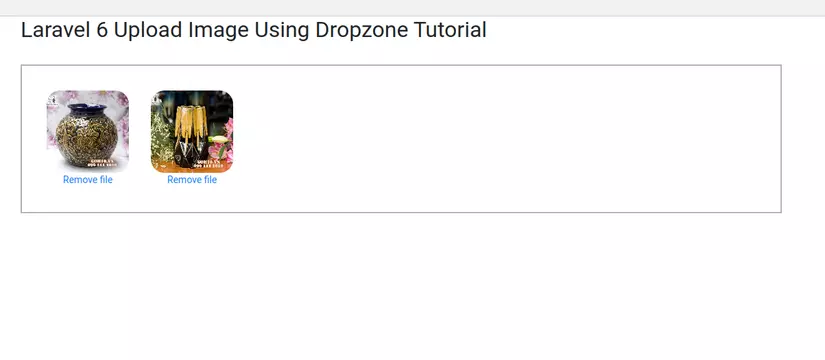
You click on the frame and drag photos from local to test offline.
Summary.
That’s it, I just bottle with you how to create and test image upload function in laravel with the use of dropzonejs. As I mentioned above, when you create a table, you can create other information fields according to the needs of the job and we just need to add the input boxes in the input form and reprocess it a bit in the Controller. Please. I wish you success and see you in the post later.
