Data related to jobs (jobs) is one of the favorite data of many people. While there are some great public databases with job-related information, it can also be gathered from many different sites.
In this article I build a job board in Ruby on Rails that will automatically run once per day, hosted for free on Heroku.
Setup
Let’s say you have successfully installed Ruby, Rails and DB. Create a new project or cd to an existing project of yours!
1 2 3 | rails new scrape_app -d postgresql cd scrape_app/ |
Here I use postgresql to make deploying the production to heroku easier underneath. You can choose any DB.
If using more gem, don’t forget to bundle install !
Configure the Database
Open the file /config/database.yml and update again as follows:
1 2 3 4 5 6 7 8 9 10 11 12 13 14 15 16 17 18 19 | default: &default adapter: postgresql encoding: unicode host: localhost username: xxx # fill in your username password: xxx # fill in your password port: 5432 pool: <%= ENV.fetch("RAILS_MAX_THREADS") { 5 } %> development: <<: *default database: scrape_app_development production: <<: *default database: scrape_app_production username: scrape_app password: <%= ENV['SCRAPE_APP_DATABASE_PASSWORD'] %> |
Replace xxx as your username / password posgres. Next, run the command rails db:create to create database.
Create the ORM Model
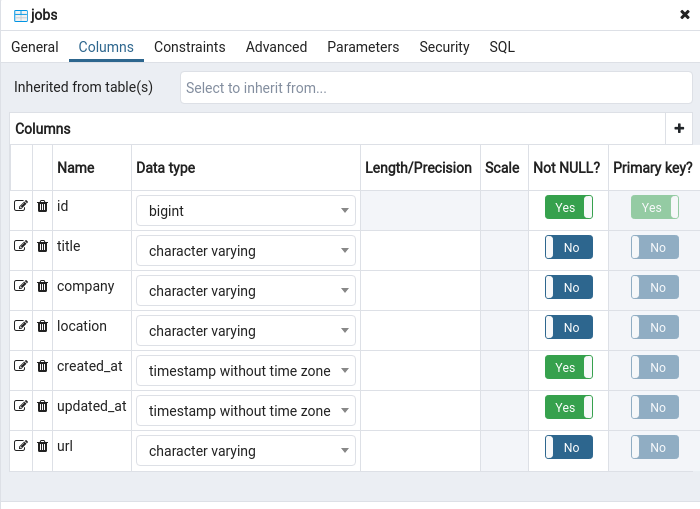
Use scaffold to create a quick Job model for rails g scaffold Jobs title:string company:string url:string location:string
We will get this file db/migrate/20200813034505_create_jobs.rb
1 2 3 4 5 6 7 8 9 10 11 12 13 | class CreateJobs < ActiveRecord::Migration[5.2] def change create_table :jobs do |t| t.string :title t.string :company t.string :url t.string :location t.timestamps end end end |
Run rails db:migrate so that rails creates the table and properties for us.
Create a Rake Task
In /lib/tasks create a new file called scrape.rake . When you want to write code and schedule it to run, this is where the code is located.
Here I will crawl the best jobs of the topcv. Update file scrape.rake :
1 2 3 4 5 6 7 8 9 10 11 12 13 14 15 16 17 18 19 20 21 22 23 24 25 26 27 28 29 30 31 32 33 34 35 36 37 38 39 40 41 42 43 44 45 46 | task scrape: :environment do require 'open-uri' # Link mình muốn vào URL_BASIC = 'https://www.topcv.vn/viec-lam-tot-nhat' # Cho Nokogiri open url và inspect nó doc_basic = Nokogiri::HTML(open(URL_BASIC)) # Đếm số trang cần crawl pages = doc_basic.search('ul.pagination > li').count - 2 # Bắt đầu crawl từng page với index là i (1..pages).each do |i| URL = "https://www.topcv.vn/viec-lam-tot-nhat?page=#{i}" doc = Nokogiri::HTML(open(URL)) postings = doc.search('div.result-job-hover') postings.each do |p| # Lấy thông tin từng field mình mong muốn theo tag html job_title = remove_n_string(p.search('div > div > h4.job-title > a > span.bold.transform-job-title').text) url = remove_n_string(p.search('div > div > h4.job-title > a')[0]['href']) company = remove_n_string(p.search('div > div > div.row-company').text) location = remove_n_string(p.search('div > div > div#row-result-info-job > div.address')[0].text) # Bỏ qua các job đã tồn tại trong database if Job.where(title: job_title, location: location, company: company).count <= 0 Job.create( title: job_title, location: location, company: company, url: url ) puts 'Added: ' + (job_title ? job_title : '') else puts 'Skipped: ' + (job_title ? job_title : '') end end end end # Loại bỏ n chứa trong string def remove_n_string string string.gsub("n","") end |
Nokogiri is Ruby’s html parsing library, this article will not cover the use of this gem. Please refer here .
Run Locally
Now let’s get started – let’s run code rake scrape
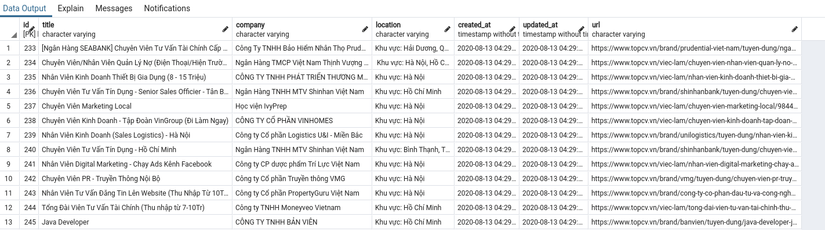
Once it’s done running, you can view your local data using PGAdmin, DBeaver or console …
Our only problem is that we don’t want to run it manually every day. To overcome that, deploy to Heroku and schedule task. If you have a server available, use Whenever, sidekiq to set up your schedule.
Deploy to Production
By default you already have a heroku account and push the code to github or gitlab.
Create a new app on the dashboard

Go to the Deploy tab> App connected to GitHub> Select your repo and branch> Manual deploy> Select Deploy
The deploy process can take a few minutes.
Configure Scheduler in Production
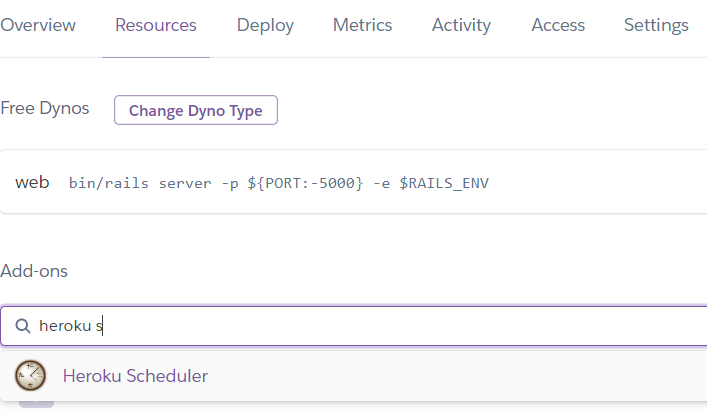
Now we need to configure rake task above into scheduled job. In the Heroku tab choose Tab Resources> Search for the Heroku Scheduler addon> Add that Addon to your project.
Note: Although this addon is free, heroku still requires you to set Billing.
Open Heroku Scheduler to proceed to config as follows:
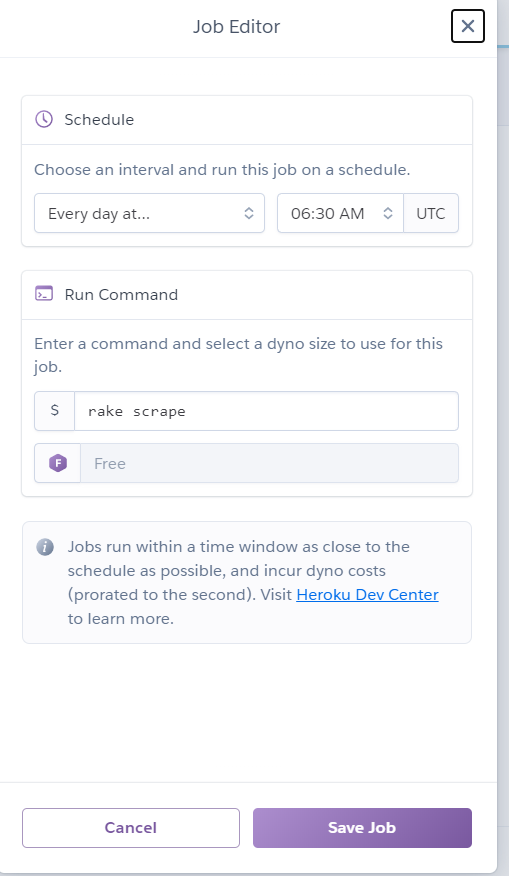
Note 2: Now config is UTC time. Here I set 6:30 AM UTC which means 1:30 PM +7
Important Note: Don’t intentionally continually crawl other people’s pages when it’s not needed if you don’t want their site to block your IP.
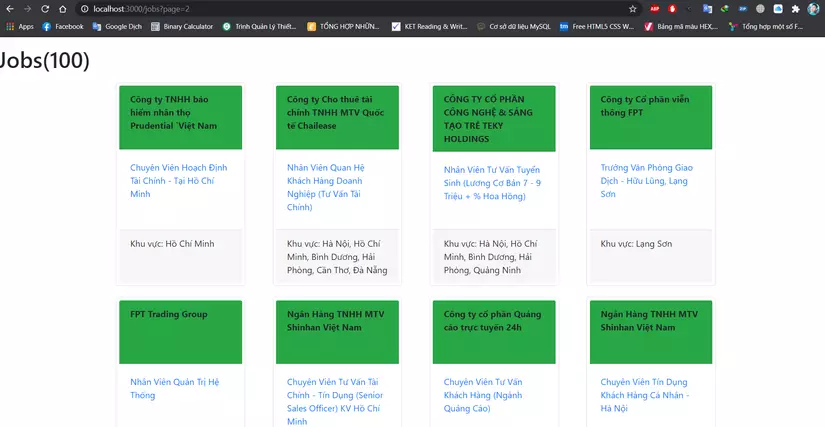
And here are my results