[JavaScript] Basic Webpack part 1
- Tram Ho
Opening
Hello friends. I am currently learning about webpack, this article and you can help each other to learn about it.
First I would like to talk about two concepts: task runner and module bundler
Task runner
- If you are writing applications that use Javascript and are developing a website, you will need to use at least a few tools to help you with some tasks such as minify css file, js file, compile scss file – > css file, when you edit sourcecode, your website reloads to update those changes and there are many functions you feel necessary to develop your website. However, there are many tools, maybe if I add a css line, I have to run command 1 to build scss -> css, command 2 to continue minify css file, command 3 to reload the website? When the tools appear, run the tool automatically => the introduction of the task runner , the program used to call other programs .
- I would like to introduce some tools like grunt and gulp . (I will try to write articles about 1 of these 2).
Module bundler
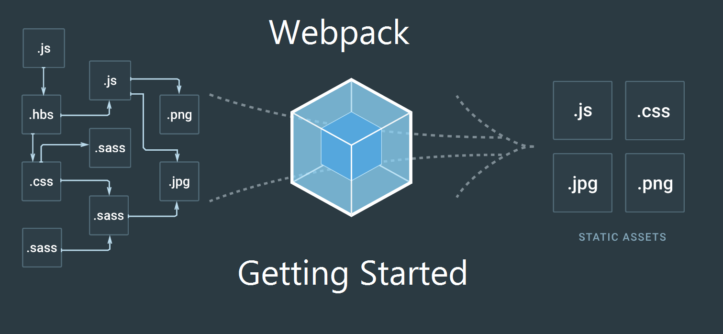
- Simple concept module : is a collection of code, can be a function or an object, the code is packaged together and kept Private. Therefore, only functions and variables in the module can be accessed and used, and when we need to use the module from outside, we will export it. Each module is usually declared in a separate file. The modules are completely separate from each other, each module will perform its own task without affecting other modules. When to use which modules, call them and combine the modules according to your processing logic.
- bundler : When splitting modules into separate files and folders, it can also be your library modules when imported to use in the project. As a result, each file will be referenced to your html file with <script /> tags, when users visit your site, the <script /> in each individual file will be downloaded one by one. 1 files, each file 1. to resolve this problem, we will pack bundler all those files into one large file to reduce the number of requests. But there is a problem with this bundler , what if I need to import code file B and code file K I need to import file B? This dependency problem has been thoroughly solved by Webpack, we do not need to declare to the webpack the order of files before or after.
Body post
The goal of webpack
- Everything is a module for webpack, files like (CSS, Images, HTML) can become modules. It is no different when we use js file. There are also import module statements like require ("myJSfile.js") or require ("myCSSfile.css"). With the module, we can use it anywhere and can be re-used when we want.
- Divide the Development and Production environments. There will be separate modules to run on the development environment, and separate modules to run only on production, or modules to run on both environments. Listening to know it and then, webpack will support you config to split the Module to run on the environment you want.
- load only module webpack Normally when working with javascript, we will use many modules to perform many different job functions, so if you put them all in the same file, surely that file is very large, This is certainly not good for your website, because when users request to load will take a long time and affect their experience, webpack understand this problem, so there are some features to split the bundler file into many other files. each with different uses. The split so help us need that load.
- … and many other interesting things.
Install project
All projects using the package manager (npm) must be initialized. To initialize we use the following statement:
1 | npm init |
After executing this command line, your project directory will create a file named package.json When you execute npm init there will be questions, you can press enter or answer to continue, but go to the yes section, remember to press the word 'yes' too.
Once completed, the package.json file will have content like this:
1 2 3 4 5 6 7 8 9 10 11 12 13 14 15 16 17 18 19 20 21 22 23 24 | { "name": "react-one", "version": "1.0.0", "description": "", "main": "index.js", "scripts": { "test": "echo "Error: no test specified" && exit 1" }, "keywords": [], "author": "", "license": "ISC" } |
I will use Reactjs in this project.
Download webpack and webpack-cli
Of course, the first thing to download is:
1 | Câu lệnh : |
1 | *npm install webpack webpack-cli --save-dev* |
And when in the package.json file:
1 2 3 4 5 6 7 | "devDependencies": { "webpack": "^4.41.0", "webpack-cli": "^3.3.9" } |
When this line appears, it has been successfully installed webpack and webpack-cli.
webpack-cli
I do not understand the function of this guy very well, read the documentation on the Internet, then tell him to provide tools to configure and customize webpack with the commands.
Download React
Continue to install react and react-dom to be able to deploy 1 reactjs app.
1 | npm install react react-dom --save |
And when in the package.json file:
1 2 3 4 5 6 7 | "dependencies": { "react": "^16.10.1", "react-dom": "^16.10.1" }, |
When this line appears, it has been successfully installed react and react-dom .
Download Babel
For React to work, we need to install Babel along with React. We need Babel to transcode ES6 and JSX to ES5. (Most browsers don't support ES6 + and JSX yet)
Continue to install babel-core , babel-loader , babel-preset-env , babel-preset-react ..
1 | npm install @babel/core babel-loader @babel/preset-env @babel/preset-react --save-dev |
And when in the package.json file:
1 2 3 4 5 6 7 8 9 10 11 12 13 14 15 | "devDependencies": { "@babel/core": "^7.6.2", "@babel/preset-env": "^7.6.2", "@babel/preset-react": "^7.0.0", "babel-loader": "^8.0.6", "webpack": "^4.41.0", "webpack-cli": "^3.3.9" } |
When this line appears, it has been successfully installed babel-core , babel-loader , babel-preset-env , babel-preset-react .
- Babel-core : It will convert code written in es6 style to es5 type. (es5 type is browser supported and readable).
- babel-loader : This component will work with webpack, giving settings for webpack.
- babel-present-env : Preset helps babel convert ES6, ES7 and ES8 code to ES5.
- babel-present-react : convert jsx to js.
Initialize project
In the current project directory, I will create another folder named src .
index.js
Create an index.js file inside the src directory. This index.js file will be the entry point of our application.
Go to edit file index.js and add console.log
1 | console.log("Đây là index.js"); |
index.html
Create an index.html file inside the src directory, the index.html file and the index.js file will be level with each other.
Go to edit file index.html and add:
1 2 3 4 5 6 7 8 9 10 11 12 13 14 15 16 17 18 19 20 21 22 23 24 25 26 27 28 29 30 31 32 33 34 35 36 37 38 39 40 41 42 43 44 45 46 47 48 49 50 51 | <!DOCTYPE html> <html lang="en"> <head> <meta charset="UTF-8"> <meta name="viewport" content="width=device-width, initial-scale=1.0"> <meta http-equiv="X-UA-Compatible" content="ie=edge"> <title>React Demo</title> </head> <body> <div id="root"> </div> </body> </html> webpack.config.jsTạo 1 file có tên webpack.config.js, file này sẽ nằm trong thư mục gốc project của bạn và nó không nằm trong thư mục src.Nghe tên là ta có thể đoán ra file webpack.config.js này sẽ làm việc cấu hình webpack rồi nhỉ .Bạn hãy edit nó và paste nội dung này vào và chúng ta sẽ giải thích nó.const path = require("path"); module.exports = { entry: "./src/index.js", //entry chính là input. output: { // như cái tên gọi của nó, đây chính là output. path: path.join(__dirname, "/dist"), filename: "index_bundle.js" } } |
- entry : As the webpack file will start working and load the file to perform the bundler , it will go from the file you choose from here. It will continue to import module from one guy to import from another guy. furthermore, there will be a systematic sequence of loading the js modules .
- output : is the output of the file after the webpack is done, this is the packaging of everything that will be in the index_bundle.js file inside this dist directory.
Module in webpack
We have the entry and the output , next we will have the Module , In the module is divided into 3 small sections
- preLoaders : Preprocessors are preloaded and run before starting with the module loaders , usually in preLoaders the Dev will check its syntax with JSHint or ESLint , this does not help the code run faster but makes the code easier to read. , should be configured to run primarily on the dev environment.
- loaders : This is a very important declaration of the webpack, it will perform complie with unsupported standards and browser formats to readable standards and browser formats, such as putting less. , scss about css has less-loader , scss-loader , or convert es6, type-script to es5 has babel-loader .. and lots of other loaders.
- postLoaders : This guy will handle last, I also do not understand what it will handle and how not to write.
1 2 3 4 5 6 7 8 9 10 11 12 13 14 15 16 17 18 19 20 21 | module: { /*Chỉ thị tiền xử lý trước khi chạy loaders*/ preLoaders: [ {} ], loaders: [ /*Danh sách các loader*/ {}, {} ] }, |
But from version v2.1-beta.23 loaders will be renamed rules and preLoaders / postLoaders will be identified with the enforce attribute if the loaders are preLoaders or postLoaders .
1 2 3 4 5 6 7 8 9 10 11 12 13 14 15 16 17 18 19 20 21 22 23 24 25 26 27 28 29 30 31 32 33 34 35 36 37 38 39 40 41 42 43 44 45 46 47 48 49 50 51 52 53 54 55 56 57 58 59 60 61 62 63 64 65 66 67 68 69 | module : { loaders : [ { test : /.jsx?/, // chỉ nạp những file có định dạng jsx. exclude: /node_module/, // bỏ qua các thư mục node_module. // Áp dụng khi dùng 1 loader loader: 'babel-loader', // loader .Ở đây mình chuyển đổi ES6 sang ES5 nên mình sử dụng babel-loader, nó sẽ giúp mình loader những module babel enforce: "pre", //preLoaders enforce: "post", //postLoaders // thiết lập dành cho loader options: { presets: ["es2015"] }, { test: /.css$/, // chỉ nạp những file có định dạng css // Áp dụng khi dùng nhiều loader use: [ "style-loader", { loader: { "css-loader" }, // tùy chọn và thiết lập options: { / ... / } } ] } ] } |
- test: value ,: when analyzing this module loaders , webpack will rely on test and test its value based on regex to determine which module loaders will load only with files of the required format, to prepare for the process. handling.
- exclude: value : When analyzing this module loaders webpack will rely on exclude and check if its value matches your file or directory, module loaders will unload these files and directories, (will often remove directories) node_module).
- loader : this is the most important component, it is the loader module that you install from the npm package.
- enforce: value : Declares if it's preLoaders or postLoaders , with values in order of pre or post .
Source : Viblo