In this article I will guide you to use AVPlayer to play an mp4 video. Note that when testing the link you should use the https link, and if you use the http link, you need to add the code to the plist file ( link )
Let’s get started
Video URL
The first and most important thing we need is a video URL. The URL can be an online URL or a URL representing the link to the video inside the bundle app.
1 2 | let url = URL(string: “https://clips.vorwaerts-gmbh.de/big_buck_bunny.mp4") |
Video Playback with AVPlayer
To create the video player, we will use the AVFoundation ‘s AVPlayer object.
AVPlayer – AVPlayer is a controller object used to play and manage media asset timing. You can use AVPlayer to play local or remote, such as QuickTime movie files and MP3 audio files, as well as media provided using HTTP Live Streaming.
1 2 3 4 | let asset = AVAsset(url: url) let playerItem = AVPlayerItem(asset: asset) let player = AVPlayer(playerItem: playerItem) |
Explain:
Line 1 – AVAsset object created with video URL. An AVAsset object will represent the media to be played.
Line 2 – AVPlayerItem object is created with AVAsset object. It models the time state and presentation of an asset played by the player.
Series 3 – AVPlayer object created with AVPlayerItem object.
Adding AVPlayer to AVPlayerLayer
We now have our AVPlayer object, followed by displaying it on the screen, ie adding it to the viewControler or a certain view.
AVPlayerLayer – A CALayer that AVPlayer displays for its output.
1 2 3 4 | let playerLayer = AVPlayerLayer(player: player) playerLayer.frame = self.videoView.bounds //bounds of the view in which AVPlayer should be displayed playerLayer.videoGravity = .resizeAspect |
Explain:
Line 1 – an AVPlayerLayer object created with the previously created AVPlayer object.
Line 2 – frame of playerLayer is set according to the view that we want the video to be displayed.
Series 3 – set videoGravity of playerLayer on demand (optional).
videoGravity – determines how the video will be displayed in the bound of the playerLayer . Its value could be:
resizeAspect – Player will maintain Video aspect ratio and fit video in bound layer.
resizeAspectFill – Player should maintain the video aspect ratio and fill the bound of the layer.
resize – The video must be adjusted to fit the bound of the layer.
Because PlayerLayer is a CALayer, it will behave exactly like a normal layer. We need to add playerLayer to a view class so that it shows up on the screen.
So here we will use:
1 2 | self.videoView.layer.addSublayer(player) |
The videoView is just a UIView in which we will add our player.
Play video in AVPlayer
Up to now, we have successfully added the player to our view. But simply adding a player to the view and of course it won’t help us play the video.
AVPlayer has 2 very simple methods to play and pause videos.
play () – Start playing the current item.
pause () – Pause the current item.
For now, we just need to play the video in the player.
1 2 | player.play() |
Summary of code for you to easily follow:
1 2 3 4 5 6 7 8 9 10 11 12 13 14 15 16 17 18 19 | //1. Create a URL if let url = URL(string: "https://clips.vorwaerts-gmbh.de/big_buck_bunny.mp4") { //2. Create AVPlayer object let asset = AVAsset(url: url) let playerItem = AVPlayerItem(asset: asset) let player = AVPlayer(playerItem: playerItem) //3. Create AVPlayerLayer object let playerLayer = AVPlayerLayer(player: player) playerLayer.frame = self.videoView.bounds //bounds of the view in which AVPlayer should be displayed playerLayer.videoGravity = .resizeAspect //4. Add playerLayer to view's layer self.videoView.layer.addSublayer(playerLayer) //5. Play Video player.play() } |
Note: One more thing, don’t forget to import AVFoundation in the file you use AVPlayer. All the classes that we have used are from the AVFoundation framework.
Playback Controls
Now that we’ve got our players working, one thing we all have to pay attention to – there’s currently no option to pause the video once the video starts playing.
Nor can we mute, nor fast forward or rewind. In short, AVPlayer does not come with default playback controls.
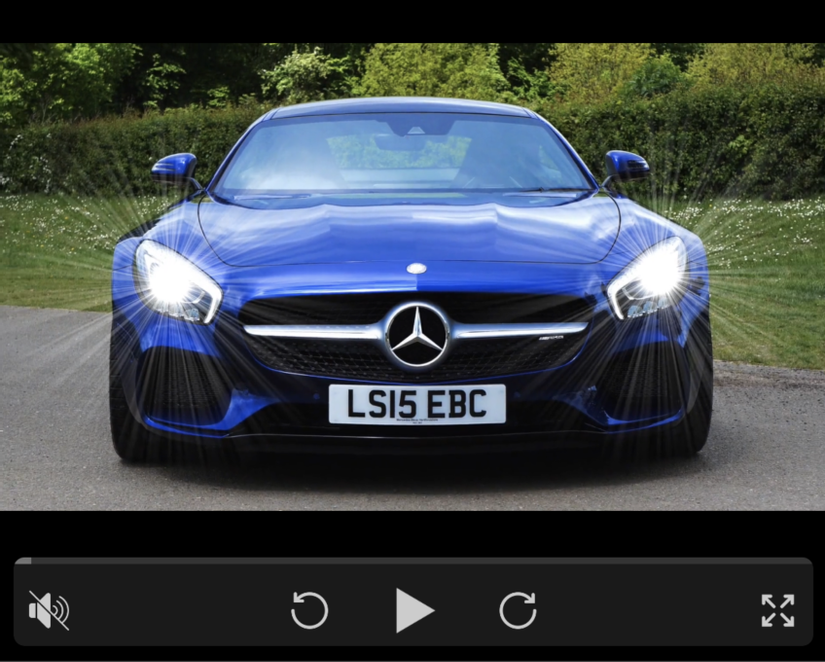
If they don’t provide it, we will create our own controls. And that, also according to our custom UI.
We will create the following controls to manage video play.
- Play / Pause
- Mute / Un-mute video
- Forward / Rewind
- Track video progress
- Playing multiple videos in a queue
- Tracking video play status
- Replay video
Of course, you need to create your own UI to support play controls. Refer to the illustration below.
Play / Pause
This is the simplest way to do it. As we said, the play () and pause () methods of AVPlayer can be used for this purpose.
1 2 3 4 5 6 7 8 | public func playVideo() { player?.play() } public func pauseVideo() { player?.pause() } |
Mute / Un-mute video
The isMuted property of AVPlayer can be used to do this.
isMuting – Boolean value indicates if the player’s audio output is muted or not.
Set its value to true / false to mute / unmute.
1 2 | player?.isMuted = true |
Fast-Forward / Rewind videos
Rewinding and fast-forwarding a video playback is simply – changing the current playback time, reducing or adding to it.
AVPlayer offers many search methods to manage time in video playback. You can find it here .
We will use the following function to do this:
seek (to 🙂 – Sets the current play time to the specified time.
1 2 3 4 5 6 7 8 9 10 11 12 13 14 15 16 17 18 19 20 | func rewindVideo(by seconds: Float64) { if let currentTime = player?.currentTime() { var newTime = CMTimeGetSeconds(currentTime) - seconds if newTime <= 0 { newTime = 0 } player?.seek(to: CMTime(value: CMTimeValue(newTime * 1000), timescale: 1000)) } } func forwardVideo(by seconds: Float64) { if let currentTime = player?.currentTime(), let duration = player?.currentItem?.duration { var newTime = CMTimeGetSeconds(currentTime) + seconds if newTime >= CMTimeGetSeconds(duration) { newTime = CMTimeGetSeconds(duration) } player?.seek(to: CMTime(value: CMTimeValue(newTime * 1000), timescale: 1000)) } } |
Explain:
currentTime () – Returns the current time of the current player item.
Lines 1 to 9 – rewind playback in a given second with a 0-second limit.
Lines 11 through 19 Fast-forward player item with total item duration limit.
Tracking video progress
We can track video playback with AVPlayer’s periodic time observer .
addPeriodicTimeObserver (forInterval: queue: using  – Request to periodically call a certain block while playing video to report time changes.
1 2 3 4 5 6 7 8 9 10 11 12 13 14 15 16 | player.addPeriodicTimeObserver(forInterval: CMTime(seconds: 1, preferredTimescale: 2), queue: DispatchQueue.main) {[weak self] (progressTime) in if let duration = player.currentItem?.duration { let durationSeconds = CMTimeGetSeconds(duration) let seconds = CMTimeGetSeconds(progressTime) let progress = Float(seconds/durationSeconds) DispatchQueue.main.async { self?.progressBar.progress = progress if progress >= 1.0 { self?.progressBar.progress = 0.0 } } } } |
In the above code, we have added an observer to the player. This observer will be called every 0.5 seconds (CMTime (seconds: 1, preferTimescale: 2)).
CMTime – A struct represents a time value such as a timestamp or duration. You can refer to this link to understand how it actually works.
Lines 2 to 6 – Percentage progress is calculated by the total duration and current duration.
Lines 9 to 11 – UIProgressView are used to display playback progress on the UI.
Playing videos in a Queue – Playlist
There is a limitation with AVPlayer. It can only be used to play a single video, ie no init function receives many AVPlayerItems .
AVQueuePlayer is the solution we will use to play all the videos in our playlist.
AVQueuePlayer – A player used to play a number of items in sequence.
AVQueuePlayer is also an AVPlayer with additional features. It can accept an AVPlayerItem array.
init (items – Create a queue player with the specified player items.
1 2 3 4 5 6 7 8 9 10 11 12 | let urls = [URL]() //Add items to urls array var playerItems = [AVPlayerItem]() urls.forEach { (url) in let asset = AVAsset(url: url) let playerItem = AVPlayerItem(asset: asset) playerItems.append(playerItem) } let player = AVQueuePlayer(items: playerItems) |
Follow the same steps as AVPlayer, ie add it to playerLayer and then call play () on it.
Tracking video play status
During completion, playback can be in several states, that is, it can be played or paused at a certain time or may still be buffered for a specific period of time. We must monitor all of these states to update the UI appropriately. For example, we can use a loading view to show the status to the user that we need to load more buffers.
AVPlayer’s timeControlStatus can be used to monitor video play status.
timeControlStatus – The state that indicates whether the playback is in progress, paused indefinitely or suspended while waiting for the appropriate network condition.
It accepts a value of type AVPlayer.TimeControlStatus ie
- paused – the player is paused.
- waitingToPlayAtSpecifiedRate – Player is in standby state due to empty buffer or insufficient buffer.
- playing – Player is currently playing a media item.
timeControlStatus is observable using Key-value observing.
Since it is an observable property, we can register an observer and keep track of any changes made in its value.
1 2 | player.addObserver(self, forKeyPath: “timeControlStatus”, options: [.old, .new], context: nil) |
In the above code, we are tracking the old value as well as the new value of timeControlStatus .
We can observe the changes made in NSKeyValueObserving , observeValue (forKeyPath: of: change: context 🙂 .
Any class that inherits from NSObject has this method available,
for example: anything of type UIView , etc. You just need to override it in your class.
NSObject provides implementation of the NSKeyValueObserving protocol, which provides automatic observe for all objects.
1 2 3 4 5 6 7 8 9 10 11 12 13 14 15 16 | override public func observeValue(forKeyPath keyPath: String?, of object: Any?, change: [NSKeyValueChangeKey : Any]?, context: UnsafeMutableRawPointer?) { if keyPath == "timeControlStatus", let change = change, let newValue = change[NSKeyValueChangeKey.newKey] as? Int, let oldValue = change[NSKeyValueChangeKey.oldKey] as? Int { let oldStatus = AVPlayer.TimeControlStatus(rawValue: oldValue) let newStatus = AVPlayer.TimeControlStatus(rawValue: newValue) if newStatus != oldStatus { //5 DispatchQueue.main.async {[weak self] in if newStatus == .playing || newStatus == .paused { self?.loaderView.isHidden = true } else { self?.loaderView.isHidden = false } } } } } |
In the above code, we are using the newValue of timeControlStatus to show / hide loader (for example, UIActivityIndicatorView). Loading view is hidden in case the video is playing / pause and displayed when the video is still in the buffering state.
Line 5 – we only change for these changes when newValue is different from oldValue.
Replay video
To replay the video after the play has finished, we can observe the notification AVPlayerItemDidPlayToEndTimeNotification .
AVPlayerItemDidPlayToEndTimeNotification – A notification is issued when Item play reaches the end time.
1 2 | NotificationCenter.default.addObserver(self, selector: #selector(playerEndedPlaying), name: Notification.Name("AVPlayerItemDidPlayToEndTimeNotification"), object: nil) |
As seen from the above code, the playerEndedPlaying method will be called whenever the play process has finished.
1 2 3 4 5 6 7 | @objc func playerEndedPlaying(_ notification: Notification) { DispatchQueue.main.async {[weak self] in player?.seek(to: kCMTimeZero) player?.play() //This is optional } } |
In the above code, we are looking for playback time to kCMTimeZero, ie start. When the video is found to the starting position, we call play () on the player. Play again is upon our request.
We can avoid it just in case we want it to be paused after playing once.
AVPlayerViewController
Besides AVPlayer, apple has also provided support for full-screen controllers to play videos.
AVPlayerViewController – An object that displays video content from a player object along with system-supplied playback controls . It is provided by the AVKit framework.
1 2 | class AVPlayerViewController : UIViewController |
1 2 3 4 5 6 7 8 | let controller = AVPlayerViewController() controller.player = player //AVPlayer object self.present(controller, animated: true) {[weak self] in DispatchQueue.main.async { player?.play() } } |
Explain:
Line 1 – create an instance of AVPlayerViewController.
Line 2 – assign an AVPlayer instance to the controller. The AVPlayer example can be created in the same way as we discussed earlier.
Lines 3 to 7 – presented controller and call play () on the player after the controller has been presented.
Full Screen Mode
We can use AVPlayerViewController to display videos in full screen mode when clicking the expand button.
Up to now, we mainly use 3 classes to display video playback on screen – AVPlayer, AVPlayerLayer and AVPlayerViewController. AVPlayerLayer and AVPlayerViewController, both use AVPlayer instance.
To display the video in full screen mode, we just need to open AVPlayerViewController and synchronize the play progress with AVPlayerLayer. Now, there may be 2 alternatives to get there:
- Create different AVPlayer objects for both AVPlayerLayer and AVPlayerViewController and use seek (to 🙂 to synchronize the process between them.
- Create a unique AVPlayer instance and use it for both when and when needed. The play progress is handled automatically in this case because we use the same player version.
Both methods will produce the expected results. We will follow up 2 as it is a bit more effective.
1 2 3 4 5 6 7 8 9 10 11 12 13 14 15 16 17 18 | func expandVideo() { player?.pause() let controller = AVPlayerViewController() controller.player = player NotificationCenter.default.addObserver(self, selector: #selector(avPlayerClosed), name: Notification.Name("avPlayerDidDismiss"), object: nil) self.parentViewController()?.present(controller, animated: true) { in DispatchQueue.main.async { player?.play() } } } @objc func avPlayerClosed(_ notification: Notification) { DispatchQueue.main.asyncAfter(deadline: DispatchTime.now() + 0.5) { in player?.play() } } |
Explain:
Line 2 – player was paused before presenting AVPlayerViewController .
Lines 3 to 10 – presented controller and call play () on the player after the controller has been presented.
Line 5 – register an observer for custom notification avPlayerDidDismiss . The avPlayerCloses method will be called after the notification is triggered. Apple does not provide any callback / delegate methods when AVPlayerViewController is dismissed. We really need this to play videos when the controller is dismissed. This is why we use custom notifications.
Lines 13 to 15 – avPlayerClosed method. It will replay the video with the current progress.
To detect the removal of AVPlayerViewController , we will use the viewWillDisappear ( .
1 2 3 4 5 6 7 8 | extension AVPlayerViewController { open override func viewWillDisappear(_ animated: Bool) { super.viewWillDisappear(animated) self.player?.pause() NotificationCenter.default.post(name: Notification.Name("avPlayerDidDismiss"), object: nil, userInfo: nil) } } |
In the above code,
Line 4 – pause video before controller is dismissed
Line 5 – a custom notification – avPlayerDidDismiss is posted on the dismissal controller. We have added observer to it before.
Do not forget to delete the observers (kvo and Notification Center) after you are done.
1 2 3 4 5 | deinit { NotificationCenter.default.removeObserver(self) player?.removeObserver(self, forKeyPath: “timeControlStatus”) } |
One last thing …
All iOS apps have pre-configured default audio sessions.
- In iOS, setting the Ring / Silent switch to silent mode silences every sound being played by the application.
- When the application plays the sound, all other background sounds will be muted.
But, that’s not the common audio behavior that any media playback needs to have, that is, we have to hear the sound even when our device is in silent mode. Also, if any other application is playing any sound, it must be stopped during this time.
AVAudioSession – An intermediary object that communicates with the system about how you plan to use sound in your application. It will configure our application sound.
1 2 3 4 5 6 | do { try AVAudioSession.sharedInstance().setCategory(AVAudioSessionCategoryPlayback, mode: AVAudioSessionModeDefault, options: .mixWithOthers) //For playing volume when phone is on silent } catch { print(error.localizedDescription) } |
Sample Project
You can download sample project from here .
I also created a cocoapod, so you can integrate the player with custom controls into your project. You can find it here .
The original article link you can read here .