Stringee Call API Overview
Stringee Call API is the easiest way to build high-quality voice applications in the Cloud. With Stringee’s Call API, you can:
Build apps that scale with web technologies of your choice. Buy a mobile phone number. Extend your infrastructure with SIP Interfaces. Control the flow of calls in JSON with the Stringee Call Control Object. (SCCO): Make an app-to-app call (peer-to-peer call) OR an app-to-phone call (outgoing call). Receive and manage phone calls (incoming calls): transfer calls to the app, reject calls, record, etc. Record and store calls. Create a conference call.
Prepare
Before you can use the Stringee Call API to make and receive video calls, you need:
- Create a free Stringee account <a href = https://asia-1.console.stringee.com/account/register target = “_blank”>here</a>.
- Create project on <a href = https://asia-1.console.stringee.com target = “_blank”>Stringee Dashboard</a>
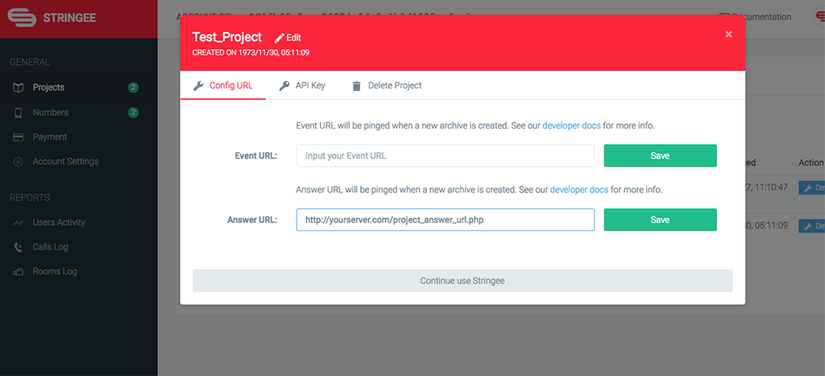
- Configure answer_url
- To better understand answer_url , you can see <a href = https://developer.stringee.com/docs/call-api-overview target = “_blank”>here</a> .You can refer to how to create answer_url <a href = https://github.com/stringeecom/server-samples/tree/master/answer_url target = “_blank”>here</a>
- To be able to make calls you need to configure the answer_url in your project as follows:
If you don’t already have an answer_url available, you can use the following Project’s answer_url to speed up the process:
1 2 | https://developer.stringee.com/scco_helper/simple_project_answer_url?record=false&appToPhone=auto&recordFormat=mp3 |
(Source code: https://github.com/stringeecom/server-samples/blob/master/answer_url/php/project_answer_url.php ) When building the app, you should have your own answer_url.
Stringee SDK integration
Prepare
- Create an Android project with minSdkVersion >= 16.
- Create class MainActivity as main screen to make connection to Stringee Server.
- Create class CallActivity to display the screen of the call.
Install Stringee SDK
The Stringee Android SDK is distributed as an AAR and can be added to your project by referencing the AAR remotely with Maven.
- Open the build.gradle file and add the following lines:1234567891011121314buildscript {repositories {...mavenCentral()}}...allprojects {repositories {...mavenCentral()}}
- Open the app/build.gradle file and add the following lines:12345678910111213android {...compileOptions {sourceCompatibility JavaVersion.VERSION_1_8targetCompatibility JavaVersion.VERSION_1_8}}dependencies {...implementation 'com.stringee.sdk.android:stringee-android-sdk:2.0'implementation 'com.android.volley:volley:1.2.1'}
Edit Permissions and proguard
Permissions
Stringee Android SDK requires some permissions, open the AndroidManifest.xml file and add the following lines:
1 2 3 4 5 6 7 8 9 10 11 12 13 14 | /// permission cho việc kết nối internet <uses-permission android:name="android.permission.INTERNET" /> <uses-permission android:name="android.permission.ACCESS_NETWORK_STATE" /> <uses-permission android:name="android.permission.ACCESS_WIFI_STATE" /> // permission cho cuộc gọi <uses-permission android:name="android.permission.RECORD_AUDIO" /> <uses-permission android:name="android.permission.CAMERA" /> // Nếu sử dụng class StringeeAudioManager của Stringee quản lý phát âm thanh thì cần thêm các permission này <uses-permission android:name="android.permission.MODIFY_AUDIO_SETTINGS" /> <uses-permission android:name="android.permission.BLUETOOTH" /> <uses-permission android:name="android.permission.BLUETOOTH_CONNECT" /> // permission này mới thêm trên Android SDK version 31 |
Note:
- You are required to grant sufficient permissions before making a call, before making a call you are required to request the following permissions: RECORD_AUDIO, CAMERA
- With using StringeeAudioManager class you need to grant BLUETOOTH_CONNECT permission for Android SDK version 31 and above
ProGuard
If your project uses ProGuard, you need to add the following settings to the proguard-rules.pro file to ensure that the Stringee SDK release can run correctly:
1 2 3 4 5 | -dontwarn org.webrtc.** -keep class org.webrtc.** { *; } -dontwarn org.apache.http.** -keep class com.stringee.** { *; } |
Connect Stringee server
To connect to Stringee Server, you need access_token . During application building, the access_token should be generated from your server, you can learn more about authentication here: <a href = https://developer.stringee.com/docs/client-authentication target = “_blank”>Client authentication</a>), and sample code to generate access_token : https://github.com/stringeecom/server-samples/tree/master/access_token .
To save time, we will hard code the access_token in the app:
- In the MainActivity class, initialize a variable to hold the access_token .123public class MainActivity extends AppCompatActivity {private String token = "access_token";
- Get access_token and hard code data: To do that, we have provided a tool to generate access_token , you access <a href = https://developer.stringee.com/tool target = “_blank”> Dashboard -> Tools -> Generate Access token</a> and generate your access_token .
Next, we will connect to the Stringee Server . You need to be able to connect to the Stringee Server first before you can make calls.
- Add StringeeClient object to MainActivity class.12private StringeeClient client;
- Instantiate StringeeClient object and listen for events from StringeeConnectionListener to communicate with Stringee Server :1234567891011121314151617181920212223242526272829client = new StringeeClient(this);// Lắng nghe sự kiện của StringeeClientclient.setConnectionListener(new StringeeConnectionListener() {@Overridepublic void onConnectionConnected(final StringeeClient stringeeClient, boolean isReconnecting) {}@Overridepublic void onConnectionDisconnected(StringeeClient stringeeClient, boolean isReconnecting) {}@Overridepublic void onIncomingCall(final StringeeCall stringeeCall) {}@Overridepublic void onIncomingCall2(StringeeCall2 stringeeCall2) {}@Overridepublic void onConnectionError(StringeeClient stringeeClient, final StringeeError stringeeError) {}@Overridepublic void onRequestNewToken(StringeeClient stringeeClient) {}@Overridepublic void onCustomMessage(String s, JSONObject jsonObject) {}@Overridepublic void onTopicMessage(String s, JSONObject jsonObject) {}});
- When the client successfully connects to the Stringee Server , the onConnectionConnected(StringeeClient stringeeClient, boolean isReconnecting) function is called.
- When the client loses connection to the Stringee Server , the onConnectionDisconnected(StringeeClient stringeeClient, boolean isReconnecting) function is called.
- When the client fails to connect to the Stringee Server , the onConnectionError(StringeeClient stringeeClient, StringeeError stringeeError) function is called.
- When the access_token expires, the onRequestNewToken(StringeeClient stringeeClient) function is called. You will need to regenerate a new access_token and reconnect.
- When the client receives an incoming call, here we use the StringeeCall2 object to make the video call, so the onIncomingCall2(StringeeCall2 stringeeCall2) function is called.
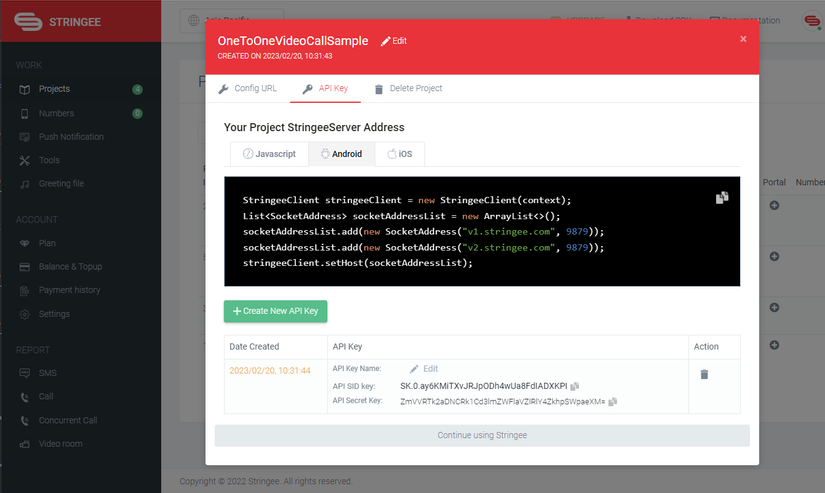
- If you use On-Premise Server , you need to add the following lines to be able to connect:12345678import com.stringee.common.SocketAddress;import java.util.ArrayList;import java.util.List;...List<SocketAddress> socketAddressList = new ArrayList<>();socketAddressList.add(new SocketAddress("ip", port));client.setHost(socketAddressList);
- ip: ip of your server in String.
- port: your server’s port is int.
Note: You need to setHost before connecting.
- Connect to Stringee Server using the access_token generated above:12client.connect(token);
Handle call logic
After connecting to Stringee Server , you need to do the following steps:
- Add the stringeeCall2 object to the CallActivity class:1234private StringeeCall2 stringeeCall2;// Class StringeeAudioManager dùng để quản lý âm thanhprivate StringeeAudioManager audioManager;
- Listen for the event of the call:12345678910111213141516171819202122232425262728293031323334353637383940414243444546474849505152// Lắng nghe sự kiện của cuộc gọistringeeCall2.setCallListener(new StringeeCall2.StringeeCallListener() {@Overridepublic void onSignalingStateChange(StringeeCall2 stringeeCall, StringeeCall2.SignalingState signalingState, String reason, int sipCode, String sipReason) {}@Overridepublic void onError(StringeeCall2 stringeeCall2, int code, String description) {}@Overridepublic void onHandledOnAnotherDevice(StringeeCall2 stringeeCall2, StringeeCall2.SignalingState signalingState, String description) {}@Overridepublic void onMediaStateChange(StringeeCall2 stringeeCall2, StringeeCall2.MediaState mediaState) {}@Overridepublic void onLocalStream(StringeeCall2 stringeeCall2) {}@Overridepublic void onRemoteStream(StringeeCall2 stringeeCall2) {}@Overridepublic void onVideoTrackAdded(StringeeVideoTrack stringeeVideoTrack) {}@Overridepublic void onVideoTrackRemoved(StringeeVideoTrack stringeeVideoTrack) {}@Overridepublic void onCallInfo(StringeeCall2 stringeeCall2, JSONObject callInfo) {}@Overridepublic void onTrackMediaStateChange(String from, MediaType mediaType, boolean enable) {}});// Khởi tạo audioManager để quản lý việc phát âm thanhaudioManager = StringeeAudioManager.create(this);audioManager.start(new StringeeAudioManager.AudioManagerEvents() {@Overridepublic void onAudioDeviceChanged(StringeeAudioManager.AudioDevice selectedAudioDevice, Set<StringeeAudioManager.AudioDevice> availableAudioDevices) {// Mọi thay đổi thiết bị âm thanh sẽ nhận được ở đây}});audioManager.setSpeakerphoneOn(true); // false: loa trong, true: loa ngoài
- When the call generation/response fails, the onError(StringeeCall stringeeCall, int code, String description) function is called.
- When creating/answering a successful call, the call will go through many states such as: CALLING , RINGING , ANSWERED , ENDED , BUSY . Each time the state of the call changes, the function onSignalingStateChange(StringeeCall call, StringeeCall.SignalingState signalingState, String reason, int sipCode, String sipReason) is called.
- When the call’s media stream connects or loses connection, the onMediaStateChange(StringeeCall stringeeCall, StringeeCall.MediaState mediaState) function is called.
- When the call is handled on another device, the onHandledOnAnotherDevice(StringeeCall stringeeCall, StringeeCall.SignalingState signalingState, String description) function is called.
- A call is actually successful when the media ‘s state is MediaState.CONNECTED .
Make an outgoing call
To make an outgoing call you need to do the following steps:
- Initialize stringeeCall2 :123stringeeCall2 = new StringeeCall2(MainActivity.this, client, from, to);stringeeCall2.setVideoCall(true); // false: Audio Call, true: Video Call
- client: The StringeeClient object has been initialized and used to connect to the previous Stringee Server . Make sure you have successfully connected to the Stringee Server and are still keeping the connection.
- from: id of the caller.
- to: is of the receiver.
- Default is voice call so if you want to initiate a video call you need to call** setVideoCall(true)** before calling makeCall() and after initializing StringeeCall2 .
- Make a call:123// Khởi tạo cuộc gọistringeeCall2.makeCall();
Answer the call
To be able to answer an incoming call, follow these steps:
- Handle receiving calls in onIncomingCall2(StringeeCall2 stringeeCall2) function of StringeeConnectionListener .12345678@Overridepublic void onIncomingCall2(StringeeCall2 stringeeCall2) {callsMap.put(stringeeCall2.getCallId(), stringeeCall2);Intent intent = new Intent(MainActivity.this, CallActivity.class);intent.putExtra("call_id", stringeeCall2.getCallId());startActivity(intent);}
Store stringeeCall2 into a HashMap() object with callId key. Then send the callId of the call to the CallActivity class. - Assign StringeeCall2 from callsMap :123String callId = getIntent().getStringExtra("call_id");stringeeCall2 = callsMap.get(callId);
- Send RINGING signal:Like initiating a call, we need to listen to the events of the call1234567// Gửi tín hiệu RINGINGstringeeCall2.ringing(new StatusListener() {@Overridepublic void onSuccess() {}});
- Answer and initiate a call:12stringeeCall2.answer();
Show videos
Stringee Android SDK exposes the video of the caller and receiver as a View object. You can add them as children of a ViewGroup object in the application. In the sample, we use the FrameLayout object as the container for the video of the caller and the receiver:
- Open the file app/res/layout/activity_call.xml and add the following lines:12345678910111213<FrameLayoutandroid:id="@+id/v_remote"android:layout_width="match_parent"android:layout_height="match_parent" /><FrameLayoutandroid:id="@+id/v_local"android:layout_width="80dp"android:layout_height="120dp"android:layout_alignParentRight="true"android:layout_margin="10dp" />
- Declare vLocal and vRemote in the CallActivity class.123456private FrameLayout vLocal;private FrameLayout vRemote;...vLocal = findViewById(R.id.v_local);vRemote = findViewById(R.id.v_remote);
- Show video:After receiving the onLocalStream(StringeeCall2 stringeeCall2) event, we can add our video to vLocal :12345678910111213@Overridepublic void onLocalStream(StringeeCall2 stringeeCall2) {runOnUiThread(new Runnable() {@Overridepublic void run() {if (stringeeCall2.isVideoCall()) {vLocal.addView(stringeeCall2.getLocalView());stringeeCall2.renderLocalView(true);}}});}
Similar to onLocalStream , we can add the other party’s video to vRemote after receiving the event onRemoteStream(StringeeCall2 stringeeCall2) :12345678910111213@Overridepublic void onRemoteStream(StringeeCall2 stringeeCall2) {runOnUiThread(new Runnable() {@Overridepublic void run() {if (stringeeCall2.isVideoCall()) {vRemote.addView(stringeeCall2.getRemoteView());stringeeCall2.renderRemoteView(false);}}});}
Adding the view of the video needs to be done in the background UI thread in order to communicate with UI components.
Some features in the call
Stop the call
Stop the call and release its resources:
1 2 3 4 | stringeeCall2.hangup(); // Nếu sử dụng StringeeAudioManager, cần gọi hàm này để đưa trạng thái của audio về như lúc trước khi vào cuộc gọi audioManager.stop(); |
Rejected calls
Rejected calls:
1 2 3 4 | stringeeCall2.reject(); // Nếu sử dụng StringeeAudioManager, cần gọi hàm này để đưa trạng thái của audio về như lúc trước khi vào cuộc gọi audioManager.stop(); |
Mute
Mute your voice:
1 2 3 | bool mute = true // true: tắt, false: mở stringeeCall2.mute(true); |
Switch speaker
Switch between internal and external speakers using StringeeAudioManager :
1 2 3 | bool isSpeaker = true // true: loa ngoài, false: loa trong audioManager.setSpeakerphoneOn(isSpeaker); |
Change camera
Change the front and back of your camera:
1 2 3 4 5 6 | stringeeCall2.switchCamera(new StatusListener() { @Override public void onSuccess() { } }); |
Video On/Off
Video On/Off:
1 2 3 | bool enableVideo = true // true: mở, false: tắt stringeeCall2.enableVideo(enableVideo); |
Run the app
Now your app can run on the device. You can refer sample full version <a href=https://github.com/stringeecom/android-sdk-samples/tree/master/OneToOneCallSample target=”_blank”>here</a>
Conclude
Above is a guide to build a 1-1 video calling application on the Android platform with Stringee Call API. Hopefully you can set up a video calling application by yourself following Stringee’s instructions. Also you can learn how to build video calling app on iOS platform <a href = https://stringee.com/en/blog/post/tutorial-building-an-iOS-video-call-%20app -with-Stringee-Call-API target = “_blank”>here</a>).