1. Introduction
To run a Laravel project we need a web server. Like on Windows, when developing a Web application that will use XAMPP, on Ubuntu there will be a similar Web Server that is LAMP. Next, you need to install Composer to install Laravel. In this article, I will guide you to install LAMP, Composer on Ubuntu 18.04, other versions are similar, but I recommend everyone to use the latest version of Ubuntu to have the best user experience.
2. LAMP
LAMP consists of 4 main components Linux, Apache, MySQL, and PHP or Python or Perl.
- Linux : Linux is the name of an open operating system and also the kernel name of the operating system. First launched in 1994 by Linus Torvalds. Ubuntu is an open source operating system based on GNU Debian / Linux. Currently, Ubuntu is very popular and is used by many IT companies because it is a free operating system (yaoming). Because I installed LAMP on Ubuntu 18.04, the operating system itself is a part of LAMP so I don’t need to install it.
- Apache : Apache is free and open source web server software. It is accounting for about 46% of the worldwide market share of websites. The official Apache name is Apache HTTP Server, which is operated and developed by the Apache Software Foundation. Here’s how to install Apache on Ubuntu:
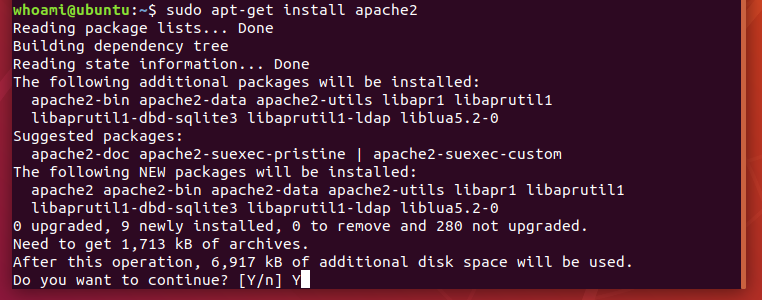
- Run the following command:
$ sudo apt-get install apache2

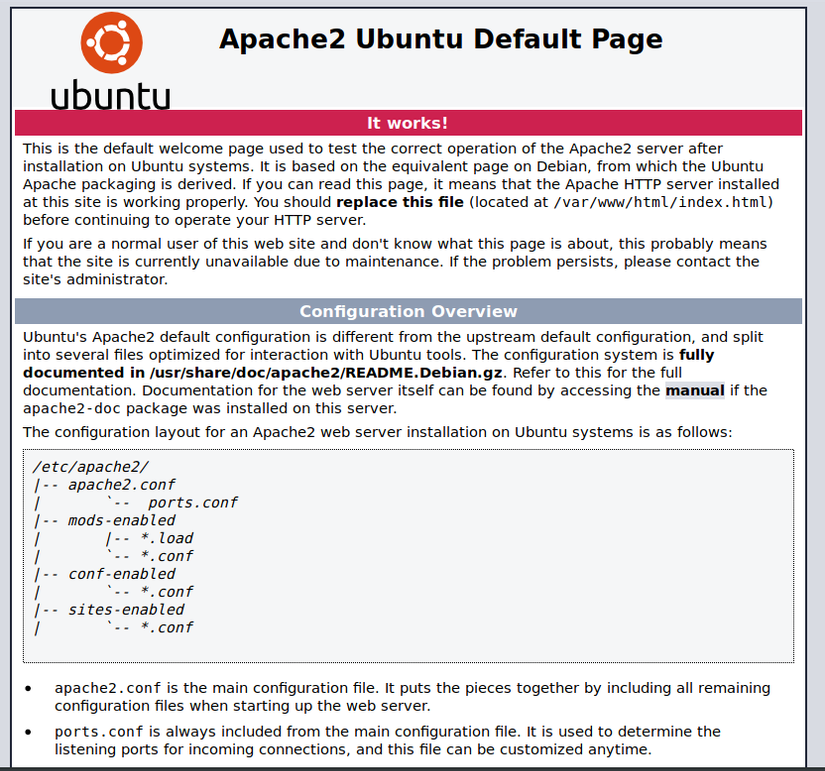
- Then press Y to continue the installation. Next, open the browser and type 127.0.0.1 to check if Apache is working.
- When the browser appears as above, successfully installed Apache. Next will install MySQL.
- Run the following command:
- MySQL : MySQL is an open source database management system, widely used in the world.
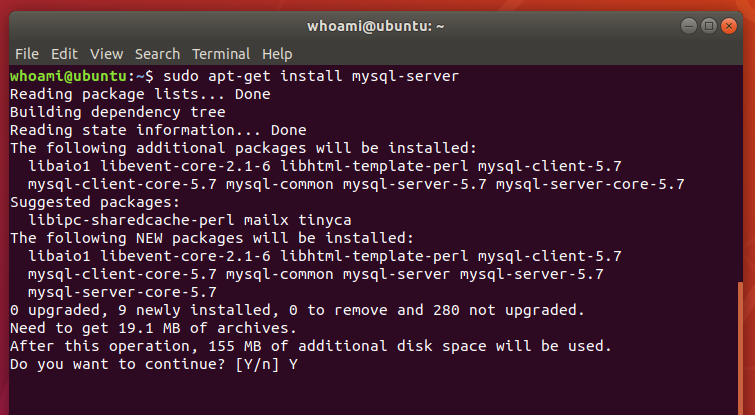
- Following is the command to install MySQL:
$ sudo apt-get install mysql-server
- Click Y to continue the installation.
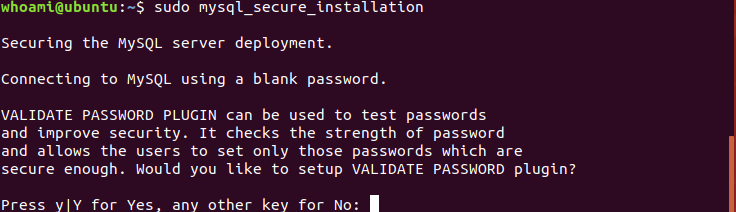
- After the installation has finished, continue running the following command:
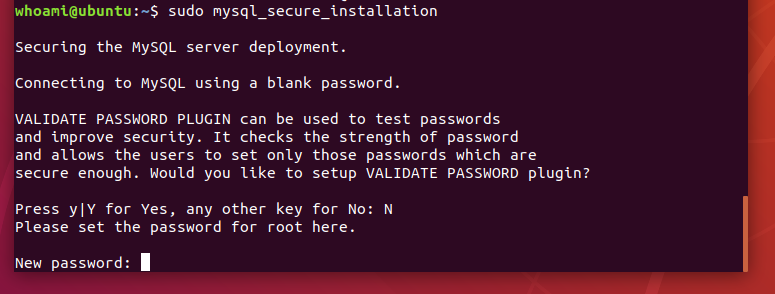
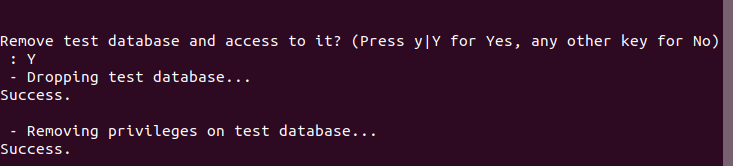
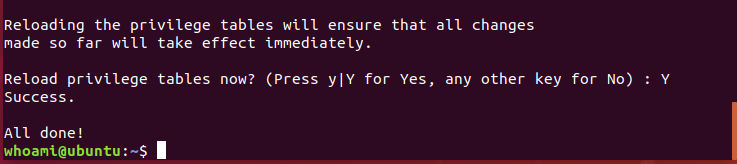
$ sudo mysql_secure_installation.
- There are two options here, if you choose Y, you will use VALIDATE PASSWORD PLUGIN which means that you must use strong password for the database, such as the password length must be over 8 characters, uppercase, lowercase, special characters, etc … If N is selected, it will not use VALIDATE PASSWORD PLUGIN. And here installed on personal computers should not need to use VALIDATE PASSWORD PLUGIN. So here I will choose N for ease of installation.
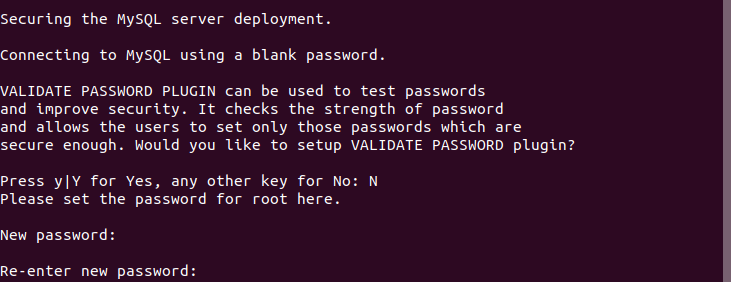
- After selecting N, will ask you to set a password for MySQL. Here to easily remember I will put is: 123456
- Type the password again. And press Enter.
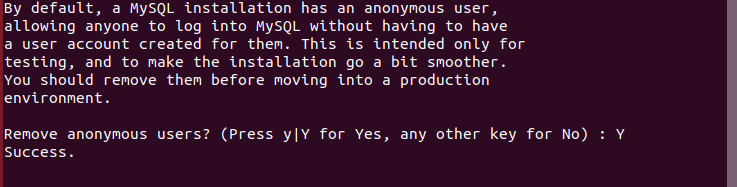
- Next select Y and press Enter.
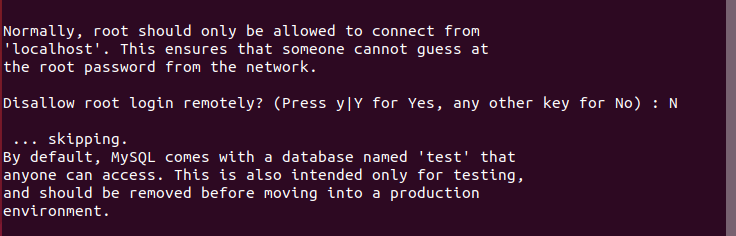
- Next select N and press Enter.
- Next choose Y and Enter.
- Next choose Y and Enter.
- So has installed MySQL. Next run the following command:
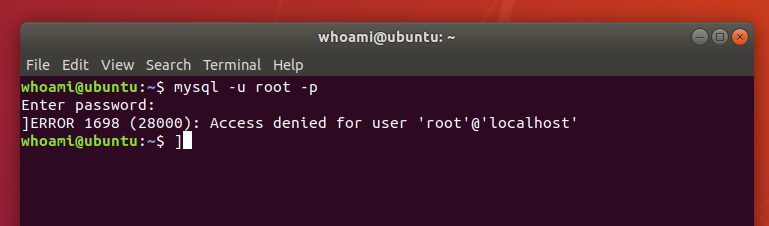
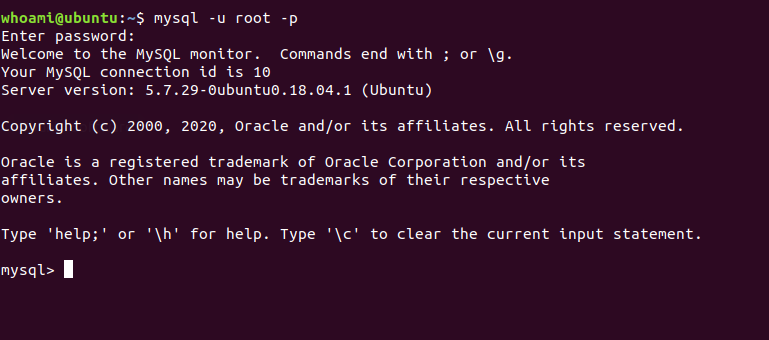
$ mysql -u root -pto access MySQL, the root here is the default username when installing MySQL. You can also create another account to access MySQL.
- Enter the password previously set, if the information shown as above. Then run the following command:
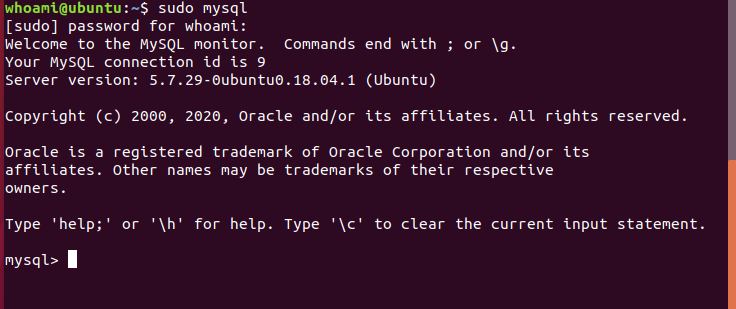
$ sudo mysql. To access MySQL with root access without the password for the account with the username as root.
- After logging in to MySQL as root, run the following command:
ALTER USER 'root'@'localhost' IDENTIFIED WITH mysql_native_password BY 'password';. The password field is to reset the password for the root account. Here I will set the password value to 123456.
- Next run the command:
FLUSH PRIVILEGES;The goal is to reload and apply the changes.
- Then log out and log back into MySQL to check if the password setup is successful.
- So has installed MySQL. Next will install PHP.
- Following is the command to install MySQL:
- PHP: To install PHP, run the following command:
$ sudo apt-get install php libapache2-mod-php php-mysql- To check if PHP is successfully installed, use the command:
php -v.
- Next need to install some necessary libraries for PHP. Here, I install the mcrypt library.
- Run the following command:
sudo apt install php-dev libmcrypt-dev php-pear - Then run the following 2 commands:
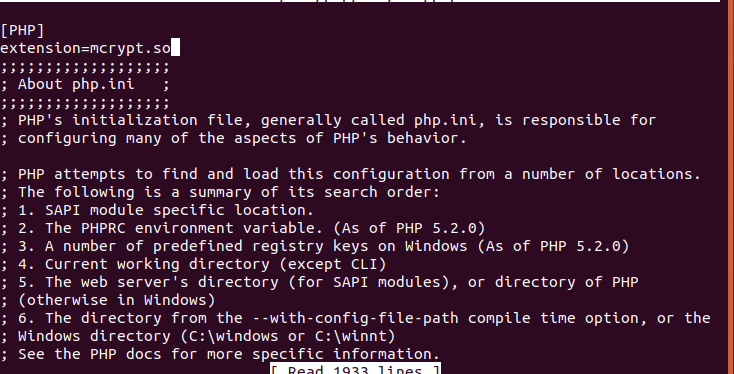
sudo pecl channel-update pecl.php.netandsudo pecl install mcrypt-1.0.1 - After installation is complete, run the following command:
sudo nano /etc/php/7.2/cli/php.iniand add the following php.ini file:extension=mcrypt.so
- Then
Ctrl + SandCtrl + Xto save. To check if the installation is successful or not, use the following command:php -m | grep mcrypt. If successful, the following will appear:
- To check if PHP is successfully installed, use the command:
- So successfully established LAMP.


3. Composer
Summary: Composer is a tool to handle PHP package or library. Composer will install libraries into a directory within your project.
- To download the composer, run the following commands:
1 2 3 4 5 | php -r "copy('https://getcomposer.org/installer', 'composer-setup.php');" php -r "if (hash_file('sha384', 'composer-setup.php') === 'c5b9b6d368201a9db6f74e2611495f369991b72d9c8cbd3ffbc63edff210eb73d46ffbfce88669ad33695ef77dc76976') { echo 'Installer verified'; } else { echo 'Installer corrupt'; unlink('composer-setup.php'); } echo PHP_EOL;" php composer-setup.php php -r "unlink('composer-setup.php');" |
- To check if Composer is installed, run the following command:
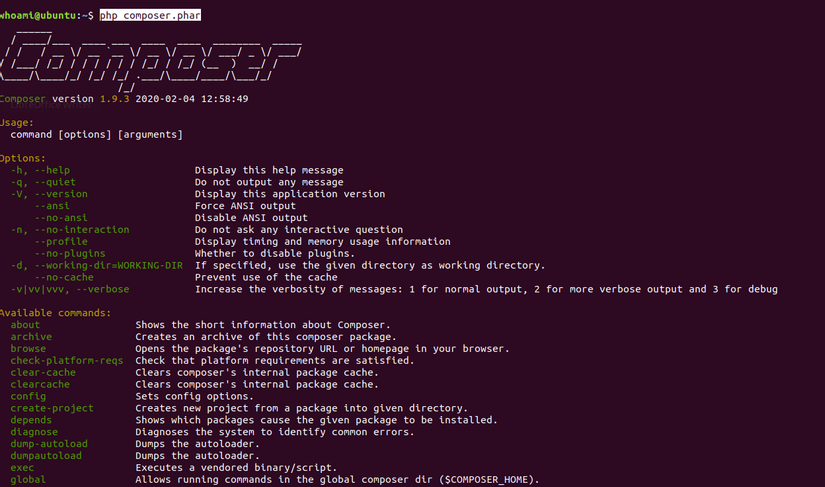
php composer.phar. If the installation is successful, will display the following:
- To be able to use Composer anywhere, use the following command:
sudo mv composer.phar /usr/local/bin/composer. Then run the command:composer. To check the configuration has been successful.
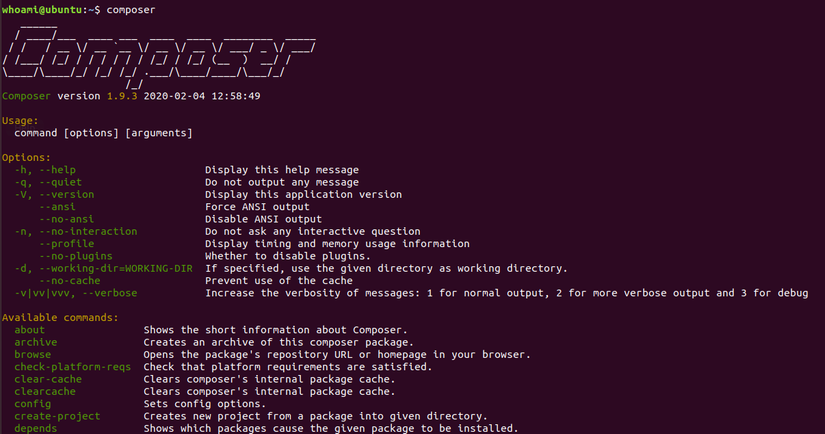
So Composer has been installed
4. Laravel
- In order to install Laravel, according to the documentation of the home page
https://laravel.com/docs/6.x, the following extensions are required:
1 2 3 4 5 6 7 8 9 10 | PHP >= 7.2.0 BCMath PHP Extension Ctype PHP Extension JSON PHP Extension Mbstring PHP Extension OpenSSL PHP Extension PDO PHP Extension Tokenizer PHP Extension XML PHP Extension |
- To check which extensions have been installed, use the following command:
php -m | grep tên extension. For example, check if the BCmath extension already exists:php -m | grep bcmath

- If the command is finished running, the above message means that the BCMath extension has not been installed. To install a php extension, use the following command:
sudo apt-get install php-bcmath. Specifically, to install the BCMath extension, use the following command:sudo apt-get install php-bcmath. Then, run thephp -m | grep bcmathcommand againphp -m | grep bcmathto check if the installation was successful.

- Thus, successfully installed the BCMath extension. The remaining extensions, follow the same.
- Next, install Laravel through Composer. Run the following command:
composer global require laravel/installer - After finishing running. Run the command:
laravel, if the current command line should be: laravel:command not found, will need to follow these steps:- Run the command:
sudo nano ~/.bashrc - Next: Add the following line at the end of the
export PATH="~/.config/composer/vendor/bin:$PATH"fileexport PATH="~/.config/composer/vendor/bin:$PATH" Ctrl + S và Ctrl + Xto save.- Finally, run the command:
source ~/.bashrc
- Run the command:
- When you have completed the above steps, run the
laravelcommandlaravelto check.
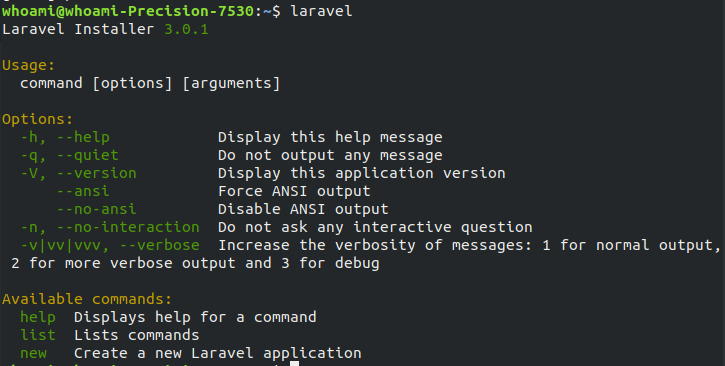
- So has established successfully.
4. Conclusion
Hopefully this tutorial will help everyone set up a successful environment and start getting acquainted with Laravel . Happy Coding !!!