What is Robotium?
Robotium is an Android Testing Framework for automating test cases for native and hybrid applications. Using Robotium, developers can create powerful automated GUI test cases for Android apps. In addition, a developer can write a script to test the functionality, system, adoption and spread of many Android operations.
Robotium testing framework
The standard Android Testing Framework has the following limitations:
- Can’t handle multiple operations
- Test execution slow
- Test cases are complex and difficult to execute
Robotium framework is a better choice for conducting testing on Android apps.
Robotium is the open source framework and is considered an extension of Android Testing Framework.
The advanced features of Robotium are as follows:
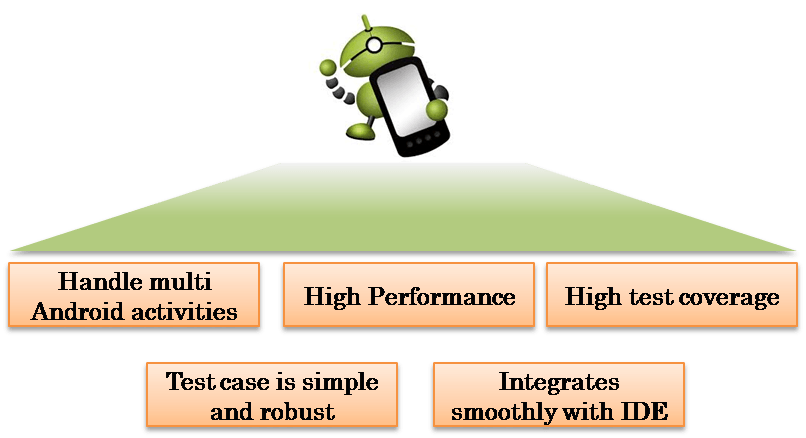
Robotium Test Case Classes Robotium uses a set of classes (com.jayway.android.robotium.solo) for testing. This class supports test cases spanning multiple operations. Solo is integrated with ActivityIusalmentationTestCase2.

Testers can write test cases without knowledge of application design using Robotium test case classes. This is a standout feature compared to Android test case classes.
How to use Robotium
To use Robotium in Android test project, you need to follow the steps below:
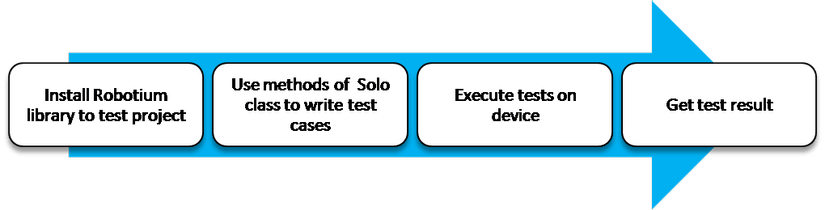
Using Robotium to conduct tests on Android apps. To ensure the quality of Android apps, you should follow the procedure below:
- Design test specification
- Write Test Program
- Execute Test Case on the device
- Collect test results
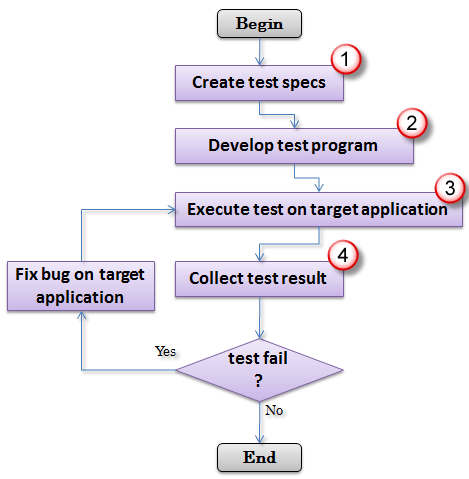
Step 1: Design test specification
- This is the first step to testing your application. In this step, you need to define the target to test. In your Android application, there are many goals that need to be tested such as UI, activity, components, services. Clearly defining the test goal in your application will help achieve a broad range of testing.
- Planning for the types of tests should be carried out (Unit test, Function test, System test).
- Design test cases for maximum coverage while minimizing the number of test cases. The more code that is checked, the more chances of early error detection.
Step 2: Write Test Program
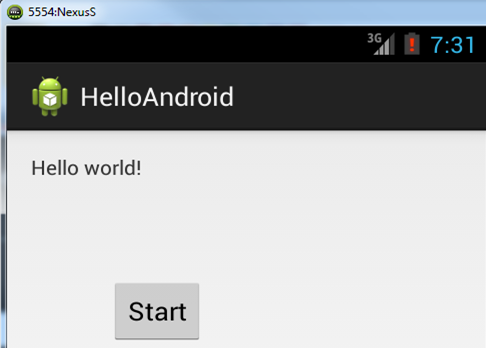
This section shows you how to write an Android test program using Android Junit Test and Robotium. Assume that you have developed an Android program name HelloAndroid. This program has several functions described below:
- Showing the words “Hello world!” on the screen.
- Display HelloAndroid message when user presses “Start” button
System requirements:
- The Android platform comes with JUnit 3.0 framework built in.
- To create an Android Test Project from Eclipse, your computer must have:
- Latest version Android Platform
You can download the Eclipse IDE with ADT (Android Developer Tools) built in. It includes the essential Android SDK components and a version of the Eclipse IDE.
For Robotium testing framework, you need to remove Robotium library from Robotium website .
Create Android Test Project
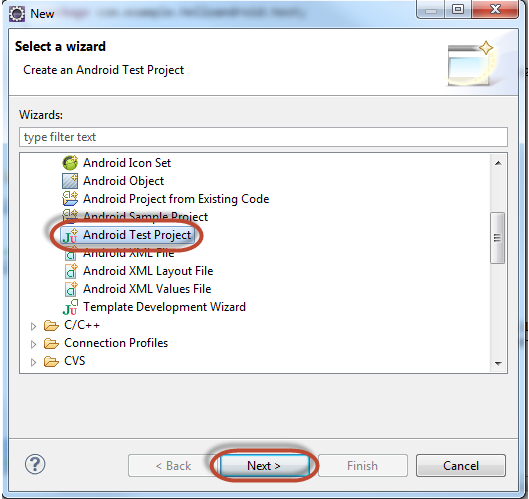
- Click File -> New -> Other
- Select: Android -> Android Test Project as per below figure -> Click Next
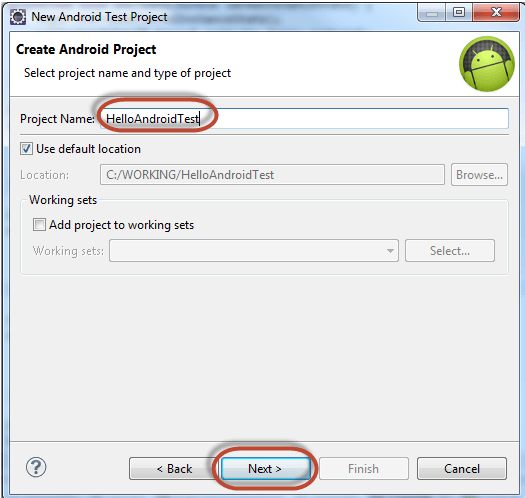
Write the name of your test project. According to the naming convention, your test project should have the name “HelloAndroidTest”.
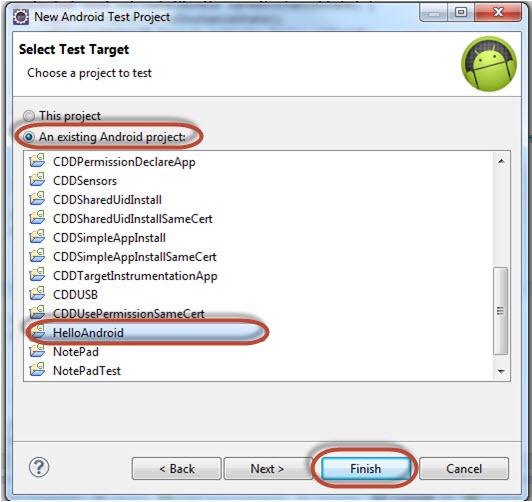
Select the target application that is testing. In this case it’s HelloAndroid. Then click Finish.
Create Test Suites Based on your test specification, you start creating test suites for your test program. You can choose from many different Testing frameworks. In this tutorial, I choose the standard Android testing framework ActivityIusalmentationTestCase2 . You have to add the Robotium library file to the libs folder in your project directory in case you want to experiment with the Robotium framework. (You create a lib directory in your project directory).
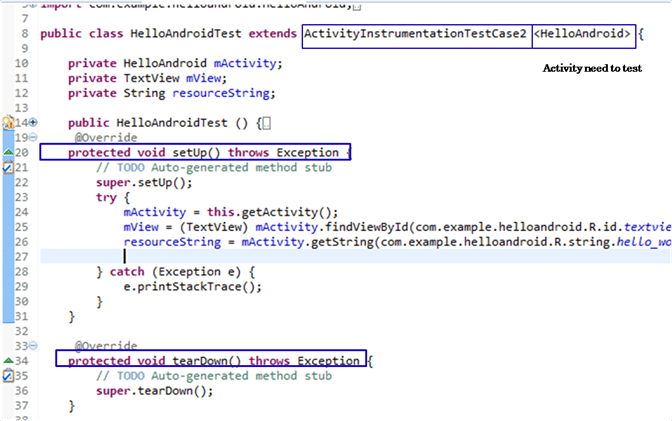
A test case requires a fixture to run multiple tests. To define a test case, you must follow the program structure below:
- Implement a subclass of TestCase.
- Define instance variables that store the state of the fixture
- Initialize fixed state by overriding setUp ()
- Clean-up after the test by overwriting tearDown () .
1 2 3 4 5 6 7 8 9 10 11 12 13 14 15 16 17 18 19 20 21 22 23 24 25 26 27 28 29 30 31 32 33 34 35 36 37 38 39 40 41 42 43 44 45 46 47 48 49 50 51 52 53 54 55 56 57 58 59 60 | package com.example.helloandroid.test; import com.example.helloandroid.HelloAndroid; import com.jayway.android.robotium.solo.Solo; import android.test.ActivityInstrumentationTestCase2; import android.widget.TextView; public class HelloAndroidTest extends ActivityInstrumentationTestCase2 <HelloAndroid> { private HelloAndroid mActivity; private TextView mView; private String resourceString; private Solo solo; public HelloAndroidTest () { // TODO Auto-generated constructor stub super("com.example.helloandroid",HelloAndroid.class); } @Override protected void setUp() throws Exception { // TODO Auto-generated method stub // super.setUp(); mActivity = this.getActivity(); solo = new Solo(getInstrumentation(),getActivity()); mView = (TextView) mActivity.findViewById(com.example.helloandroid.R.id.textview2); resourceString = mActivity.getString(com.example.helloandroid.R.string.hello_world); } @Override protected void tearDown() throws Exception { // TODO Auto-generated method stub //super.tearDown(); solo.finishOpenedActivities(); } public void testPrecondition() { assertNotNull(mView); } /* test Target application contains a text display "Hello World!"*/ public void testSearchText() { assertEquals(resourceString,(String) mView.getText()); } /* test HelloAndroid Activity on target application is exist*/ public void testCurrentActivity() throws Exception { solo.assertCurrentActivity("wrong activity", HelloAndroid.class); } /* test Application UI contains "Start" button */ /* send event click button to target application */ public void testSearchButton() throws Exception { boolean found = solo.searchButton("Start"); solo.clickOnButton("Start"); assertTrue(found); } } |
Add Test Cases
- In the same package as TestSuite, we create class TestCase
- To test certain activity i.e. HelloAndroid let’s create a test case extent ActivityInticmentationTestCase2 <HelloAndroid>
- In this class, tester can get test activity through getActivity () method.
- You are welcome to create a test for a test activity using the create method named “test + original Method Name”
- In the test method, the tester can use the Android JUnit function to compare the actual value and expected value. These methods are shown below.
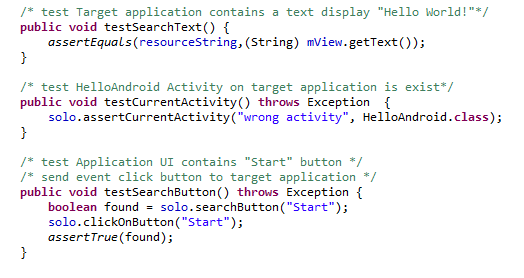
The test suites above have verified that the application GUI must display the text “Hello World!” and contains the “Start” button name.
Step 3: Run the test
After you have finished writing your test program, run the test according to the steps below:
- Connect your Android device to your PC (or launch an Emulator in case you don’t have a real one).
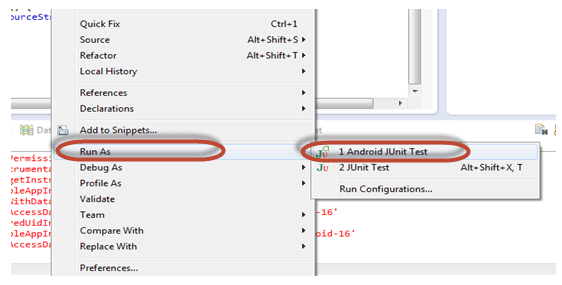
- In your IDE, right-click on Run as> Android Unit Test
Besides running tests on the IDE, you can run tests on the command line. In this test program, the test package is com.example.helloandroid.test . In the Linux terminal you can use the following command to run all checks in this package:
1 2 | $ adb shell am instrument -w -e package com.example.helloandroid.test |
Step 4: Get test results
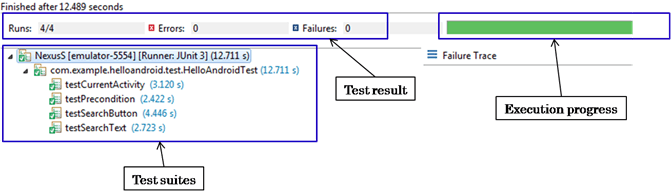
After doing the test, you will get that test result.
In this test program, 4 test methods were performed and all test cases passed.
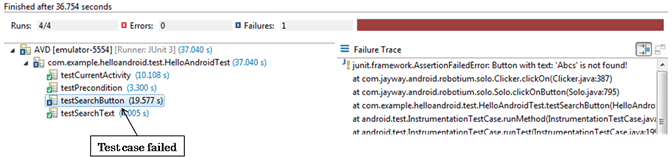
In case the test failed, the output will show up and let you know which of the tests failed.
Source code examples This article includes some Source Code examples to help you better understand and quickly grasp technical knowledge:
- HelloAndroid : The application is tested.
- HelloAndroidTest : The test program using Android Test Framework
The article is translated from: