VR (Virtual reality) is the future of human technology in general and the gaming industry in particular.
In recent years, more and more VR-enabled games are being released for gamers with increasing perfection. Catching that trend, the major game engine has also provided support for users to create their own VR games easily, and Unity3D is no exception.
In this article, I will show you how to create an application (Android) to watch 360 videos using VR technology in Unity in just 10 minutes. And the best part is that you almost don’t need to touch the code
First, talk about what you need:
- An Android phone with gyroscope for motion sensor of the head, using KitKat operating system (4.4) or newer.
- A set of Google Cardboard headsets (or better if you can afford it).
- Unity3D version 5.6 or greater.
- GoogleVR SDK for Unity that you can download here .
- 360 A 360 video , which can be recorded by 360 camera or simply downloaded online.
How to create this application?
Unlike normal videos that are rectangular, 360 videos are spherical. So first we need to create a spherical screen to project our video on. Viewers will be positioned in this sphere and can watch videos from any direction.
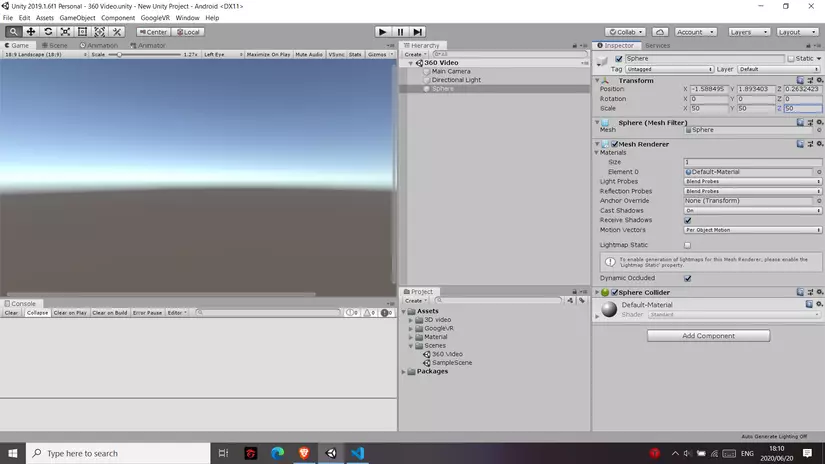
Step 1: Create a sphere
First, create a new Unity project if you’re starting from scratch (or a new Scene if you want to integrate a 360 video player into an existing project). A Scene is like a game level and a project is like a full game
Then add an ojbect Sphere inside the Scence, placing it at the center (Position = 0, 0, 0), with a radius of 50 (Scale = 50, 50, 50). Camera position should also be set to 0, 0, 0. The camera is the eye of the player / viewer, so you’ll want it in the center of the Sphere. Placing it elsewhere will make the video distorted.

When the Camera is placed inside the Sphere, you will not see the Sphere in the Scene anymore. Don’t worry, there’s a cause for that! In fact, most game engines do not, by default, display the interior of 3D objects. This is because we rarely need to see them, so it is a waste of resources to display them. We will fix it later.
Step 2: Turn the normal line of sphere khối
We need to see the inside of the sphere, so we need to turn it inside out.
In Unity, spheres are not really spheres, they are polygons created with thousands of tiny faces. The outer sides of can be seen, but the inner faces are not. For that reason, we’re going to use a bit of code to turn them around as quickly as your ex will turn around  .
.
We will use something called Shader, to apply the Sphere’s Material. Material controls the appearance of Objects in Unity. And Shader are small scripts that calculate the color of each pixel displayed, based on the light and information taken from their Material.
First, we create a new Material for our Sphere, then add a Shader and assign it to that Material.
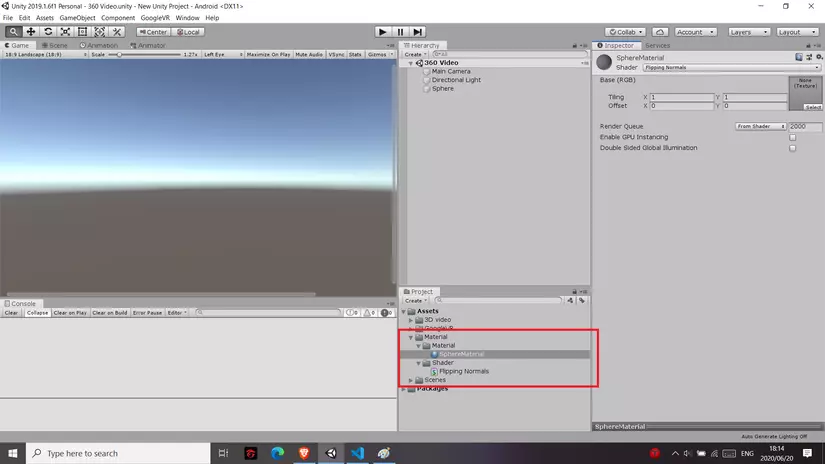
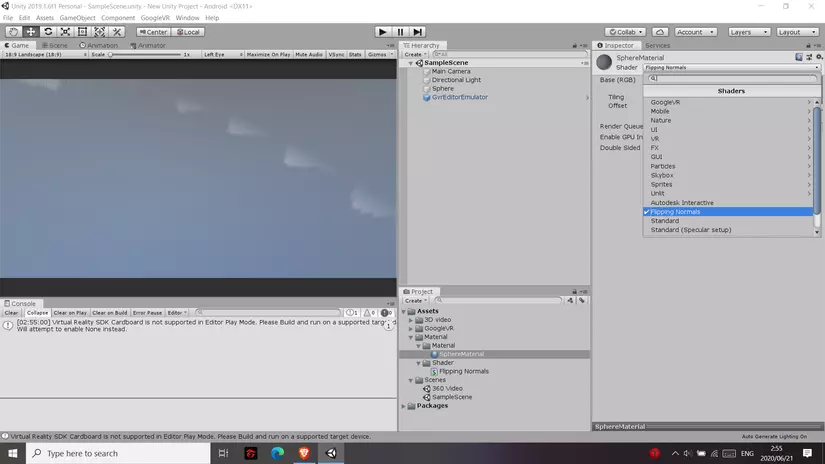
We will need to modify this Shader code a bit. This is quite a difficult part because Unity’s Shader is written in a special language called ShaderLab. But don’t worry, I already helped you with this difficult part. All you need to do is copy the code below and double click on our shader to paste it in, it’s so simple, isn’t it?
1 2 3 4 5 6 7 8 9 10 11 12 13 14 15 16 17 18 19 20 21 22 23 24 25 26 27 28 29 30 31 32 33 34 35 36 37 | Shader "Flipping Normals" { Properties { _MainTex ("Base (RGB)", 2D) = "white" {} } SubShader { Tags { "RenderType" = "Opaque" } Cull Off CGPROGRAM #pragma surface surf Lambert vertex:vert sampler2D _MainTex; struct Input { float2 uv_MainTex; float4 color : COLOR; }; void vert(inout appdata_full v) { v.normal.xyz = v.normal * -1; } void surf (Input IN, inout SurfaceOutput o) { fixed3 result = tex2D(_MainTex, IN.uv_MainTex); o.Albedo = result.rgb; o.Alpha = 1; } ENDCG } Fallback "Diffuse" } |
This shader turns upside down every pixel of the Sphere from the inside out, so now our Sphere looks like a large ball seen from the inside out. The next step is to turn this balloon into a video screen, and remember to apply this shader to the Sphere’s Material.
Step 3: Project 360 videos into Sphere
Import the 360 video you downloaded into the project, then drag it and drop it into our Sphere. And in a note, the Sphere has an additional Video player component and the video is ready to run. 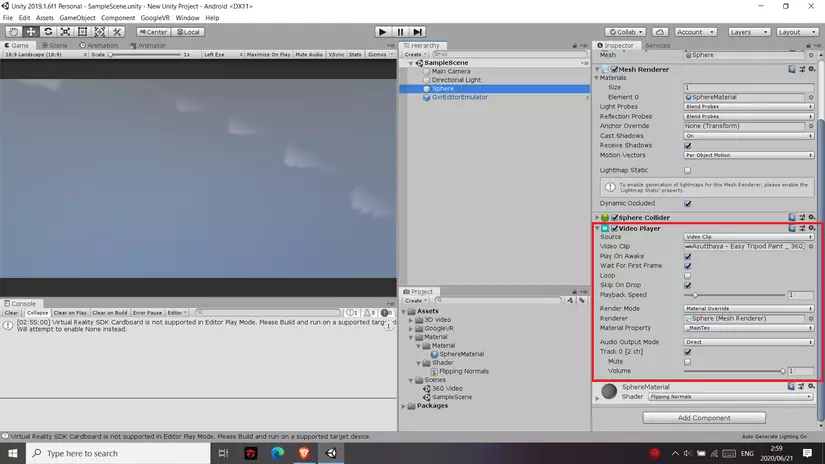
You can add other settings to the video such as loop, or even streaming it.
Step 4: Install Google Cardboard
In this step, we will make our application a bit colorful when viewing it on a VR headset, such as Google Cardboard. We will create a stereoscopic view with a fisheye effect (each eye will see a different scene) using the GoogleVR SDK.
First, let’s add the GoogleVR SDK to our project just like with a normal unity package, then we’ll play around with the Android settings a bit.
Check your File> Build Settings to see if the platform we built is Android. If not, then use Switch Platform to switch to Android, this process may take a few minutes.
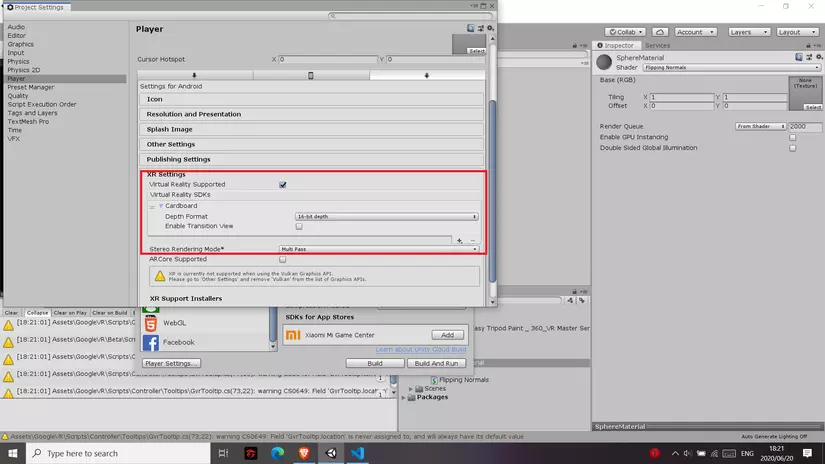
The next step is to click on Player Settings and make the following changes:
- Open XR Settings, check the Virtual Reality Supported box. Then use the + button to select Cardboard.
- Enter the package name in the Bundle Identifier field (such as com.yourdomain.demo360).
- Open the dropdown and select Minimum API Level and select Android 4.4 ‘Kit Kat’ (API level 19).
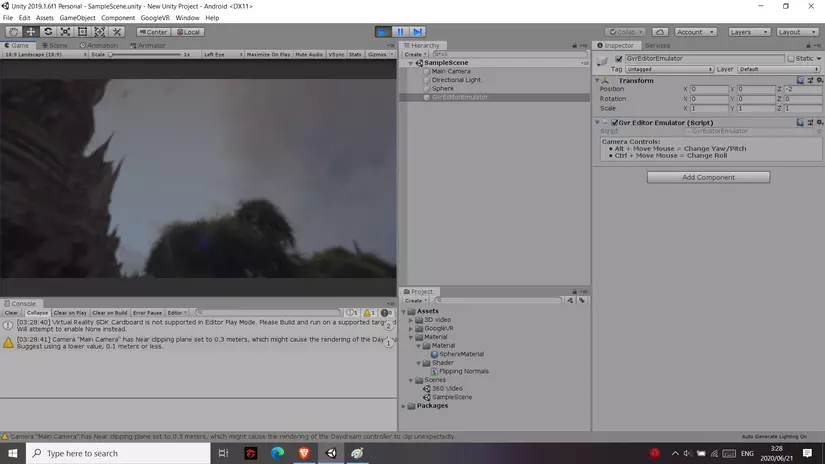
Finally, just go to the GoogleVR Prefabs folder and drag the GvrEditorEmulator prefab into your Scene and your application is ready to run.
Step 5: Build and run the app
You can run the application in Unity’s emulator to test first and then build to the next device.
The build method is the same as with every other app built on Unity so I will skip this part and go straight to …
Epilogue
The application introduced in this article is just a very simple application, but I hope it has been able to help you get a little closer to VR technology and how to handle it in the Unity environment. Unity is a very powerful tool that can help you create games or applications that are more complex than the applications introduced in the article. You can create a completely 3D environment and allow players to move in it, or add cool effects to your 3D video with the Particles effect of Unity … There are countless possibilities, And the only limit is your imagination