Following the viblo: https://viblo.asia/p/lam-the-nao-de-tich-hop-uft-qtp-voi-alm-hp-alm-quality-center-phan-3-1VgZv1WmKAw
Part F – Analyze the results:
Step 1) The Execution panel is displayed again to the user when the 'AutoRun' dialog box is closed.
- With execution status updated.
- Available UFT test reports can be accessed by clicking on the 'Launch Report' button.

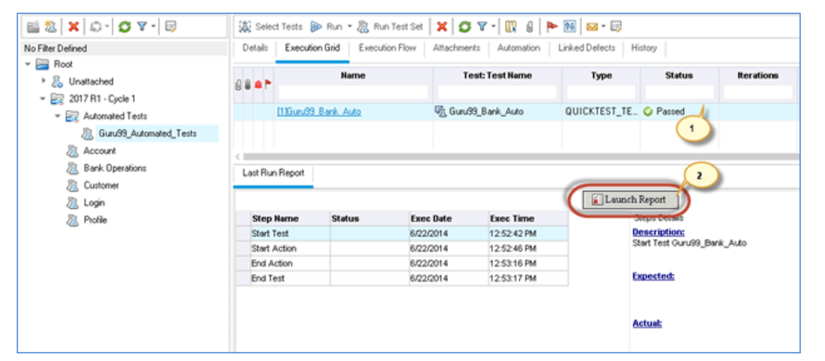
Step 2) UFT test report will be displayed to the user. 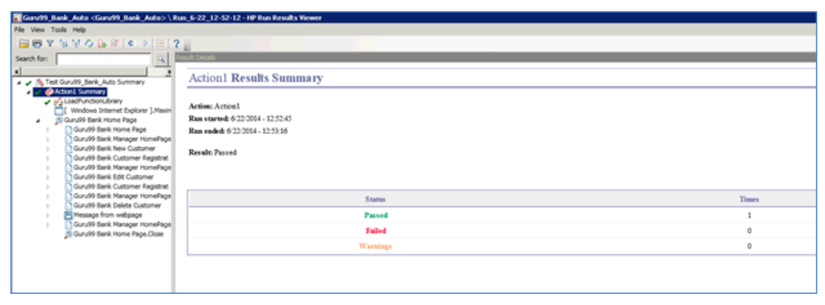
Step 3) Detailed results can be accessed using the 'Test Runs' module. Like a manual test, detailed results show all information. 
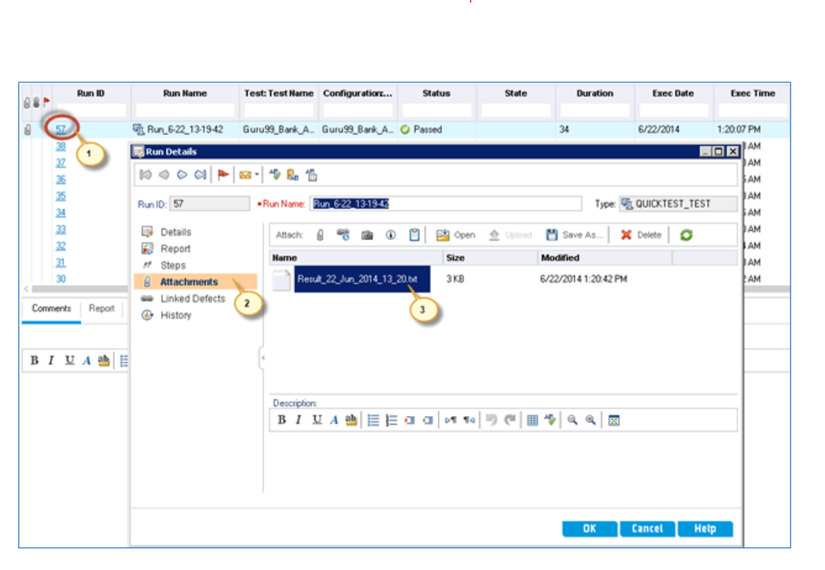
Step 4) Results Test also creates a text result file that can be accessed from the attachment. The text file created by the test framework is NOT an UFT built-in report. For similar access do the following:
- Select 'Run ID'.
- The 'Run details' dialog box opens.
- Go to 'Attachments'.
- A resulting file will be available for download by the user. Double click on the text file.
Step 5) The resulting text file is opened in notepad. The resulting file will be displayed as below. 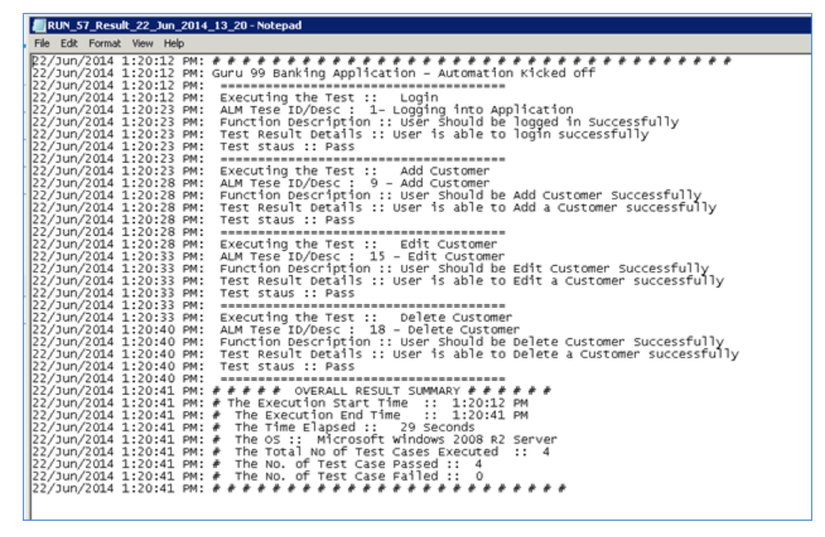
How to create a new Defect
Step 1) Navigate to the Quality Center tab and click the "New Defect" button. 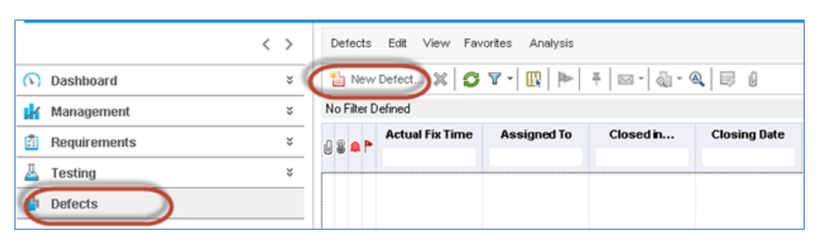
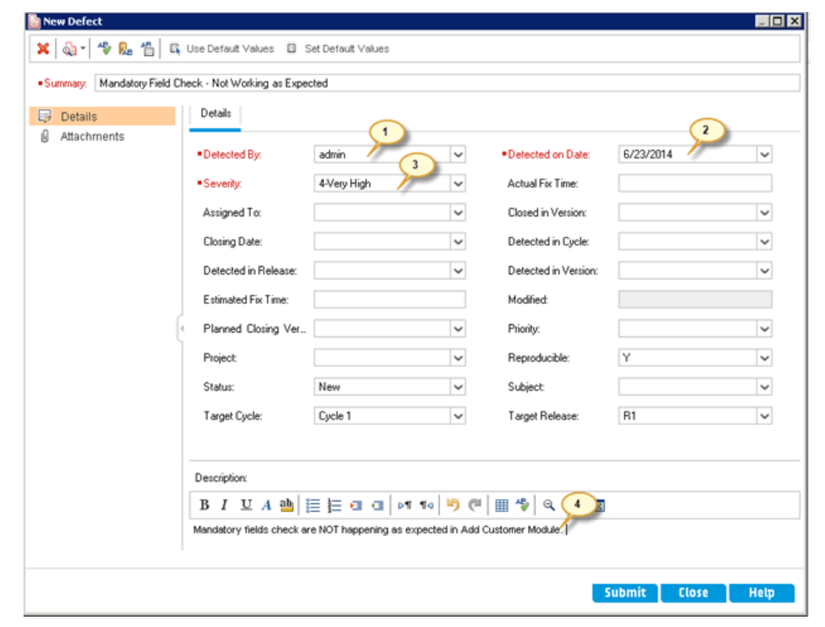
Step 2) The "New Defect" dialog box opens. Fill in the following required information.
- Enter Detected by field
- Enter Detect Date – By default the current date will be selected
- Set the severity of disability.
- Users can also enter other information and enter a brief description of the error
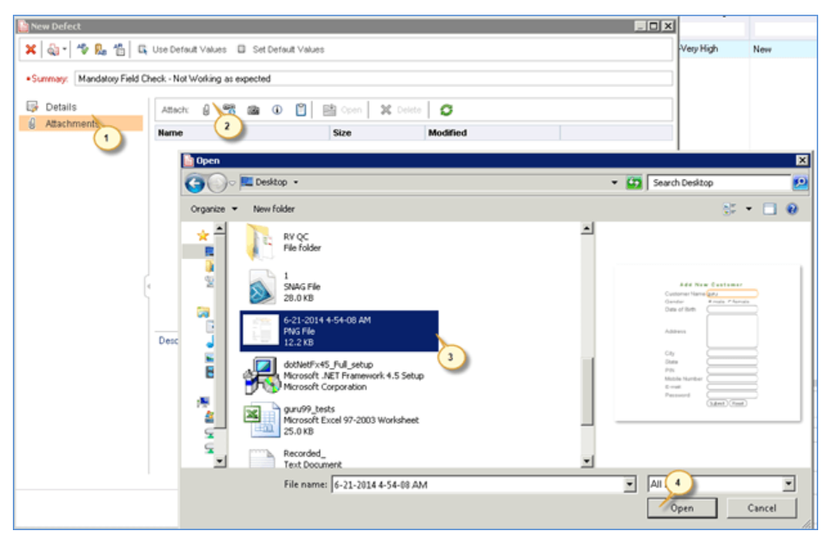
Step 3) Reviewers can also attach screenshots / other related files related to the error using the 'attachments' tab.
- Click on the 'Attachments' tab
- Click the 'Attachment' button
- Select a file from the File Explorer dialog box.
- Click on 'Open'
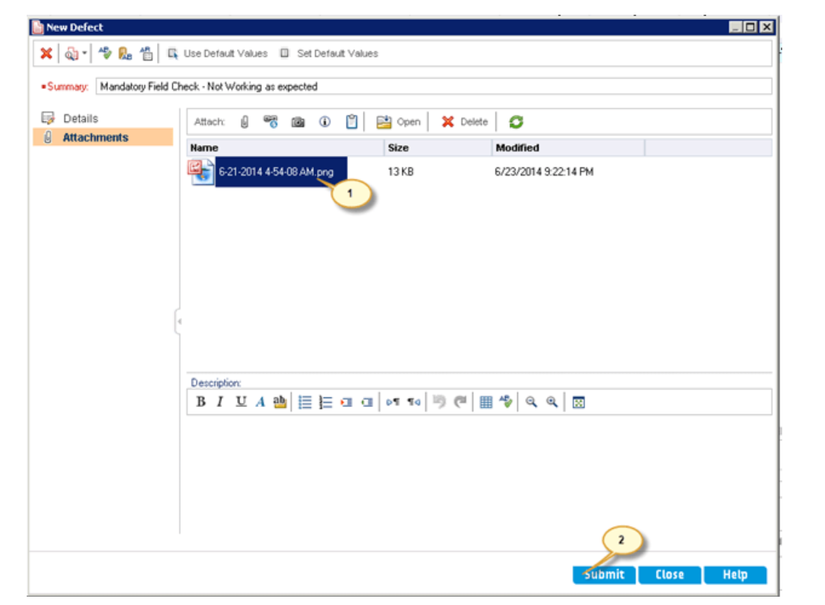
Step 4) When clicking 'Open', we will be able to see that the file is attached in the attachment.
- The selected file has been uploaded
- Click 'Submit' to submit a defect then it generates a defect ID.
Step 5) The error is posted, similarly accessed in the Defect Tab as shown below. You may also notice that a defect ID is generated when posting an error. 
How to associate a defect with a request
- The user can associate one defect with other defects or link one defect to the requirements. By linking defects and requirements, we can create insurance analysis charts and traceability matrices.
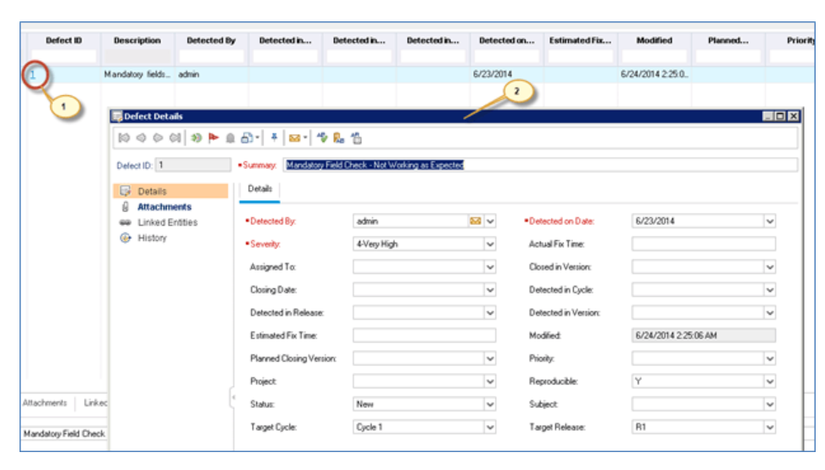
- Step 1) After generating the error, the tester can map the requests associated with it. To do the same thing,
- Click on 'Defect ID'
- The error details dialog box opens as shown below.
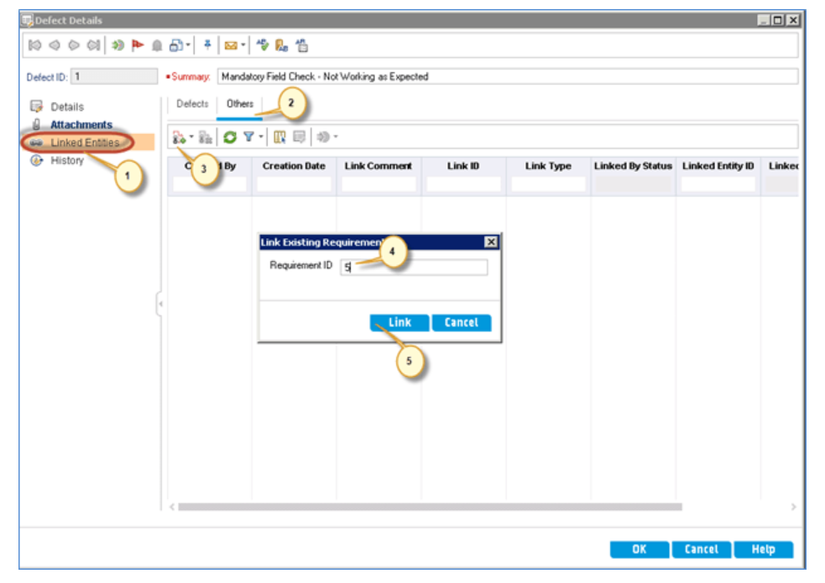
Step 2) To link the entities,
- Navigate to 'Linked Entities'
- Click 'Others' to link the requirements against this defect.
- Click the 'Link' button and select 'by Id' (we can also choose based on the name requested)
- Enter the request ID to which this error must be mapped.
- Click on the 'Link' button
Step 3) After clicking the link button, the error details window is displayed again to the user with the link added as below. 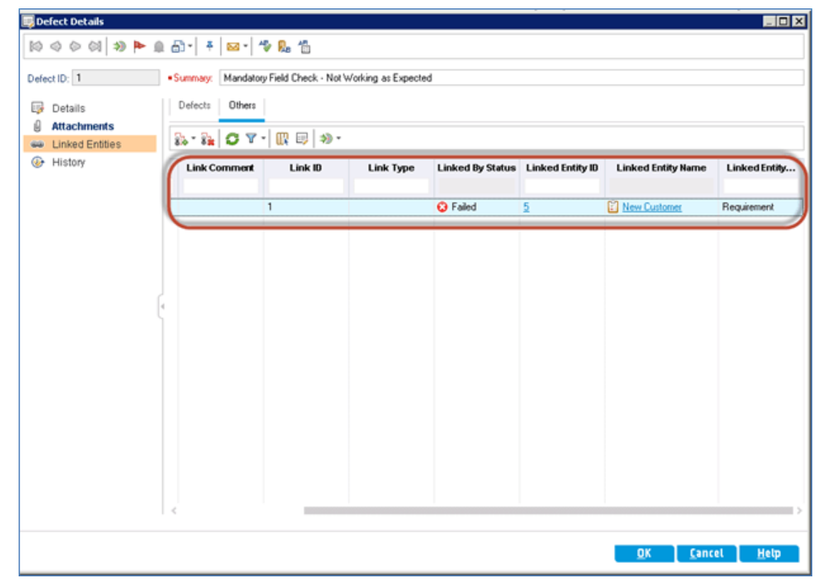
Step 4) After the request is associated with a defect, the request will display with the icon associated with it as shown below. 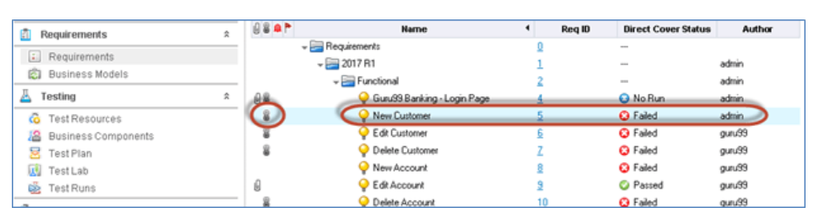
Step 5) When the request is associated with a defect, the Traceability Matrix can be created. To create the Navigation traceability matrix to view the menu of 'Requirements' and select 'Traceability matrix'. The traceability matrix created will be created as shown below.
Note: Please refer to the 'Request Module' instructions for creating a traceability matrix in which the steps are elaborated. 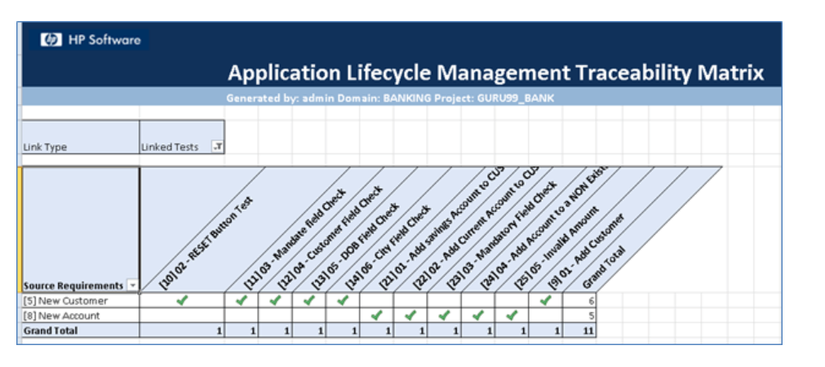
Reference: https://www.guru99.com/hp-alm-defect-management.html