In Case Study Learn WordPress lesson no.4 on how to install localhost on your computer with Xampp and AppServ. However, during the installation process, there may be some common errors such as: You cannot start Apache to resolve the php file and localhost will say Not found that your website cannot be found. In this article, I will list two ways to help you fix Apache failure on your computer.
Method 1: Modify the HTTPD-SSL file to Start Apache
When you install XAMPP on your computer to create a web server, apache will use the default port 80 to transfer data, but other software installed on the machine has occupied port 80 to use, making you unable to boot. get Apache 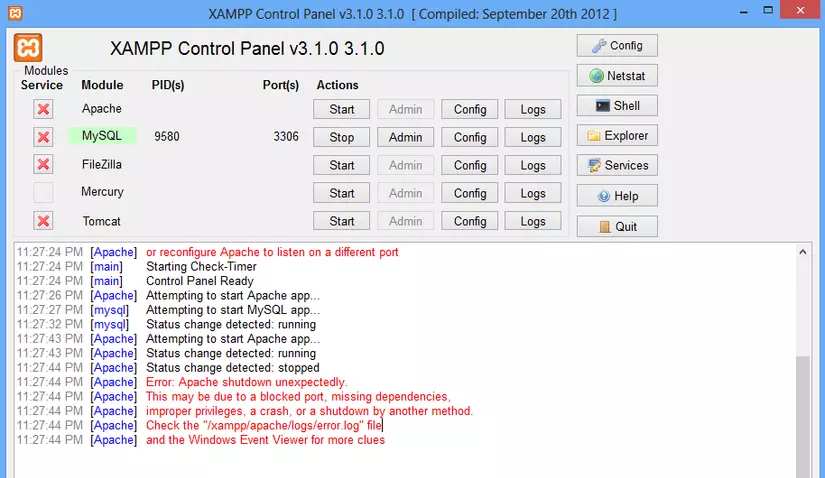
To edit the HTTPD-SSL file, do the following:
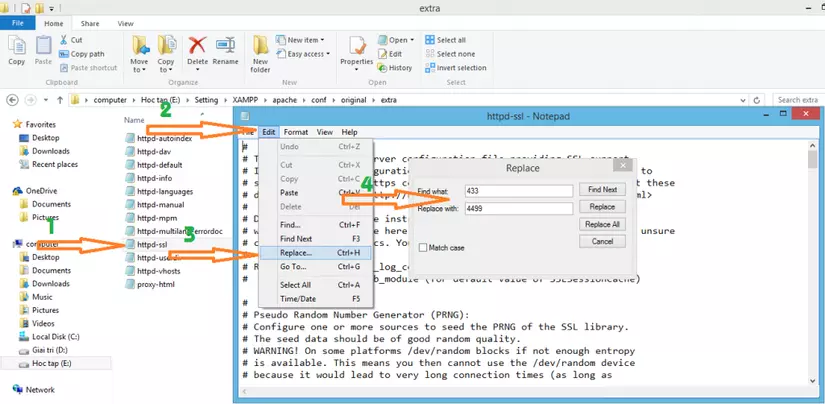
Step 1 : Go to the XAMPP installation directory> Find the HTTPD-SSL file under the default normal path as follows:
C: program fileXAMPPapacheconforiginalextra
Step 2: Right-click on the HTTPD-SSL file and choose to open in notepab> Click Edit on the toolbar of Notepad> Select Replace a new window appears
The Find what line you entered 443
The Replace with line you enter 4499
=> Select Replace All to replace all> Then save it and start Apache and then go to the browser to type localhost to check if apache is working normally.
Method 2: Change Post for Apache
With this method 2 we need to change post for Apache to another port
Step 1 : Turn on the XAMPP software> Click on the config box located on the Apache line> Click on Apache (httpd.conf) to open the file.
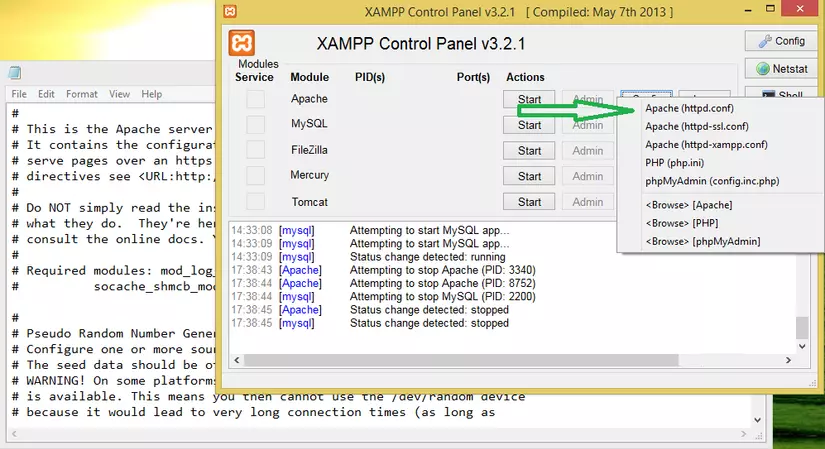
Step 2 : Choose to open in notepad> Click Edit on the toolbar of Notepad> Select Replace a new window appears
The Find what line you enter 80
The Replace with line you enter 81
=> Then choose Replace All > Save again
**** Step 3 ***: Go to the browser to check
You go to xampp> Click on start Apache and type on the browser localhost: 81
In the above article, I introduce to you two ways to fix Apache failure in XAMPP simple.