Icon is one of the essentials for a website system, there are many websites that help us use the icon immediately by downloading and importing, and done without having to install anything like fontawesome , icomoon or icons8 , … Have you ever thought about creating such icons yourself? Let’s find out how to create icons in Adobe Illustrator!
Artboard setup
Turn on the AI and first create a new file, the parameters to note here are:
- Width
- Cao
- Artboard
- Pixels
In the advanced tab, you just leave the following parameters as default:
- Color Mode: RGB
- Raster Effects: Screen (72ppi)
- Preview Mode: Default
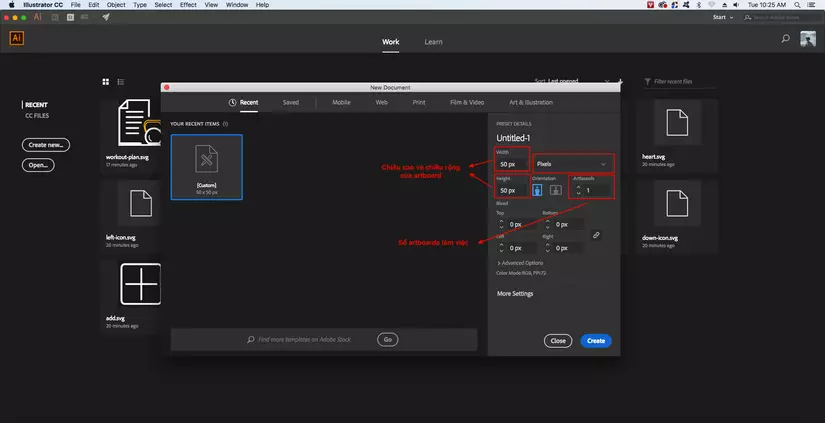
First you need to specify the size, for example you want to draw 20×20 or 16×16 px. This is necessary because if you draw the perfect pixel, you have to watch each pixel one by one, leading to sometimes drawing a 1px line icon, even the size of the line will not be centered, left or right. For artboard we can stack multiple artboart at the same time.
Set Layers
First create 2 layers, 1 layer to create a frame and 1 layer to draw the icon.
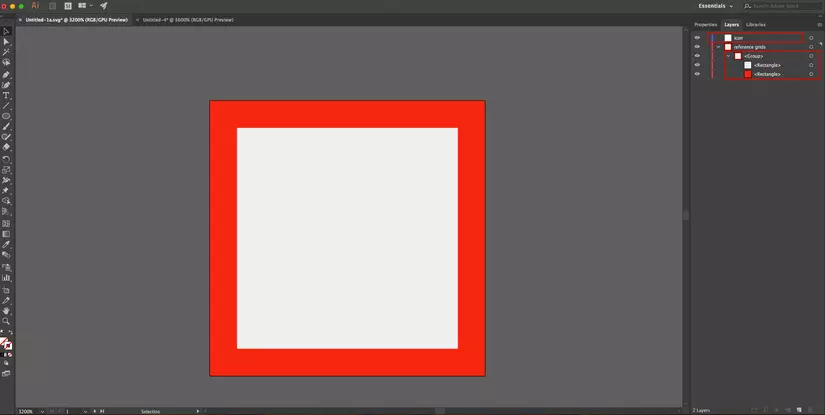
The first step is to create a red square the size of the artboard. To do this, click on the rectangle icon on the left-hand bar, or press the shortcut M.
Next, create another square 4px away, white, and remember to align it between it, then move it to this 2 square group with the keyboard shortcut Ctrl + G so we created the frame.
The remaining steps will work on the icon layer
Set up Grid
Go to Preferences> Guides & Grid or shortcut Command / Ctrl K and adjust the following settings:
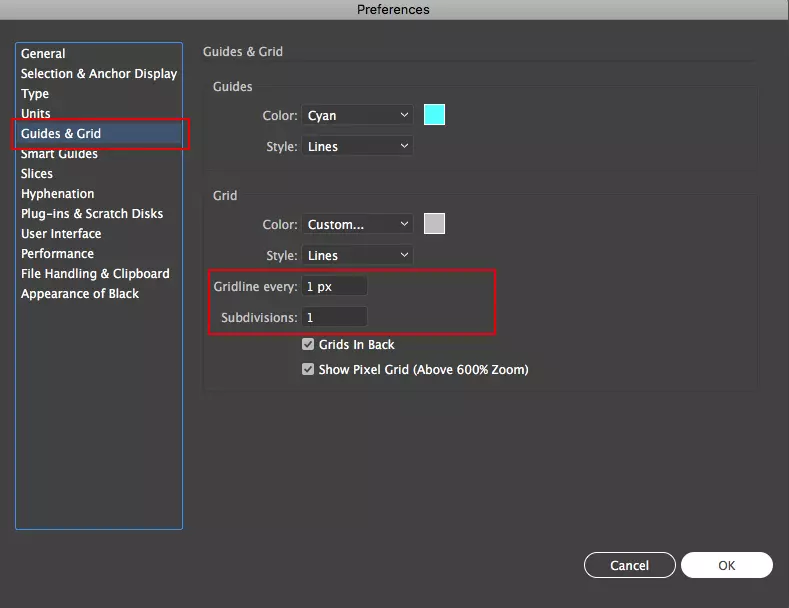
- Gridline every: 1 px
- Subdivisions: 1
Next go to View and turn on Snap to Grid and Snap to Pixel . Finally you turn on Show Grid to display the grid
Create Icon with AI Pen tool
Open the Pen tool on the left hand bar as shown below, or you can use the shortcut P to open this tool
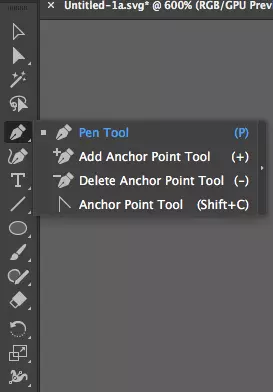
Because the icon is quite small, just using the pen tool is enough, no need to use other advanced tools. Compare the two photos below

The image on the left is a square rectangle and the right side is rounded. To do this, just go to the Stroke section and set Cap and Corner to be okay

Once set up, proceed to draw the icon according to your creativity and remember that we are working on the icon layer! However, to master the Pen tool, we need to practice a bit. I would like to share with you a page to practice the pen tool that is bezier . This is a website with many levels and increasing levels of difficulty to help you get used to and master this tool easily and most interestingly.
Steps to create icon denote Nutrition plan
Step 1: draw text icon

First use the pen tool to create a line like the image to display the text icon

Next add a few dash strokes as above
Step 2: draw apples
Now it is the hardest part to draw an apple shape, similar to the above we can draw an apple first, then the knob at the top, remember to make it balanced and fit!

To create more points for the icon, I will color the leaves slightly

Demo link: https://www.figma.com/file/YPMSYv2KgsgafvT1g6eKiRGu/Icon-set
So done! Hopefully, through this article, people can create an icon for themselves