This is a translation from medium.com , please see the original article here: https://medium.com/dev-genius/how-to-animate-your-images-in-swift-ios-swift-guide -64de30ea616b
5 steps to create animations with UIImage and UIImageView

UIKit provides a great inbuilt feature for displaying animations with just a few lines of code. It allows animations for a variety of situations, from loading animations, to glowing items, rotating items and more. Here are 5 steps to create and add animation based on your own images to the application. Let’s get started.
1. Create a set of images for your animation
First, you need to create a folder containing a set of images for your animation. Make sure that the name of the image file is the serial number of that image in the animation, starting at 0 (eg. 0.png ) In this article, I will use an example like this: imagine imagine we have a podcast listener, and we need an animation to indicate which song is being played. These will be images representing each state of the animation in the example above.

And this is an example of a rotating coin animation. We will create a 360-degree rotating coin animation with 6 different images as follows:

Assuming the duration is short enough (less than 1 second in this case), our animation will look very smooth with the same number of images.
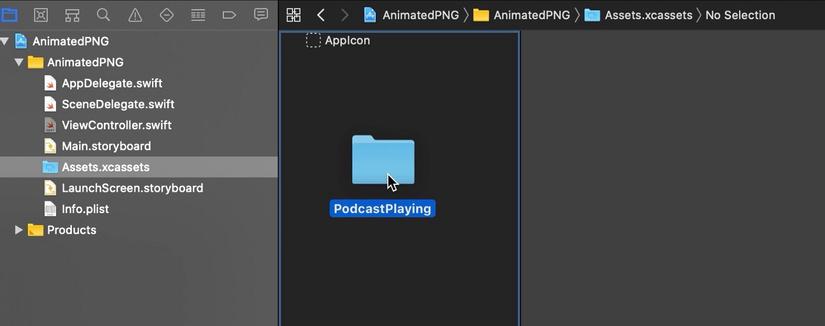
2. Add your images to the xcassets folder
Once you have the folder containing the images, open XCode, select the asset portfolio in the project, then drag and drop that folder into the XCode.
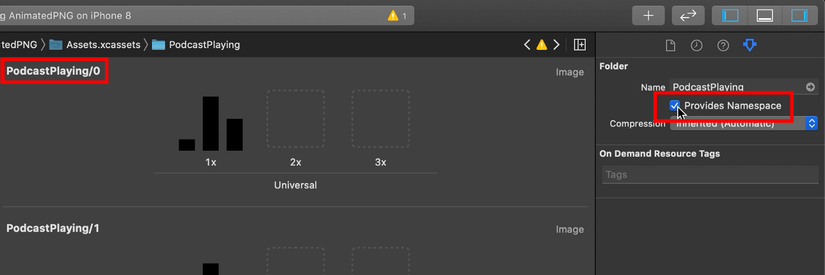
To make sure everything is under control, turn on the Provide Namespace option. This will make the asset accessible to FolderName / ImageName instead of ImageName .
3. Create an automatic image retriever
Now, we will put all the animations into your code. Create a function named animatedImages with the animation’s input parameter (corresponding to the name of the folder we created in the xcassets file in the previous step), and return an array of images. To avoid having to check how many component images you have, repeat from 0 until all the images are in the folder. This way, all images of the animation will be removed regardless of how many images there are and do not specify the number of images to load.
1 2 3 4 5 6 7 8 9 10 11 12 | func animatedImages(for name: String) -> [UIImage] { var i = 0 var images = [UIImage]() while let image = UIImage(named: "(name)/(i)") { images.append(image) i += 1 } return images } |
4. Configure ImageView to run the animation
We already have our image loader, so the final step is to place these images in the imageView and configure the animation to work. UIImageView has an inbuilt feature for animations, including some of the following customizable properties:
- Interval for
animationDuration:animationDuration. This interval is measured in seconds, showing how many seconds it will display all the images. If you have 10 images in the animation, displayed within 0.5 seconds, then each image will be displayed within 0.5 / 10 seconds. The default value of this time period parameter is 0. - Number of repetitions of
animationRepeatCount:animationRepeatCount. This attribute specifies the number of times that the animation will be repeated, a value of 0 means the animation will be repeated forever. Also, don’t forget to set theimageattribute to the first image of the animation, otherwise nothing will be displayed if the animation is not running.
1 2 3 4 5 6 | imageView.animationImages = animatedImages(for: "PodcastPlaying") imageView.animationDuration = 0.9 imageView.animationRepeatCount = 2 imageView.image = imageView.animationImages?.first imageView.startAnimating() |
5. An alternative is to use UIImage
Above, we have a way to implement using UIImageView , with some basic customizations. The UIImage class also has a property for creating an animation object, still based on an array of component images. One advantage of this option is to allow you to use the tintColor property to change the color of your animation. For the example above, we customized the colors for the animation as follows:
1 2 3 4 | let animatedImage = UIImage.animatedImage(with: images, duration: 1) imageView.image = animatedImage imageView.tintColor = UIColor.red |
In addition to color, another advantage of using UIImage is that we can use advanced features for UIImage , such as image stretching.
For more detailed information on animations, see the Apple documentation below:
https://developer.apple.com/documentation/uikit/uiimage/1624149-animatedimage https://developer.apple.com/documentation/uikit/uiimageview/1621068-animationimages
Summary
Animations are a good opportunity for us to add effects to the application. UIKit also has some features available to support some types of effects such as loading effects, lighting, rotating objects … Here is a quick summary of 5 steps to take to add animation. Figure into your application:
- Create a set of images for your animation
- Add your images to the xcassets folder of XCode
- Create an image retriever automatically
- Configure ImageView to run animation
- Alternatives