Nowadays, fingerprint authentication has become popular when online payments are so familiar to us.
Today’s article I want to focus on this topic, how can we deploy fingerprint authentication in Android, just 4 basic steps, let’s get started!
Step 1: Add permission permissions to AndroidManifest.xml
1 2 3 4 5 6 7 8 9 10 11 | <span class="token operator"><</span> manifest xmlns <span class="token operator">:</span> android <span class="token operator">=</span> <span class="token string">"http://schemas.android.com/apk/res/android"</span> <span class="token keyword">package</span> <span class="token operator">=</span> <span class="token string">"com.an.biometric"</span> <span class="token operator">></span> <span class="token operator"><</span> <span class="token operator">!</span> <span class="token operator">--</span> Step <span class="token number">1</span> <span class="token operator">:</span> Add the following permission to the app <span class="token operator">--</span> <span class="token operator">></span> <span class="token operator"><</span> uses <span class="token operator">-</span> permission android <span class="token operator">:</span> name <span class="token operator">=</span> <span class="token string">"android.permission.USE_BIOMETRIC"</span> <span class="token operator">/</span> <span class="token operator">></span> <span class="token operator"><</span> <span class="token operator">!</span> <span class="token operator">--</span> Step <span class="token number">2</span> <span class="token operator">:</span> This permission is depreciated in Android P <span class="token operator">--</span> <span class="token operator">></span> <span class="token operator"><</span> uses <span class="token operator">-</span> permission android <span class="token operator">:</span> name <span class="token operator">=</span> <span class="token string">"android.permission.USE_FINGERPRINT"</span> <span class="token operator">/</span> <span class="token operator">></span> <span class="token operator"><</span> <span class="token operator">/</span> manifest <span class="token operator">></span> |
Step 2: Check if the device supports biometric authentication
We will check the conditions:
- The device is running Android 6.0 and above
- The device has a fingerprint sensor
- The user has granted your application access to the fingerprint sensor.
- User has registered at least one fingerprint on their device.
We can create an Util class to test the above conditions: public class BiometricUtils {
1 2 3 4 5 6 7 8 9 10 11 12 13 14 15 16 17 18 19 20 21 22 23 24 25 26 27 28 29 30 31 32 33 34 35 36 37 38 39 40 41 42 43 44 45 46 47 48 49 50 51 52 53 54 55 56 57 58 59 60 61 | <span class="token keyword">public</span> <span class="token keyword">class</span> <span class="token class-name">BiometricUtils</span> <span class="token punctuation">{</span> <span class="token keyword">public</span> <span class="token keyword">static</span> <span class="token keyword">boolean</span> <span class="token function">isBiometricPromptEnabled</span> <span class="token punctuation">(</span> <span class="token punctuation">)</span> <span class="token punctuation">{</span> <span class="token keyword">return</span> <span class="token punctuation">(</span> Build <span class="token punctuation">.</span> VERSION <span class="token punctuation">.</span> SDK_INT <span class="token operator">>=</span> Build <span class="token punctuation">.</span> VERSION_CODES <span class="token punctuation">.</span> P <span class="token punctuation">)</span> <span class="token punctuation">;</span> <span class="token punctuation">}</span> <span class="token comment">/* * Condition I: Check if the android version in device is greater than * Marshmallow, since fingerprint authentication is only supported * from Android 6.0. * Note: If your project's minSdkversion is 23 or higher, * then you won't need to perform this check. * * */</span> <span class="token keyword">public</span> <span class="token keyword">static</span> <span class="token keyword">boolean</span> <span class="token function">isSdkVersionSupported</span> <span class="token punctuation">(</span> <span class="token punctuation">)</span> <span class="token punctuation">{</span> <span class="token keyword">return</span> <span class="token punctuation">(</span> Build <span class="token punctuation">.</span> VERSION <span class="token punctuation">.</span> SDK_INT <span class="token operator">>=</span> Build <span class="token punctuation">.</span> VERSION_CODES <span class="token punctuation">.</span> M <span class="token punctuation">)</span> <span class="token punctuation">;</span> <span class="token punctuation">}</span> <span class="token comment">/* * Condition II: Check if the device has fingerprint sensors. * Note: If you marked android.hardware.fingerprint as something that * your app requires (android:required="true"), then you don't need * to perform this check. * * */</span> <span class="token keyword">public</span> <span class="token keyword">static</span> <span class="token keyword">boolean</span> <span class="token function">isHardwareSupported</span> <span class="token punctuation">(</span> Context context <span class="token punctuation">)</span> <span class="token punctuation">{</span> FingerprintManagerCompat fingerprintManager <span class="token operator">=</span> FingerprintManagerCompat <span class="token punctuation">.</span> <span class="token function">from</span> <span class="token punctuation">(</span> context <span class="token punctuation">)</span> <span class="token punctuation">;</span> <span class="token keyword">return</span> fingerprintManager <span class="token punctuation">.</span> <span class="token function">isHardwareDetected</span> <span class="token punctuation">(</span> <span class="token punctuation">)</span> <span class="token punctuation">;</span> <span class="token punctuation">}</span> <span class="token comment">/* * Condition III: Fingerprint authentication can be matched with a * registered fingerprint of the user. So we need to perform this check * in order to enable fingerprint authentication * * */</span> <span class="token keyword">public</span> <span class="token keyword">static</span> <span class="token keyword">boolean</span> <span class="token function">isFingerprintAvailable</span> <span class="token punctuation">(</span> Context context <span class="token punctuation">)</span> <span class="token punctuation">{</span> FingerprintManagerCompat fingerprintManager <span class="token operator">=</span> FingerprintManagerCompat <span class="token punctuation">.</span> <span class="token function">from</span> <span class="token punctuation">(</span> context <span class="token punctuation">)</span> <span class="token punctuation">;</span> <span class="token keyword">return</span> fingerprintManager <span class="token punctuation">.</span> <span class="token function">hasEnrolledFingerprints</span> <span class="token punctuation">(</span> <span class="token punctuation">)</span> <span class="token punctuation">;</span> <span class="token punctuation">}</span> <span class="token comment">/* * Condition IV: Check if the permission has been added to * the app. This permission will be granted as soon as the user * installs the app on their device. * * */</span> <span class="token keyword">public</span> <span class="token keyword">static</span> <span class="token keyword">boolean</span> <span class="token function">isPermissionGranted</span> <span class="token punctuation">(</span> Context context <span class="token punctuation">)</span> <span class="token punctuation">{</span> <span class="token keyword">return</span> ActivityCompat <span class="token punctuation">.</span> <span class="token function">checkSelfPermission</span> <span class="token punctuation">(</span> context <span class="token punctuation">,</span> Manifest <span class="token punctuation">.</span> permission <span class="token punctuation">.</span> USE_FINGERPRINT <span class="token punctuation">)</span> <span class="token operator">==</span> PackageManager <span class="token punctuation">.</span> PERMISSION_GRANTED <span class="token punctuation">;</span> <span class="token punctuation">}</span> <span class="token punctuation">}</span> |
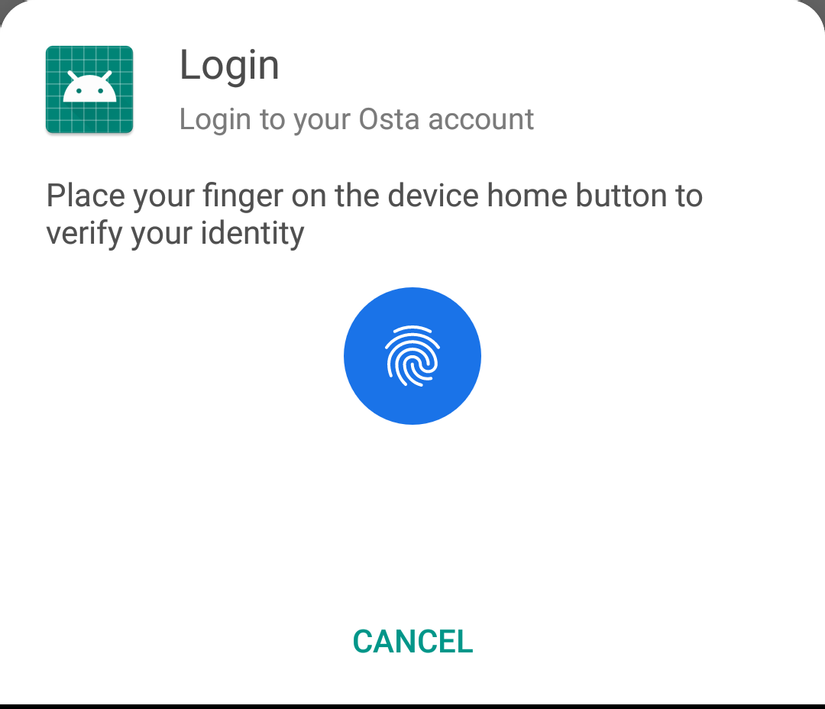
Step 3: Display the BiometricPrompt dialog
Once the conditions in step 2 have been verified, can we check if the Android version of the device is Android P? because BIometricPrompt dialog is only supported in Android P
1 2 3 4 5 6 7 8 9 10 11 12 13 14 15 | <span class="token annotation punctuation">@TargetApi</span> <span class="token punctuation">(</span> Build <span class="token punctuation">.</span> VERSION_CODES <span class="token punctuation">.</span> P <span class="token punctuation">)</span> <span class="token keyword">private</span> <span class="token keyword">void</span> <span class="token function">displayBiometricPrompt</span> <span class="token punctuation">(</span> <span class="token keyword">final</span> BiometricCallback biometricCallback <span class="token punctuation">)</span> <span class="token punctuation">{</span> <span class="token keyword">new</span> <span class="token class-name">BiometricPrompt <span class="token punctuation">.</span> Builder</span> <span class="token punctuation">(</span> context <span class="token punctuation">)</span> <span class="token punctuation">.</span> <span class="token function">setTitle</span> <span class="token punctuation">(</span> title <span class="token punctuation">)</span> <span class="token punctuation">.</span> <span class="token function">setSubtitle</span> <span class="token punctuation">(</span> subtitle <span class="token punctuation">)</span> <span class="token punctuation">.</span> <span class="token function">setDescription</span> <span class="token punctuation">(</span> description <span class="token punctuation">)</span> <span class="token punctuation">.</span> <span class="token function">setNegativeButton</span> <span class="token punctuation">(</span> negativeButtonText <span class="token punctuation">,</span> context <span class="token punctuation">.</span> <span class="token function">getMainExecutor</span> <span class="token punctuation">(</span> <span class="token punctuation">)</span> <span class="token punctuation">,</span> <span class="token keyword">new</span> <span class="token class-name">DialogInterface <span class="token punctuation">.</span> OnClickListener</span> <span class="token punctuation">(</span> <span class="token punctuation">)</span> <span class="token punctuation">{</span> <span class="token annotation punctuation">@Override</span> <span class="token keyword">public</span> <span class="token keyword">void</span> <span class="token function">onClick</span> <span class="token punctuation">(</span> DialogInterface dialogInterface <span class="token punctuation">,</span> <span class="token keyword">int</span> i <span class="token punctuation">)</span> <span class="token punctuation">{</span> biometricCallback <span class="token punctuation">.</span> <span class="token function">onAuthenticationCancelled</span> <span class="token punctuation">(</span> <span class="token punctuation">)</span> <span class="token punctuation">;</span> <span class="token punctuation">}</span> <span class="token punctuation">}</span> <span class="token punctuation">)</span> <span class="token punctuation">.</span> <span class="token function">build</span> <span class="token punctuation">(</span> <span class="token punctuation">)</span> <span class="token punctuation">;</span> <span class="token punctuation">}</span> |
Using the BiometricPrompt Builder, we can:
- setTitle () – Set a title to display (Required)
- setSubtitle () – Set subtitles to display (Optional)
- Description setDes () – Set a description to display (Optional)
- setNegativeButton () – Sets the text for the negative button (Required). You must also provide an Executor version and a click listener for the negative button. Note: You can customize the icon or error message used in a dialog.
Step 4: Handling authentication via callback functions
Next, we use BiometricPrompt.AuthenticationCallback to listen for authentication events from the user. It includes 4 methods:
onAuthenticationSceeded
This function will be run when the fingerprint has been successfully matched to one of the registered fingerprints on the device, from which the object will be authenticated.
onAuthenticationFails
This function will be run when the fingerprint does not match any fingerprint registered on the device, this callback will be triggered.
onAuthenticationError
This function will be run when an unrecoverable error is encountered and the authentication process has completed without success. The function is provided with an error code to identify the cause of the error, along with an error message. The different types of error codes that can occur are:
- BIOMETRIC_ERROR_LOCKOUT THEM Operation was canceled because the API was locked due to too many attempts.
- BIOMETRIC_ERROR_LOCKOUT_PERMANENT – The operation was canceled because BIOMETRIC_ERROR_LOCKOUT happened too many times.
- BIOMETRIC_ERROR_NOClickACE – The operation could not be completed because there is not enough space to complete the operation.
- BIOMETRIC_ERROR_TIMEOUT – The timeout occurred because the current request has run too long.
- BIOMETRIC_ERROR_UNABLE_TO_PROCESS – The sensor cannot process the current image.
- BIOMETRIC_ERROR_USER_CANCELED – The user has canceled the operation.
- BIOMETRIC_ERROR_VENDOR – If there are conditions that do not fall into any of the above categories.
- BIOMETRIC_ERROR_NO_BIOMETRICS – User does not have any biometrics registered in the device.
- BIOMETRIC_ERROR_CANCELED – The operation was canceled because the biometric sensor is not available.
- BIOMETRIC_ERROR_HW_NOT_PRESENT – Devices without biometric sensors.
- BIOMETRIC_ERROR_HW_UNAVAILABLE – Device hardware not available.
onAuthenticationHelp
This function is called when a non-fatal error occurred during validation. The callback will be provided with a help code to identify the cause of the error, along with a help message. The different types of help codes that can occur are:
- BIOMETRIC_ACQUIRED_IMAGER_DIRTY – The biometric image is too noisy due to suspected dust on the sensor.
- BIOMETRIC_ACQUIRED_INSUFFICIENT – Biometric image too noisy to process. This could be for a variety of reasons but in general this is due to the image being unreadable.
- BIOMETRIC_ACQUIRED_PARTIAL – Only one biometric image was detected.
- BIOMETRIC_ACQUIRED_TOO_FAST – The biometric image is incomplete because the user moves their finger around the sensor too quickly.
- BIOMETRIC_ACQUIRED_TOO_SLOW – Biometric image could not be read due to lack of movement from the user around the sensor.
1 2 3 4 5 6 7 8 9 10 11 12 13 14 15 16 17 18 19 20 21 22 23 24 25 26 27 28 29 30 31 32 33 34 35 36 37 | <span class="token annotation punctuation">@RequiresApi</span> <span class="token punctuation">(</span> api <span class="token operator">=</span> Build <span class="token punctuation">.</span> VERSION_CODES <span class="token punctuation">.</span> P <span class="token punctuation">)</span> <span class="token keyword">public</span> <span class="token keyword">class</span> <span class="token class-name">BiometricCallbackV28</span> <span class="token keyword">extends</span> <span class="token class-name">BiometricPrompt <span class="token punctuation">.</span> AuthenticationCallback</span> <span class="token punctuation">{</span> <span class="token keyword">private</span> BiometricCallback biometricCallback <span class="token punctuation">;</span> <span class="token keyword">public</span> <span class="token function">BiometricCallbackV28</span> <span class="token punctuation">(</span> BiometricCallback biometricCallback <span class="token punctuation">)</span> <span class="token punctuation">{</span> <span class="token keyword">this</span> <span class="token punctuation">.</span> biometricCallback <span class="token operator">=</span> biometricCallback <span class="token punctuation">;</span> <span class="token punctuation">}</span> <span class="token annotation punctuation">@Override</span> <span class="token keyword">public</span> <span class="token keyword">void</span> <span class="token function">onAuthenticationSucceeded</span> <span class="token punctuation">(</span> BiometricPrompt <span class="token punctuation">.</span> AuthenticationResult result <span class="token punctuation">)</span> <span class="token punctuation">{</span> <span class="token keyword">super</span> <span class="token punctuation">.</span> <span class="token function">onAuthenticationSucceeded</span> <span class="token punctuation">(</span> result <span class="token punctuation">)</span> <span class="token punctuation">;</span> biometricCallback <span class="token punctuation">.</span> <span class="token function">onAuthenticationSuccessful</span> <span class="token punctuation">(</span> <span class="token punctuation">)</span> <span class="token punctuation">;</span> <span class="token punctuation">}</span> <span class="token annotation punctuation">@Override</span> <span class="token keyword">public</span> <span class="token keyword">void</span> <span class="token function">onAuthenticationHelp</span> <span class="token punctuation">(</span> <span class="token keyword">int</span> helpCode <span class="token punctuation">,</span> CharSequence helpString <span class="token punctuation">)</span> <span class="token punctuation">{</span> <span class="token keyword">super</span> <span class="token punctuation">.</span> <span class="token function">onAuthenticationHelp</span> <span class="token punctuation">(</span> helpCode <span class="token punctuation">,</span> helpString <span class="token punctuation">)</span> <span class="token punctuation">;</span> biometricCallback <span class="token punctuation">.</span> <span class="token function">onAuthenticationHelp</span> <span class="token punctuation">(</span> helpCode <span class="token punctuation">,</span> helpString <span class="token punctuation">)</span> <span class="token punctuation">;</span> <span class="token punctuation">}</span> <span class="token annotation punctuation">@Override</span> <span class="token keyword">public</span> <span class="token keyword">void</span> <span class="token function">onAuthenticationError</span> <span class="token punctuation">(</span> <span class="token keyword">int</span> errorCode <span class="token punctuation">,</span> CharSequence errString <span class="token punctuation">)</span> <span class="token punctuation">{</span> <span class="token keyword">super</span> <span class="token punctuation">.</span> <span class="token function">onAuthenticationError</span> <span class="token punctuation">(</span> errorCode <span class="token punctuation">,</span> errString <span class="token punctuation">)</span> <span class="token punctuation">;</span> biometricCallback <span class="token punctuation">.</span> <span class="token function">onAuthenticationError</span> <span class="token punctuation">(</span> errorCode <span class="token punctuation">,</span> errString <span class="token punctuation">)</span> <span class="token punctuation">;</span> <span class="token punctuation">}</span> <span class="token annotation punctuation">@Override</span> <span class="token keyword">public</span> <span class="token keyword">void</span> <span class="token function">onAuthenticationFailed</span> <span class="token punctuation">(</span> <span class="token punctuation">)</span> <span class="token punctuation">{</span> <span class="token keyword">super</span> <span class="token punctuation">.</span> <span class="token function">onAuthenticationFailed</span> <span class="token punctuation">(</span> <span class="token punctuation">)</span> <span class="token punctuation">;</span> biometricCallback <span class="token punctuation">.</span> <span class="token function">onAuthenticationFailed</span> <span class="token punctuation">(</span> <span class="token punctuation">)</span> <span class="token punctuation">;</span> <span class="token punctuation">}</span> <span class="token punctuation">}</span> |
Conclude
So with 4 basic steps, we can deploy the fingerprint login authentication into our project
References
https://proandroiddev.com/5-steps-to-implement-biometric-authentication-in-android-dbeb825aeee8