The content of the article is completely theoretical so that you have an overview of what Nginx has and what to do. So today I’m going to learn how to configure Nginx for your project. Hopefully the article will be useful to you.
Setting
Installing Nginx from supplies including third-party modules makes Nginx much more powerful. It allows us to customize it to fit the needs of the application.
Use Debian to install.
1 2 3 | sudo apt-get update sudo apt-get install nginx |
The way you can check that the above command has successfully installed Nginx is to use the version checking command.
1 2 | nginx -v |
Result  The webserver you just installed will have installation information at
1 2 | /etc/nginx/ |
These are the folders and files inside it 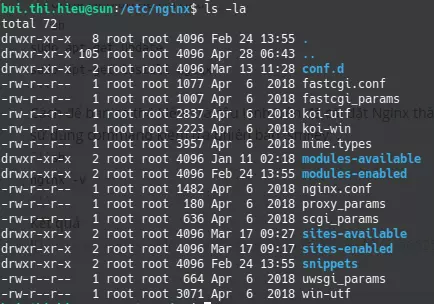
As you can see, there are quite a lot of folders and files inside. However, we only need to pay special attention to nginx.conf and the sites-available directory.
Configuration
By default, the nginx.conf file will look like this:
1 2 3 4 5 6 7 8 9 10 11 12 13 14 15 16 17 18 19 20 21 22 23 24 25 26 27 28 29 30 31 32 33 34 35 36 37 38 39 40 41 42 43 44 45 46 47 48 49 50 51 52 53 54 55 56 57 58 59 60 61 62 63 64 65 66 67 68 69 70 71 72 73 74 75 76 77 78 79 80 81 82 83 84 85 86 | user www-data; worker_processes auto; pid /run/nginx.pid; include /etc/nginx/modules-enabled/*.conf; events { worker_connections 768; # multi_accept on; } http { ## # Basic Settings ## sendfile on; tcp_nopush on; tcp_nodelay on; keepalive_timeout 65; types_hash_max_size 2048; # server_tokens off; # server_names_hash_bucket_size 64; # server_name_in_redirect off; include /etc/nginx/mime.types; default_type application/octet-stream; ## # SSL Settings ## ssl_protocols TLSv1 TLSv1.1 TLSv1.2; # Dropping SSLv3, ref: POODLE ssl_prefer_server_ciphers on; ## # Logging Settings ## access_log /var/log/nginx/access.log; error_log /var/log/nginx/error.log; ## # Gzip Settings ## gzip on; # gzip_vary on; # gzip_proxied any; # gzip_comp_level 6; # gzip_buffers 16 8k; # gzip_http_version 1.1; # gzip_types text/plain text/css application/json application/javascript text/xml application/xml application/xml+rss text/javascript; ## # Virtual Host Configs ## include /etc/nginx/conf.d/*.conf; include /etc/nginx/sites-enabled/*; } #mail { # # See sample authentication script at: # # http://wiki.nginx.org/ImapAuthenticateWithApachePhpScript # # # auth_http localhost/auth.php; # # pop3_capabilities "TOP" "USER"; # # imap_capabilities "IMAP4rev1" "UIDPLUS"; # # server { # listen localhost:110; # protocol pop3; # proxy on; # } # # server { # listen localhost:143; # protocol imap; # proxy on; # } #} |
The file is structured into Contexts . The first is the events context , the next is the http context and the last is an example to configure mail. The above structure allows for some advanced configuration classes. Because in each context there may be other nested contexts that can inherit from their parents and it is also possible to override when needed.
Many things in this file can be customized based on your needs. However, with the simplicity of Nginx, you can completely use the default configuration without any modification. With the current reality as I did not edit this file  . Some important parts of this configuration file are:
- worker_processes: Determine the number of worker processes that Nginx will use. Because Nginx is a single thread, this number is usually equal to the number of cores of the CPU.
- worker_connections: This is the maximum number of connections at a time per worker process and indicates how many users the worker process can be served simultaneously by Nginx. The larger this number, the higher the number of users served by Nginx.
- access_log and error_log: These are the files that Nginx uses to record errors and access.
- gzip: These are the settings for compressing the GZIP of the responses. Activating this setting along with the other sub-settings by default will increase performance.
Installing Nginx is possible for more than one site and server identification files. Your sites are located in /etc/nginx/sites-available .
The sites-available directory includes configurations for virtual hosts. This allows the web server to be configured for many specially configured websites. The sites in this directory don’t work and are only enabled if we create a sumbolic link to the /etc/nginx/sites-enabled .
We try with a configuration file defined in the Laravel document
1 2 3 4 5 6 7 8 9 10 11 12 13 14 15 16 17 18 19 20 21 22 23 24 25 26 27 28 29 30 31 32 33 34 | server { listen 80; server_name example.com; root /example.com/public; add_header X-Frame-Options "SAMEORIGIN"; add_header X-XSS-Protection "1; mode=block"; add_header X-Content-Type-Options "nosniff"; index index.html index.htm index.php; charset utf-8; location / { try_files $uri $uri/ /index.php?$query_string; } location = /favicon.ico { access_log off; log_not_found off; } location = /robots.txt { access_log off; log_not_found off; } error_page 404 /index.php; location ~ .php$ { fastcgi_pass unix:/var/run/php/php7.2-fpm.sock; fastcgi_index index.php; fastcgi_param SCRIPT_FILENAME $realpath_root$fastcgi_script_name; include fastcgi_params; } location ~ /.(?!well-known).* { deny all; } } |
Like nginx.conf , the file as above is defined in the nested context. The server context defines a specific virtual server to handle user requests. You can have multiple server blocks and Nginx will choose between them based on listen and server_name .
In the server block, we define multiple location contexts that are used to decide how to handle client requests. Whenever a request comes in, Nginx will try to compare its URI with one of the appropriate locations from which to provide appropriate handling.
Some important content is used in location context :
- try_files will try to serve a static file in the directory pointing to root.
- proxy_pass will send a request to a specified proxy server.
- The rewrite will override the incoming URI based on the regex so a location block will be able to handle it.
Start Nginx
After a long series of steps to configure Nginx for your server as above, we can then start Nginx as follows:
1 2 | sudo service nginx start |
And when you make any changes in Nginx configuration, you need to reboot (without down time) as follows:
1 2 | sudo service nginx reload |
To check the status of Nginx:
1 2 | service nginx status |
Stop Nginx service:
1 2 | sudo service nginx stop |
Stop and restart Nginx
1 2 | sudo service nginx restart |
Conclude
This article is a basic starting point for you to configure Nginx for your own applications. However, as you see the above configuration information is completely in the form of copy / paste and still do not understand each command line with the purpose, Let’s find out them in the following articles.