Hi everyone, welcome back to my Docker and CICD series
In the previous article, we docked the VueJS and ReactJS applications together with the related issues in the process of getting used to Docker.
In this post, we will dockerize a Laravel app together
Let’s get started
Money Setup
Remember to check that you have installed Docker and Docker-compose already. If not, then check the end of your previous post to know how to install it.
Setup
Remember to check that you have installed Docker and Docker-compose already. If not, then check the end of your previous post to know how to install it.
Setup Clone source code here
In this article, we will only need to consider one folder in the source code above that is docker- laravel
In the above directory, I have created for you a Laravel project. If you have PHP, composer installed, you can run it to check it out. If not, then still ok, just keep “zin” for your root and Docker will take care of all
Build Docker Image
Shake the brain
For project Laravel will be “a bit harder” when dockerize, so I will analyze for you first, and then we will configure the environment based on analysis offline.
- To run a simple Laravel project (like this article) we need PHP and composer (not to mention DB, redis, ….)
- To run PHP code we need a friend called “handler”, which means that PHP code does not have to work immediately, it needs to have a friend who is responsible for executing PHP code. And at the moment, PHP-FPM is the most popular, so we will use PHP-FPM
- Often, the fact is that most of us will use it with a webserver like Apache or Nginx in running PHP applications (Laravel). Because Nginx is now extremely popular and powerful far superior to Apache. So we will use Nginx
Therefore this article we will split the application into 2 parts as follows:
- One part contains PHP-FPM, which includes everything related to composers, libraries, and setups, because php-fpm is in charge of running the code.
- Part of the Nginx webserver acts as a doorman, standing outside, when a request is sent to the doorman he will do some tasks and send the request in for php-fpm inside to handle it.
So you will see later we have 2 corresponding services in the file docker-compose.yml , not one as the previous post offline.
Configure Dockerfile
In this article Nginx we do not need any complicated configuration so we will not need 1 Dockerfile for you, but later we will use the built-in Nginx image directly.
Here we just need to write the Dockerfile configuration for php-fpm
In the docker-laravel folder you create the Dockerfile file with the following content:
1 2 3 4 5 6 7 8 9 10 11 12 13 14 15 | <span class="token comment"># Set master image</span> <span class="token keyword">FROM</span> php <span class="token punctuation">:</span> 7.2 <span class="token punctuation">-</span> fpm <span class="token punctuation">-</span> alpine <span class="token comment"># Set working directory</span> <span class="token keyword">WORKDIR</span> /var/www/html <span class="token comment"># Install PHP Composer</span> <span class="token keyword">RUN</span> curl <span class="token punctuation">-</span> sS https <span class="token punctuation">:</span> //getcomposer.org/installer <span class="token punctuation">|</span> php <span class="token punctuation">-</span> <span class="token punctuation">-</span> <span class="token punctuation">-</span> <span class="token punctuation">-</span> install <span class="token punctuation">-</span> dir=/usr/local/bin <span class="token punctuation">-</span> <span class="token punctuation">-</span> filename=composer <span class="token comment"># Copy existing application directory permissions</span> <span class="token keyword">COPY</span> <span class="token punctuation">-</span> <span class="token punctuation">-</span> chown=www <span class="token punctuation">-</span> data <span class="token punctuation">:</span> www <span class="token punctuation">-</span> data . . <span class="token comment"># Change current user to www-data</span> <span class="token keyword">USER</span> www <span class="token punctuation">-</span> data |
I will explain the important points in the Dockfile file:
- First we start from the image named php: 7.2-fpm-alpine (I take it here )
- Next we navigate to / var / www / html
- Next we install the composer, so we can install the php libraries
- Next, we COPY the entire current folder in the external environment to the current path in Image, which is WORKDIR. At the same time we copy to the image under the “name” of the user named www-data
- Why is it necessary to copy under the “name” of a user named www-data ? Because by default the containers will be run as root, so to restrict the permissions for the user running this project, we create a user and group named www-data , this user will have the right to read and write the files we just copied to the path. / var / www / html, but not elsewhere. You can choose a name other than www-data offline (optional
 )
)
Where can I see CMD ??? In the first post, I said that I need a CMD at the end of Dockerfile to run, but ???
Let’s get to the root of the image php: 7.2-fpm-alpine here . Scroll down to the bottom and you will see the following lines:
1 2 3 | EXPOSE 9000 CMD ["php-fpm"] |
Above you can see that the image php: 7.2-fpm-alpine itself has already run CMD for us, so when running Docker you will see that “the container is still in active state”  , that’s why in our Dockerfile we don’t need CMD anymore
At the same time, please pay attention to your line above EXPOSE 9000 , pay attention to yourself that line, let me explain later 
Build Image
And as usual as the other posts, to build the image, we run the following command:
1 2 | docker build -t learning-docker/laravel:v1 . |
Configure docker-compose
We create the file docker-compose.yml with the following content:
1 2 3 4 5 6 7 8 9 10 11 12 13 14 15 16 17 18 19 20 | <span class="token key atrule">version</span> <span class="token punctuation">:</span> <span class="token string">'3.4'</span> <span class="token key atrule">services</span> <span class="token punctuation">:</span> <span class="token comment">#PHP Service</span> <span class="token key atrule">app</span> <span class="token punctuation">:</span> <span class="token key atrule">image</span> <span class="token punctuation">:</span> learning <span class="token punctuation">-</span> docker/laravel <span class="token punctuation">:</span> v1 <span class="token key atrule">restart</span> <span class="token punctuation">:</span> unless <span class="token punctuation">-</span> stopped <span class="token key atrule">volumes</span> <span class="token punctuation">:</span> <span class="token punctuation">-</span> ./ <span class="token punctuation">:</span> /var/www/html <span class="token comment">#Nginx Service</span> <span class="token key atrule">webserver</span> <span class="token punctuation">:</span> <span class="token key atrule">image</span> <span class="token punctuation">:</span> nginx <span class="token punctuation">:</span> 1.17 <span class="token punctuation">-</span> alpine <span class="token key atrule">restart</span> <span class="token punctuation">:</span> unless <span class="token punctuation">-</span> stopped <span class="token key atrule">ports</span> <span class="token punctuation">:</span> <span class="token punctuation">-</span> <span class="token string">"8000:80"</span> <span class="token key atrule">volumes</span> <span class="token punctuation">:</span> <span class="token punctuation">-</span> ./ <span class="token punctuation">:</span> /var/www/html <span class="token punctuation">-</span> ./nginx.conf <span class="token punctuation">:</span> /etc/nginx/conf.d/default.conf |
I did follow the previous songs too
But also need to explain some of the above for you to wonder:
- In the service app I have mounted (or more simply interpreted as mapping) a volume from the current folder into the container inside the path / var / www / html , what you can see at the end of the article
- In the webserver service, we just mounted the current folder inside / var / www / html and also mounted the nginx.conf file in the current folder inside the container at /etc/nginx/conf.d/default.conf. . Because nginx can understand php and operate properly, we need to add a little config so that when launched, Nginx will read the config file and operate correctly, that config file will be defined in the next section. Please
Nginx configuration
All the previous posts have finished building Image, it should work but this article we need to configure Nginx a little more, because we will use Nginx as a webserver later 
In the docker-laravel root folder, we create the nginx.conf file with the following content:
1 2 3 4 5 6 7 8 9 10 11 12 13 14 15 16 17 18 19 20 21 22 23 24 25 | server { listen 80; index index.php index.html; error_log /var/log/nginx/error.log; access_log /var/log/nginx/access.log; root /var/www/html/public; location ~ .php$ { try_files $uri =404; fastcgi_split_path_info ^(.+.php)(/.+)$; fastcgi_pass app:9000; fastcgi_index index.php; include fastcgi_params; fastcgi_param SCRIPT_FILENAME $document_root$fastcgi_script_name; fastcgi_param PATH_INFO $fastcgi_path_info; fastcgi_hide_header X-Powered-By; } location / { try_files $uri $uri/ /index.php?$query_string; } } |
Above you notice the line fastcgi_pass app: 9000; : when there is a request sent to nginx, nginx will forward that request to PHP-FPM listening on the host named app and port 9000 .
Explain a bit:
Where is the host named app ? That is the address of the service app. This name will have to match the name of the service we define in the docker-compose file.
Where is 9000 port, did the docker-compose file have a port port? Then you review the configuration of the Dockerfile above the last paragraph we have tested the image php: 7.2-fpm-alpine and saw the EXPOSE 9000 segment, this is a very important point that I want you to notice.
EXPOSE 9000 aims to say: I accept for other containers to communicate with me at port 9000
Notice the difference between mapping port in previous posts and EXPORT port in this article:
- Mapping port aims to help the outside world communicate with containers
- Export port is to help the containers to communicate with each other, on the webserver will need to send requests to the app , so the app must expose port 9000, but the webserver does not need to expose because no one calls it.
- In the outside world, you will not be able to access the service app on port 9000 but the webserver is possible
If you are still wondering about whether or not you need EXPOSE and what it means, read the comment with one question you asked and I did the demo directly explained.
Run the project
Done all the configuration then time to run the project only. You run the following command:
1 2 | docker-compose up |
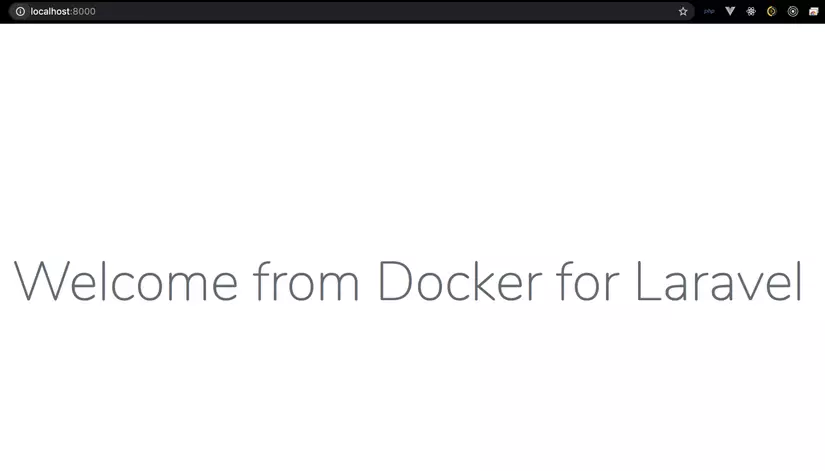
Then open your browser and you should see the following:

That’s because we haven’t run composer install yet , the reason why we didn’t run right when the image was built is to look at the end of this article.
And this command must be run in the container of the service app , because on the webserver is only responsible for “guarding the door” only, no php or composer at all, if we run there will command error not found
To run composer install we have 2 ways:
- Get inside the app container
- Stand outside and run
I will use method 2 for convenience, you run the following command:
1 2 | docker-compose exec app composer install |
Wait for the command to finish running and return to F5 browser and see:

That’s because we haven’t generated the key for the project yet, but don’t click the “generate app key” button, we do it manually for “dangerous”. , run the following command to generate the key:
1 2 | docker-compose exec app php artisan key:generate |
Then we return to F5 browser again and ….:
Related questions
Why not run composer install right after the build image?
The answer is that you can have composer install in Dockerfile so that command is run at the time of building the image. If so, we need to comment the mount volume of the service app again and everything will work normally
But in the next article we will need to fix the code directly outside and inside the container will have to be updated to see changes in the browser, so we have to mount the service app’s volume.
Yeah, so mount the volume of the service app, what happens?
When we mount the service app’s volume from the outside into the container, when the container is initialized, all the files from the outside will be overwritten inside the container, resulting in the vendor vendor folder (made by composer install) being corrupted. lost in the container, because in the environment we don’t have a vendor
So in this article I am familiar with you and from the following articles, we all run composer after installation, not in the Dockerfile file.
I rebuilt the image and when I “crawl” into the app container, I see the nginx.conf file, is it necessary?
It is true that the service app doesn’t need nginx.conf file, the service app is responsible for executing PHP code, and the new nginx service needs that file.
By default, when building the image will take all the files in the current folder and build, if you want to remove one or several files / folders, we need to create a file called .dockerignore , its role is y like .gitignore , and the syntax is the same.
For example, in our lesson, we created the .dockerignore file with the following content:
1 2 | nginx.conf |
Then when building image file nginx.conf will be ignored and our app container will not have that file when running, reduce the size of the image to
Remember this .dockerignore file, we will use it a lot
At the top of the Dockerfile configuration section, the paragraph explains why there is no need for CMD, so why doesn’t the same thing happen in the Dockerize NodeJS application?
If you notice in the Dockerize NodeJS application in the Dockerfile file, we still have to have a CMD, although when we went to the configuration of the image node: 13-alpine here, we also saw people writing CMD [“node”]
So why don’t we need this article ??
Because the reason in the Dockerize NodeJS application we need to run CMD is npm start , and that CMD will “overwrite” the CMD that the node image : 13-alpine has already declared
For this article, we have no special requirements and we can use the default CMD image php: 7.2-fpm-alpine provided
A little confusing, you pay attention to yourself
summary
Another post with lots of new things, .
In this article, you have a lot of new concepts, not just Docker but now Linux and Webserver, reading blogs but sometimes the mind is spinning. There are many parts of my mind that I can explain but I am not sure I can understand. This article I will have to review and edit a lot to help readers easier to understand.
I advise you to slowly calm down, at first “accept” and use it, then work and study and learn more and recognize the truth.
Through this article there are some important content I want to say as follows:
- EXPOSE PORT, distinguishes EXPOSE PORT from Mapping Port
- Use .dockerignore to remove any files we don’t want when building the image
I personally find the dockerize of Laravel application quite confusing, but once you get used to it, it will be really useful, not only teach us knowledge of Docker but also the knowledge related to Linux and webserver ( nginx). This Project Laravel has only Hello World, until the post with MySQL, Redis, Queue, Horizon, Schedule task, … then it was really a challenge.
In this article we have not yet done the support for fixing the code directly from the outside and see the change right in the browser, we just go slowly, slowly you guys
If you have any questions, please leave a comment to let me know.
Source code for this article I put here (branch complete tutorial )
Thank you all so much for watching and see you guys in the future