Kubernetes is an open source system for automating the deployment, scaling, and management of containerized applications (container docker).
Learning and leveraging kubernetes are valuable skills that you can learn to succeed in deploying and scaling your application. I will guide you step-by-step to apply kubernetes to your application deployment. This first part I will guide you to familiarize yourself with docker and deploy applications using docker
1. Build a small application to do
We will build an installation with Spring Boot. We will use bootstrapping Spring initializr to quickly build our application framework.
First, you need to access https://start.spring.io to generate a framework for the application
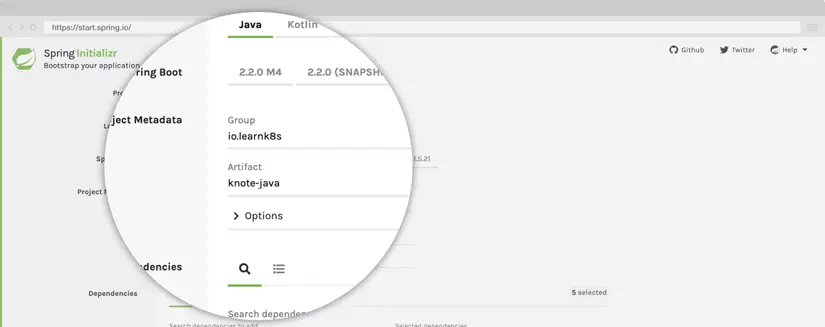
Enter the group and name for the application:
- GroupId: learnk8s.io
- Name: knote-java
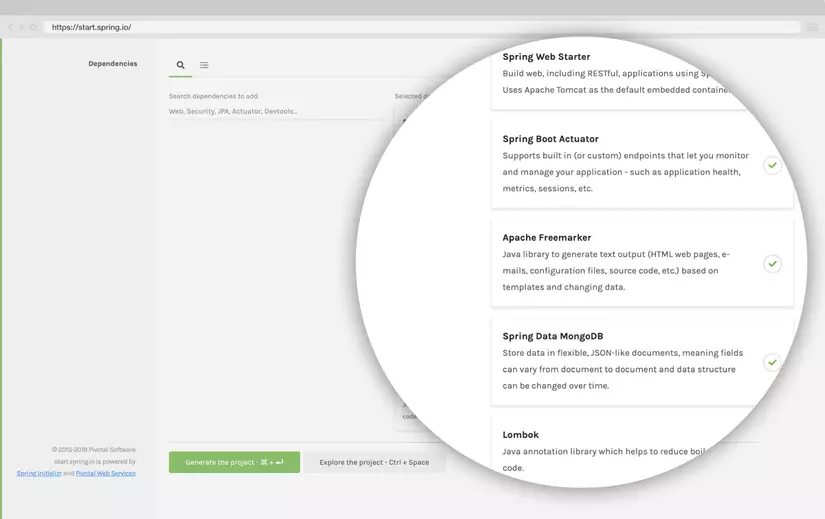
Next, go to the dependencies section and choose;
- Web -> Spring Web Starter: basic web support in Spring Boot
- Actuator -> Spring Boot Actuator: provides health endponts to check application status
- FreeMarket -> Apache FreeMarket: templating engine for HTMLs
- LomboK -> Lombok: Libraries that generate commonly used pre-written functions such as getter, setter, …
Then click on generate the project to download the zip file containing the framework for your project. Unzip the file and use the IDE you use and launch it as a maven project.
Front End:
Go to src / main / resources, create the template directory. Then you create the file index.ftl
Next, create a static directory in src / main / resources, and then create the file app.min.css:
The back end:
Now in the file src / main / java / io / learnk8s / knote-java / KnoteJavaApplication.java
Create the file src / main / resources / application.properties to configure connecting to mongodb:
Create the directory src / main / java / io / learnk8s / knote-java / entities. Then create class NoteEntity.java
Create the directory src / main / java / io / learnk8s / knote-java / repositories. Then create the class NotesRepository.java
We will use commonmark-java letter to parse notes and render HTML
Create the directory src / main / java / io / learnk8s / knote-java / controller. Then create the class KNoteController.java
Create the directory src / main / java / io / learnk8s / knote-java / config:
- Create class KnoteProperties.java
- Create class KnoteConfig.java
Here we create 2 APi: one is a list of notes, and the other is a list of notes. So we have completed the functionality of the application.
Database installation
You can install MongoDB according to this tutorial the official MongoDB documentation
When the installation is complete, launch the MongoDB server:
1 2 | $ mongod |
Now let’s run the application:
1 2 | mvn clean install spring-boot:run |
The application runs on port 8080. You can access the application on http: // localhost: 8080
Try making a note and viewing it on the web page.
2. Use docker for deploy
Install docker for your machine: https://docs.docker.com/engine/install/ubuntu/ . After the installation is complete, continue to the instructions below.
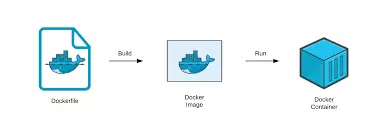
Create a DockerFile file in the root project
- ‘From’ defines the base layer for the container, which is OpenJDK11 in our case
- ‘WORKDIR’ sets the working directory to / opt /. Any further instructions will run in that directory
- ‘ENV’ is used to set an environment variable
- ‘COPY’ copies the jar files from / target / to the / opt / directory inside the container
- ‘ENTRYPOINT’ executes the java $ JAVA_OPTS-jar app.jar command inside the container
Now we build an image for our application:
1 2 | $ docker build -t knote-java . |
- -t knote-javaa let xavs assign the name (“tag”) of your image, as above is knote-java
- . is the location of the Dockerfile and the application code – in this case, it’s the current directory. Understanding the image: it is a repository of all the files that will run in the container, an image can create multiple containers, one container will correspond to one application
Check the list of images you use the following command!
1 2 | $ docker images |
Now we will run our application using docker
Here we will run 2 containers, one for our knote application and the other for MongoDB. We will use the knote-java image to create the container for the knote and the mongo image for the MongoDB container. Image mongo is provided on Docker hug First, we will create a network to connect 2 containers. Run the command
1 2 | docker network create knote |
Then run mongo:
1 2 | $ docker run --name=mongo --rm --network=knote mongo |
- –name to specify a name for the container, if you do not define a specific name, it will be generated automatically
- –rm to automatically delete containers and delete system files when a container of the image exists
- – The network represents the Docker network that the same container will run – when omitted, the zone will not run in the default network
- butt is the name of the image.
Now we will run knote-java:
1 2 | $ docker run --name=knote-java --rm --network=knote -p 8080:8080 -e MONGO_URL=mongodb://mongo:27017/dev knote-java |
- p 8080: 8080: to publish port 8080 for the container to port 8080 of the local machine. This means, when you access an application via port 8080 on your computer, it will request to port 8080 of the Knote container. This makes it possible to access your applications on the local machine
- -e to set the environment variable inside the container
- MONGO_URL is the environment variable for the application we connect to MongoDB. One thing to note here is why it is not an id address like 127.0.0.1 but a mongo. Then in docker has created dns network, so that the containers can connect with each other by name. Now you can test your application by going to: http: // localhost: 8080
Deploy to the server
Note you need to install docker for your server first! We will push the image to the Docker hub:
1 2 | docker tag knote-java <username>/knote-java:1.0.0 |
Be careful to change <username> with the username on your DockerHub account. The above command lets us rename the image to push to your repository on Docker Hub Now push the image up with the command:
1 2 | docker push username/knote-java:1.0.0 |
And show access to the server and run the commands:
1 2 3 4 | $ docker network create knote $ docker run --name=knote-java --rm --network=knote -p 8080:8080 -e MONGO_URL=mongodb://mongo:27017/dev knote-java $ docker run --name=knote-java --rm --network=knote -p 8080:8080 -e MONGO_URL=mongodb://mongo:27017/dev knote-java:1.0.0 |
Please visit <server_ip>: 8080 to access your app!
So the diapers have completed deploying using docker!
Note if you do not want to push the image to Docker Hub. Please push your code to github and clone to the machine on the server and perform the same steps as running the application by docker locally So in this article I have shown you how to deploy the application using docker! Next article I will guide you to deploy using kubernetes Reference: https://learnk8s.io/spring-boot-kubernetes-guide