Preamble
To continue the Dapp build series, this article will guide you to build sample Dapp with the vuejs framework. Basically, we will build an application based on smart cotnract that was built in the first article: Building smart contract.
We will basically use the existing smart contract and build an application to transfer tokens as we did with React. For Vuejs, there are a few things that need to be changed, but the ideas are basically the same

Prepare
Just like init react , just run the command
1 2 | vue create vue <span class="token operator">-</span> frontend |
- Note: the vue version you use is vue 3, so if you are using the older versions (1.x or 2.x), you can uninstall it with the commands npm uninstall vue-cli -g or yarn global remove vue-cli .
In case you do not have vue , you can install it via the following command:
1 2 3 4 | <span class="token function">npm</span> <span class="token function">install</span> -g @vue/cli <span class="token comment"># OR</span> yarn global add @vue/cli |
Once completed, the directory structure will look like this: 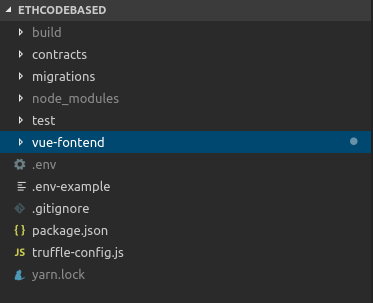
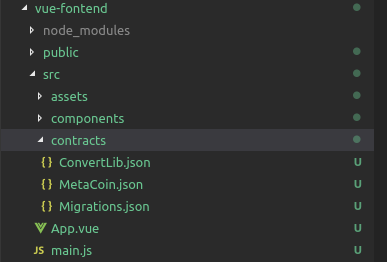
Continuing, we will add the migrated contracts to the vue-fronted src folder – this step is similar to the react side
Application deployment
For those of you who are just using react , vue components are designed to be quite different when it contains both js , html and css – for me, I find this design quite convenient and more compact than react.
In the framework of the article only shows how to interact with smart contracts, so I will not talk about the file structure as well as the division of components or views , with the demo, I will code directly on the App.vue component.
Other than having to add enough combo action , reducer , store or add a middleware (I use thunk) as react, with just one store vue is enough.
Note: The biggest difference that you need to keep in mind when deciding whether to use react or vue to build is that it comes with the corresponding State manager, redux and vuex . The biggest difference here is that redux is immuatble and vuex is mutable. The states in react will be immutable, states that cannot be modified but can only be completely changed (as in the previous lesson, we can see that the reducers use syntax … the purpose state to reuse the old state . Combine with new variables to create new state ). For vuex , their idea is that we can change the state directly. It is difficult to talk about which is better, depending on each person’s purpose
Add 2 vuex and web3 packages to package.json :
1 2 3 4 5 6 7 | <span class="token string">"dependencies"</span> <span class="token punctuation">:</span> <span class="token punctuation">{</span> <span class="token string">"core-js"</span> <span class="token punctuation">:</span> <span class="token string">"^3.4.3"</span> <span class="token punctuation">,</span> <span class="token string">"vue"</span> <span class="token punctuation">:</span> <span class="token string">"^2.6.10"</span> <span class="token punctuation">,</span> <span class="token string">"vuex"</span> <span class="token punctuation">:</span> <span class="token string">"^3.1.2"</span> <span class="token punctuation">,</span> <span class="token string">"web3"</span> <span class="token punctuation">:</span> <span class="token string">"1.2.4"</span> <span class="token punctuation">}</span> |
Store
Add a store / index.js file that looks like this:
1 2 3 4 5 6 7 8 9 10 11 12 | <span class="token keyword">import</span> Vue <span class="token keyword">from</span> <span class="token string">'vue'</span> <span class="token punctuation">;</span> <span class="token keyword">import</span> Vuex <span class="token keyword">from</span> <span class="token string">'vuex'</span> <span class="token punctuation">;</span> Vue <span class="token punctuation">.</span> <span class="token function">use</span> <span class="token punctuation">(</span> Vuex <span class="token punctuation">)</span> <span class="token punctuation">;</span> <span class="token keyword">export</span> <span class="token keyword">default</span> <span class="token keyword">new</span> <span class="token class-name">Vuex <span class="token punctuation">.</span> Store</span> <span class="token punctuation">(</span> <span class="token punctuation">{</span> state <span class="token punctuation">:</span> <span class="token punctuation">{</span> <span class="token punctuation">}</span> <span class="token punctuation">,</span> mutation <span class="token punctuation">:</span> <span class="token punctuation">{</span> <span class="token punctuation">}</span> <span class="token punctuation">,</span> actions <span class="token punctuation">:</span> <span class="token punctuation">{</span> <span class="token punctuation">}</span> <span class="token punctuation">,</span> getters <span class="token punctuation">:</span> <span class="token punctuation">{</span> <span class="token punctuation">}</span> <span class="token punctuation">}</span> <span class="token punctuation">)</span> <span class="token punctuation">;</span> |
At a glance, it also looks similar to the 3 action combo, reducer and store like react except they are designed in the same file.
Regarding usage, you can read directly on the homepage of vuex or you can read through the overview of myself:
- state : Similar to react, these are the states that will be used and used by the app, shared between views and components
- mutation : This is the only thing that can change states and the only thing it cares about is also state
- actions : It can be considered as business logic that performs application actions, an action can call many mutations
- getter : Getter is basically added to make it easier to return states, you can add functions (eg, data filters) here to return the necessary state instead of the raw state.
Finally update to let App know that we are using vuex to manage state , edit main.js file :
1 2 3 4 5 6 7 8 9 10 11 | <span class="token keyword">import</span> Vue <span class="token keyword">from</span> <span class="token string">'vue'</span> <span class="token punctuation">;</span> <span class="token keyword">import</span> App <span class="token keyword">from</span> <span class="token string">'./App.vue'</span> <span class="token punctuation">;</span> <span class="token keyword">import</span> store <span class="token keyword">from</span> <span class="token string">'@/store'</span> <span class="token punctuation">;</span> Vue <span class="token punctuation">.</span> config <span class="token punctuation">.</span> productionTip <span class="token operator">=</span> <span class="token boolean">false</span> <span class="token punctuation">;</span> <span class="token keyword">new</span> <span class="token class-name">Vue</span> <span class="token punctuation">(</span> <span class="token punctuation">{</span> store <span class="token punctuation">,</span> render <span class="token punctuation">:</span> <span class="token punctuation">(</span> h <span class="token punctuation">)</span> <span class="token operator">=></span> <span class="token function">h</span> <span class="token punctuation">(</span> App <span class="token punctuation">)</span> <span class="token punctuation">}</span> <span class="token punctuation">)</span> <span class="token punctuation">.</span> <span class="token function">$mount</span> <span class="token punctuation">(</span> <span class="token string">'#app'</span> <span class="token punctuation">)</span> <span class="token punctuation">;</span> |
State
The initial state init will be similar to the react side:
1 2 | state <span class="token punctuation">:</span> <span class="token punctuation">{</span> web3 <span class="token punctuation">:</span> <span class="token keyword">null</span> <span class="token punctuation">,</span> account <span class="token punctuation">:</span> <span class="token keyword">null</span> <span class="token punctuation">,</span> balance <span class="token punctuation">:</span> <span class="token keyword">null</span> <span class="token punctuation">,</span> metaCoin <span class="token punctuation">:</span> <span class="token keyword">null</span> <span class="token punctuation">}</span> |
Actions
First, we also add the action to connect to the metamask in the utils / getWeb3.js folder:
1 2 3 4 5 6 7 8 9 10 11 12 13 14 15 16 17 18 19 20 21 22 23 24 25 26 27 28 29 30 31 32 33 34 | <span class="token comment">/* eslint-disable no-console */</span> <span class="token keyword">import</span> Web3 <span class="token keyword">from</span> <span class="token string">'web3'</span> <span class="token punctuation">;</span> <span class="token keyword">const</span> getWeb3 <span class="token operator">=</span> <span class="token keyword">async</span> <span class="token punctuation">(</span> <span class="token punctuation">)</span> <span class="token operator">=></span> <span class="token punctuation">{</span> <span class="token comment">// Wait for loading completion to avoid race conditions with web3 injection timing.</span> <span class="token keyword">if</span> <span class="token punctuation">(</span> window <span class="token punctuation">.</span> ethereum <span class="token punctuation">)</span> <span class="token punctuation">{</span> <span class="token keyword">const</span> web3 <span class="token operator">=</span> <span class="token keyword">new</span> <span class="token class-name">Web3</span> <span class="token punctuation">(</span> window <span class="token punctuation">.</span> ethereum <span class="token punctuation">)</span> <span class="token punctuation">;</span> <span class="token keyword">try</span> <span class="token punctuation">{</span> <span class="token comment">// Request account access if needed</span> <span class="token keyword">await</span> window <span class="token punctuation">.</span> ethereum <span class="token punctuation">.</span> <span class="token function">enable</span> <span class="token punctuation">(</span> <span class="token punctuation">)</span> <span class="token punctuation">;</span> <span class="token comment">// Acccounts now exposed</span> <span class="token keyword">return</span> web3 <span class="token punctuation">;</span> <span class="token punctuation">}</span> <span class="token keyword">catch</span> <span class="token punctuation">(</span> <span class="token class-name">error</span> <span class="token punctuation">)</span> <span class="token punctuation">{</span> console <span class="token punctuation">.</span> <span class="token function">error</span> <span class="token punctuation">(</span> error <span class="token punctuation">)</span> <span class="token punctuation">;</span> <span class="token punctuation">}</span> <span class="token punctuation">}</span> <span class="token comment">// Legacy dapp browsers...</span> <span class="token keyword">else</span> <span class="token keyword">if</span> <span class="token punctuation">(</span> window <span class="token punctuation">.</span> web3 <span class="token punctuation">)</span> <span class="token punctuation">{</span> <span class="token comment">// Use Mist/MetaMask's provider.</span> <span class="token keyword">const</span> web3 <span class="token operator">=</span> window <span class="token punctuation">.</span> web3 <span class="token punctuation">;</span> console <span class="token punctuation">.</span> <span class="token function">log</span> <span class="token punctuation">(</span> <span class="token string">'Injected web3 detected.'</span> <span class="token punctuation">,</span> window <span class="token punctuation">.</span> web3 <span class="token punctuation">)</span> <span class="token punctuation">;</span> <span class="token keyword">return</span> web3 <span class="token punctuation">;</span> <span class="token punctuation">}</span> <span class="token comment">// Fallback to localhost; use dev console port by default...</span> <span class="token keyword">else</span> <span class="token punctuation">{</span> <span class="token keyword">const</span> provider <span class="token operator">=</span> <span class="token keyword">new</span> <span class="token class-name">Web3 <span class="token punctuation">.</span> providers <span class="token punctuation">.</span> HttpProvider</span> <span class="token punctuation">(</span> <span class="token string">'http://127.0.0.1:9545'</span> <span class="token punctuation">)</span> <span class="token punctuation">;</span> <span class="token keyword">const</span> web3 <span class="token operator">=</span> <span class="token keyword">new</span> <span class="token class-name">Web3</span> <span class="token punctuation">(</span> provider <span class="token punctuation">)</span> <span class="token punctuation">;</span> console <span class="token punctuation">.</span> <span class="token function">log</span> <span class="token punctuation">(</span> <span class="token string">'No web3 instance injected, using Local web3.'</span> <span class="token punctuation">)</span> <span class="token punctuation">;</span> <span class="token keyword">return</span> web3 <span class="token punctuation">;</span> <span class="token punctuation">}</span> <span class="token punctuation">}</span> <span class="token punctuation">;</span> <span class="token keyword">export</span> <span class="token keyword">default</span> getWeb3 <span class="token punctuation">;</span> |
Next will be similar to react as the web3Connect , initContract , sendCoin , getBalance actions :
web3Connect:
1 2 3 4 5 6 7 8 9 10 11 12 13 14 15 16 17 18 19 20 | <span class="token keyword">import</span> getWeb3 <span class="token keyword">from</span> <span class="token string">'@/utils/getWeb3'</span> <span class="token punctuation">;</span> <span class="token keyword">async</span> <span class="token function">setWeb3</span> <span class="token punctuation">(</span> <span class="token punctuation">{</span> commit <span class="token punctuation">}</span> <span class="token punctuation">)</span> <span class="token punctuation">{</span> <span class="token keyword">const</span> web3 <span class="token operator">=</span> <span class="token keyword">await</span> <span class="token function">getWeb3</span> <span class="token punctuation">(</span> <span class="token punctuation">)</span> <span class="token punctuation">;</span> <span class="token keyword">const</span> accounts <span class="token operator">=</span> <span class="token keyword">await</span> web3 <span class="token punctuation">.</span> eth <span class="token punctuation">.</span> <span class="token function">getAccounts</span> <span class="token punctuation">(</span> <span class="token punctuation">)</span> <span class="token punctuation">;</span> window <span class="token punctuation">.</span> web3 <span class="token punctuation">.</span> version <span class="token punctuation">.</span> <span class="token function">getNetwork</span> <span class="token punctuation">(</span> <span class="token punctuation">(</span> e <span class="token punctuation">,</span> netId <span class="token punctuation">)</span> <span class="token operator">=></span> <span class="token punctuation">{</span> <span class="token keyword">if</span> <span class="token punctuation">(</span> netId <span class="token operator">!==</span> process <span class="token punctuation">.</span> env <span class="token punctuation">.</span> <span class="token constant">VUE_APP_NETWORK_ID</span> <span class="token punctuation">)</span> <span class="token punctuation">{</span> <span class="token function">alert</span> <span class="token punctuation">(</span> <span class="token string">'Unknown network, please change network to Ropsten testnet network'</span> <span class="token punctuation">)</span> <span class="token punctuation">;</span> <span class="token keyword">return</span> <span class="token punctuation">;</span> <span class="token punctuation">}</span> <span class="token punctuation">}</span> <span class="token punctuation">)</span> <span class="token punctuation">;</span> <span class="token keyword">if</span> <span class="token punctuation">(</span> accounts <span class="token punctuation">.</span> length <span class="token operator">></span> <span class="token number">0</span> <span class="token punctuation">)</span> <span class="token punctuation">{</span> <span class="token keyword">const</span> account <span class="token operator">=</span> accounts <span class="token punctuation">[</span> <span class="token number">0</span> <span class="token punctuation">]</span> <span class="token punctuation">;</span> <span class="token function">commit</span> <span class="token punctuation">(</span> <span class="token string">'setWeb3'</span> <span class="token punctuation">,</span> <span class="token punctuation">{</span> web3 <span class="token punctuation">:</span> getWeb3 <span class="token punctuation">}</span> <span class="token punctuation">)</span> <span class="token punctuation">;</span> <span class="token function">commit</span> <span class="token punctuation">(</span> <span class="token string">'setAccount'</span> <span class="token punctuation">,</span> <span class="token punctuation">{</span> account <span class="token punctuation">:</span> account <span class="token punctuation">}</span> <span class="token punctuation">)</span> <span class="token punctuation">;</span> <span class="token punctuation">}</span> <span class="token keyword">else</span> <span class="token punctuation">{</span> console <span class="token punctuation">.</span> <span class="token function">log</span> <span class="token punctuation">(</span> <span class="token string">'Account not found'</span> <span class="token punctuation">)</span> <span class="token punctuation">;</span> <span class="token punctuation">}</span> <span class="token punctuation">}</span> |
initContract:
1 2 3 4 5 6 7 8 9 10 11 12 | <span class="token keyword">import</span> MetaCoin <span class="token keyword">from</span> <span class="token string">'@/contracts/MetaCoin.json'</span> <span class="token punctuation">;</span> <span class="token keyword">async</span> <span class="token function">initContarct</span> <span class="token punctuation">(</span> <span class="token punctuation">{</span> commit <span class="token punctuation">,</span> state <span class="token punctuation">}</span> <span class="token punctuation">)</span> <span class="token punctuation">{</span> <span class="token keyword">const</span> web3 <span class="token operator">=</span> <span class="token keyword">await</span> state <span class="token punctuation">.</span> <span class="token function">web3</span> <span class="token punctuation">(</span> <span class="token punctuation">)</span> <span class="token punctuation">;</span> <span class="token keyword">const</span> networkId <span class="token operator">=</span> process <span class="token punctuation">.</span> env <span class="token punctuation">.</span> <span class="token constant">VUE_APP_NETWORK_ID</span> <span class="token punctuation">;</span> <span class="token keyword">const</span> metaCoin <span class="token operator">=</span> <span class="token keyword">new</span> <span class="token class-name">web3 <span class="token punctuation">.</span> eth <span class="token punctuation">.</span> Contract</span> <span class="token punctuation">(</span> Factory <span class="token punctuation">.</span> abi <span class="token punctuation">,</span> MetaCoin <span class="token punctuation">.</span> networks <span class="token punctuation">[</span> networkId <span class="token punctuation">]</span> <span class="token punctuation">.</span> address <span class="token punctuation">,</span> <span class="token punctuation">{</span> transactionConfirmationBlocks <span class="token punctuation">:</span> <span class="token number">1</span> <span class="token punctuation">}</span> <span class="token punctuation">)</span> <span class="token punctuation">;</span> <span class="token keyword">let</span> <span class="token function-variable function">metaCoinyFunc</span> <span class="token operator">=</span> <span class="token punctuation">(</span> <span class="token punctuation">)</span> <span class="token operator">=></span> metaCoin <span class="token punctuation">;</span> <span class="token function">commit</span> <span class="token punctuation">(</span> <span class="token string">'setMetaCoin'</span> <span class="token punctuation">,</span> <span class="token punctuation">{</span> factoryFunc <span class="token punctuation">}</span> <span class="token punctuation">)</span> <span class="token punctuation">;</span> <span class="token punctuation">}</span> |
sendCoin:
1 2 3 4 5 6 7 8 9 10 11 12 13 14 15 16 | <span class="token keyword">async</span> <span class="token function">sendCoin</span> <span class="token punctuation">(</span> <span class="token punctuation">{</span> commit <span class="token punctuation">,</span> state <span class="token punctuation">}</span> <span class="token punctuation">,</span> params <span class="token punctuation">)</span> <span class="token punctuation">{</span> <span class="token keyword">const</span> metaCoin <span class="token operator">=</span> state <span class="token punctuation">.</span> metaCoin <span class="token punctuation">;</span> <span class="token keyword">const</span> account <span class="token operator">=</span> state <span class="token punctuation">.</span> account <span class="token punctuation">;</span> <span class="token keyword">let</span> amount <span class="token operator">=</span> params <span class="token punctuation">.</span> amount <span class="token punctuation">;</span> <span class="token keyword">let</span> receiver <span class="token operator">=</span> params <span class="token punctuation">.</span> receiver <span class="token punctuation">;</span> metaCoin <span class="token punctuation">.</span> methods <span class="token punctuation">.</span> <span class="token function">sendCoin</span> <span class="token punctuation">(</span> receiver <span class="token punctuation">,</span> amount <span class="token punctuation">)</span> <span class="token punctuation">.</span> <span class="token function">send</span> <span class="token punctuation">(</span> <span class="token punctuation">{</span> <span class="token keyword">from</span> <span class="token punctuation">:</span> account <span class="token punctuation">}</span> <span class="token punctuation">)</span> <span class="token punctuation">.</span> <span class="token function">on</span> <span class="token punctuation">(</span> <span class="token string">'confirmation'</span> <span class="token punctuation">,</span> <span class="token punctuation">(</span> <span class="token punctuation">)</span> <span class="token operator">=></span> <span class="token punctuation">{</span> <span class="token function">commit</span> <span class="token punctuation">(</span> <span class="token string">'setNewAmount'</span> <span class="token punctuation">,</span> <span class="token punctuation">{</span> amount <span class="token punctuation">:</span> amount <span class="token punctuation">}</span> <span class="token punctuation">)</span> <span class="token punctuation">;</span> <span class="token punctuation">}</span> <span class="token punctuation">)</span> <span class="token punctuation">.</span> <span class="token keyword">catch</span> <span class="token punctuation">(</span> <span class="token punctuation">(</span> e <span class="token punctuation">)</span> <span class="token operator">=></span> <span class="token punctuation">{</span> console <span class="token punctuation">.</span> <span class="token function">log</span> <span class="token punctuation">(</span> e <span class="token punctuation">)</span> <span class="token punctuation">;</span> <span class="token punctuation">}</span> <span class="token punctuation">)</span> <span class="token punctuation">;</span> <span class="token punctuation">}</span> |
getBalance:
1 2 3 4 5 6 7 | <span class="token keyword">async</span> <span class="token function">getBalance</span> <span class="token punctuation">(</span> <span class="token punctuation">{</span> commit <span class="token punctuation">,</span> state <span class="token punctuation">}</span> <span class="token punctuation">)</span> <span class="token punctuation">{</span> <span class="token keyword">const</span> metaCoin <span class="token operator">=</span> state <span class="token punctuation">.</span> metaCoin <span class="token punctuation">;</span> <span class="token keyword">const</span> account <span class="token operator">=</span> state <span class="token punctuation">.</span> account <span class="token punctuation">;</span> <span class="token keyword">let</span> balance <span class="token operator">=</span> <span class="token keyword">await</span> metaCoin <span class="token punctuation">.</span> methods <span class="token punctuation">.</span> <span class="token function">getBalance</span> <span class="token punctuation">(</span> account <span class="token punctuation">)</span> <span class="token punctuation">.</span> <span class="token function">call</span> <span class="token punctuation">(</span> <span class="token punctuation">{</span> <span class="token keyword">from</span> <span class="token punctuation">:</span> account <span class="token punctuation">}</span> <span class="token punctuation">)</span> <span class="token punctuation">;</span> <span class="token function">commit</span> <span class="token punctuation">(</span> <span class="token string">'setBalance'</span> <span class="token punctuation">,</span> <span class="token punctuation">{</span> balance <span class="token punctuation">:</span> balance <span class="token punctuation">}</span> <span class="token punctuation">)</span> <span class="token punctuation">;</span> <span class="token punctuation">}</span> |
You will notice that we have quite a few commits that appear, which is the syntax to enable mutations.
Mutations
We will define the mutations that have been used in all of the above actions :
1 2 3 4 5 6 7 8 9 10 11 12 13 14 15 16 17 18 | mutations <span class="token punctuation">:</span> <span class="token punctuation">{</span> <span class="token function">setWeb3</span> <span class="token punctuation">(</span> state <span class="token punctuation">,</span> payload <span class="token punctuation">)</span> <span class="token punctuation">{</span> state <span class="token punctuation">.</span> web3 <span class="token operator">=</span> payload <span class="token punctuation">.</span> web3 <span class="token punctuation">;</span> <span class="token punctuation">}</span> <span class="token punctuation">,</span> <span class="token function">setAccount</span> <span class="token punctuation">(</span> state <span class="token punctuation">,</span> payload <span class="token punctuation">)</span> <span class="token punctuation">{</span> state <span class="token punctuation">.</span> account <span class="token operator">=</span> payload <span class="token punctuation">.</span> account <span class="token punctuation">;</span> <span class="token punctuation">}</span> <span class="token punctuation">,</span> <span class="token function">setMetaCoin</span> <span class="token punctuation">(</span> state <span class="token punctuation">,</span> payload <span class="token punctuation">)</span> <span class="token punctuation">{</span> state <span class="token punctuation">.</span> metaCoin <span class="token operator">=</span> payload <span class="token punctuation">.</span> metaCoin <span class="token punctuation">;</span> <span class="token punctuation">}</span> <span class="token punctuation">,</span> <span class="token function">setNewAmount</span> <span class="token punctuation">(</span> state <span class="token punctuation">,</span> payload <span class="token punctuation">)</span> <span class="token punctuation">{</span> state <span class="token punctuation">.</span> balance <span class="token operator">=</span> state <span class="token punctuation">.</span> balance <span class="token operator">-</span> payload <span class="token punctuation">.</span> amount <span class="token punctuation">;</span> <span class="token punctuation">}</span> <span class="token punctuation">,</span> <span class="token function">setBalance</span> <span class="token punctuation">(</span> state <span class="token punctuation">,</span> payload <span class="token punctuation">)</span> <span class="token punctuation">{</span> state <span class="token punctuation">.</span> balance <span class="token operator">=</span> payload <span class="token punctuation">.</span> balance <span class="token punctuation">;</span> <span class="token punctuation">}</span> <span class="token punctuation">}</span> |
App
The store is basically complete, now it’s time to rewrite the interface and call actions accordingly
Script section:
1 2 3 4 5 6 7 8 9 10 11 12 13 14 15 16 17 18 19 20 21 22 23 24 25 | <span class="token operator"><</span> script <span class="token operator">></span> <span class="token comment">/* eslint-disable no-console */</span> <span class="token keyword">import</span> <span class="token punctuation">{</span> mapActions <span class="token punctuation">,</span> mapState <span class="token punctuation">}</span> <span class="token keyword">from</span> <span class="token string">"vuex"</span> <span class="token punctuation">;</span> <span class="token keyword">export</span> <span class="token keyword">default</span> <span class="token punctuation">{</span> name <span class="token punctuation">:</span> <span class="token string">"app"</span> <span class="token punctuation">,</span> components <span class="token punctuation">:</span> <span class="token punctuation">{</span> <span class="token punctuation">}</span> <span class="token punctuation">,</span> <span class="token function">data</span> <span class="token punctuation">(</span> <span class="token punctuation">)</span> <span class="token punctuation">{</span> <span class="token keyword">return</span> <span class="token punctuation">{</span> receiver <span class="token punctuation">:</span> <span class="token string">""</span> <span class="token punctuation">,</span> amount <span class="token punctuation">:</span> <span class="token string">""</span> <span class="token punctuation">}</span> <span class="token punctuation">;</span> <span class="token punctuation">}</span> <span class="token punctuation">,</span> computed <span class="token punctuation">:</span> <span class="token punctuation">{</span> <span class="token operator">...</span> <span class="token function">mapState</span> <span class="token punctuation">(</span> <span class="token punctuation">[</span> <span class="token string">"balance"</span> <span class="token punctuation">,</span> <span class="token string">"account"</span> <span class="token punctuation">]</span> <span class="token punctuation">)</span> <span class="token punctuation">}</span> <span class="token punctuation">,</span> methods <span class="token punctuation">:</span> <span class="token punctuation">{</span> <span class="token operator">...</span> <span class="token function">mapActions</span> <span class="token punctuation">(</span> <span class="token punctuation">[</span> <span class="token string">"setWeb3"</span> <span class="token punctuation">,</span> <span class="token string">"initContarct"</span> <span class="token punctuation">,</span> <span class="token string">"getBalance"</span> <span class="token punctuation">,</span> <span class="token string">"sendCoin"</span> <span class="token punctuation">]</span> <span class="token punctuation">)</span> <span class="token punctuation">,</span> send <span class="token punctuation">:</span> <span class="token keyword">async</span> <span class="token keyword">function</span> <span class="token punctuation">(</span> <span class="token punctuation">)</span> <span class="token punctuation">{</span> <span class="token keyword">await</span> <span class="token keyword">this</span> <span class="token punctuation">.</span> <span class="token function">sendCoin</span> <span class="token punctuation">(</span> <span class="token punctuation">{</span> receiver <span class="token punctuation">:</span> <span class="token keyword">this</span> <span class="token punctuation">.</span> receiver <span class="token punctuation">,</span> amount <span class="token punctuation">:</span> <span class="token keyword">this</span> <span class="token punctuation">.</span> amount <span class="token punctuation">}</span> <span class="token punctuation">)</span> <span class="token punctuation">;</span> <span class="token punctuation">}</span> <span class="token punctuation">}</span> <span class="token punctuation">,</span> <span class="token keyword">async</span> <span class="token function">mounted</span> <span class="token punctuation">(</span> <span class="token punctuation">)</span> <span class="token punctuation">{</span> <span class="token keyword">await</span> <span class="token keyword">this</span> <span class="token punctuation">.</span> <span class="token function">setWeb3</span> <span class="token punctuation">(</span> <span class="token punctuation">)</span> <span class="token punctuation">;</span> <span class="token keyword">await</span> <span class="token keyword">this</span> <span class="token punctuation">.</span> <span class="token function">initContarct</span> <span class="token punctuation">(</span> <span class="token punctuation">)</span> <span class="token punctuation">;</span> <span class="token keyword">await</span> <span class="token keyword">this</span> <span class="token punctuation">.</span> <span class="token function">getBalance</span> <span class="token punctuation">(</span> <span class="token punctuation">)</span> <span class="token punctuation">;</span> <span class="token punctuation">}</span> <span class="token punctuation">}</span> <span class="token punctuation">;</span> <span class="token operator"><</span> <span class="token operator">/</span> script <span class="token operator">></span> |
In this section, the functions setWeb3 , initContract , getBalance will be called as soon as the compenent is mounted. To use state or action in vuex we will use mapActions and mapState . The send () function has been added to enable the sendCoin function to be more convenient since two user input arguments are receiver and amount .
Finally, add a little HTML to show the account , balance and form so that the user can submit sendCoin:
1 2 3 4 5 6 7 8 9 10 11 | <span class="token tag"><span class="token tag"><span class="token punctuation"><</span> template</span> <span class="token punctuation">></span></span> <span class="token tag"><span class="token tag"><span class="token punctuation"><</span> div</span> <span class="token attr-name">id</span> <span class="token attr-value"><span class="token punctuation">=</span> <span class="token punctuation">"</span> app <span class="token punctuation">"</span></span> <span class="token punctuation">></span></span> <span class="token tag"><span class="token tag"><span class="token punctuation"><</span> img</span> <span class="token attr-name">alt</span> <span class="token attr-value"><span class="token punctuation">=</span> <span class="token punctuation">"</span> Vue logo <span class="token punctuation">"</span></span> <span class="token attr-name">src</span> <span class="token attr-value"><span class="token punctuation">=</span> <span class="token punctuation">"</span> ./assets/logo.png <span class="token punctuation">"</span></span> <span class="token punctuation">></span></span> <span class="token tag"><span class="token tag"><span class="token punctuation"><</span> p</span> <span class="token punctuation">></span></span> Account: {{this.account}} <span class="token tag"><span class="token tag"><span class="token punctuation"></</span> p</span> <span class="token punctuation">></span></span> <span class="token tag"><span class="token tag"><span class="token punctuation"><</span> p</span> <span class="token punctuation">></span></span> Balance: {{this.balance}} <span class="token tag"><span class="token tag"><span class="token punctuation"></</span> p</span> <span class="token punctuation">></span></span> <span class="token tag"><span class="token tag"><span class="token punctuation"><</span> input</span> <span class="token attr-name">v-model</span> <span class="token attr-value"><span class="token punctuation">=</span> <span class="token punctuation">"</span> receiver <span class="token punctuation">"</span></span> <span class="token attr-name">placeholder</span> <span class="token attr-value"><span class="token punctuation">=</span> <span class="token punctuation">"</span> Receiver <span class="token punctuation">"</span></span> <span class="token punctuation">></span></span> <span class="token tag"><span class="token tag"><span class="token punctuation"><</span> input</span> <span class="token attr-name">v-model</span> <span class="token attr-value"><span class="token punctuation">=</span> <span class="token punctuation">"</span> amount <span class="token punctuation">"</span></span> <span class="token attr-name">placeholder</span> <span class="token attr-value"><span class="token punctuation">=</span> <span class="token punctuation">"</span> Receiver <span class="token punctuation">"</span></span> <span class="token punctuation">></span></span> <span class="token tag"><span class="token tag"><span class="token punctuation"><</span> button</span> <span class="token attr-name"><span class="token namespace">v-on:</span> click</span> <span class="token attr-value"><span class="token punctuation">=</span> <span class="token punctuation">"</span> send <span class="token punctuation">"</span></span> <span class="token punctuation">></span></span> Submit <span class="token tag"><span class="token tag"><span class="token punctuation"></</span> button</span> <span class="token punctuation">></span></span> <span class="token tag"><span class="token tag"><span class="token punctuation"></</span> div</span> <span class="token punctuation">></span></span> <span class="token tag"><span class="token tag"><span class="token punctuation"></</span> template</span> <span class="token punctuation">></span></span> |
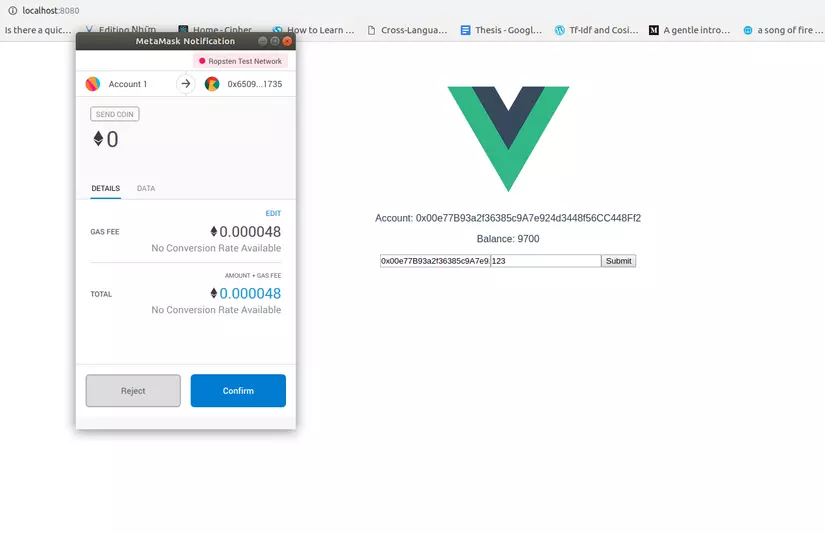
Result
As a result, we will also have a pretty similar application that was built with react that will display the address, balance of the user and can generate transactions: