Build test plan automatically with JMeter
- Tram Ho
1. HTTP(S) Test Script Recorder
When you first use JMeter, when you do not know how to create a test plan for your test plan. HTTP(S) Test Script Recorder will assist you in auto-generating basic Testplan, allowing you to record script through your actions when using web application using browser.
2. Add HTTP(S) Test Script Recorder
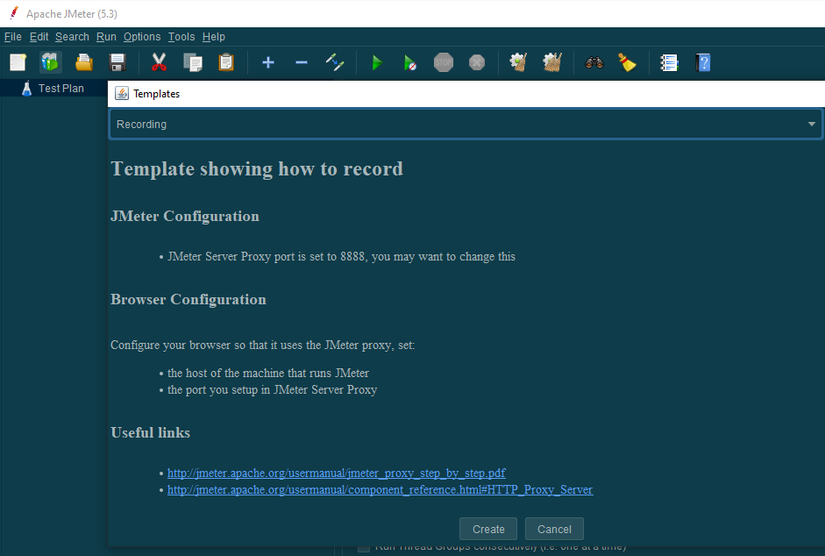
- In JMeter main screen → Select Templates → In Template window, select option Recording → Select Create.

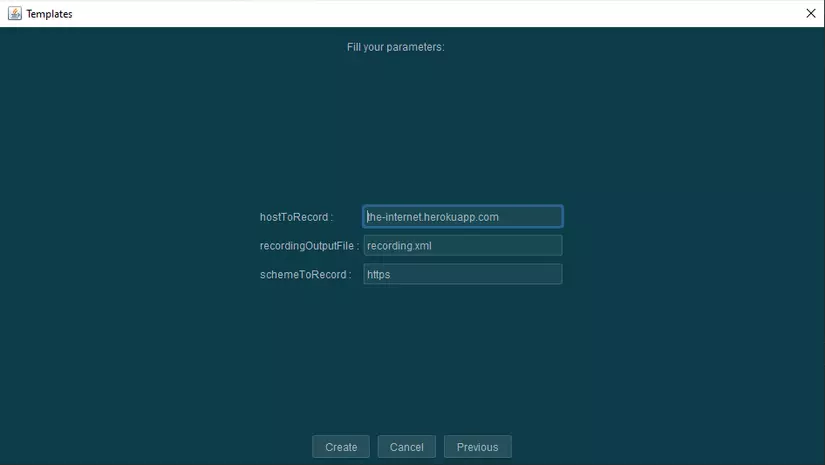
- At the Parameters → Select Create screen.
- You can change the corresponding values or leave the default like that (Here, I changed the host)
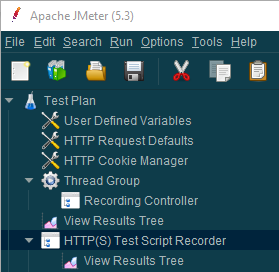
- JMeter will create for you 1 Test plan
- Includes the following components:
- User Defined Variables
- HTTP Request Defaults
- HTTP Cookie Manager
- Thread group with default values. (The above components temporarily we will not learn thoroughly, simply understand it will be the basic elements in your testplan)
- HTTP(S) Test Script Recorder – This is the element that we need to pay attention to in this article.
- Includes the following components:
3. Configuration for HTTP(S) Test Script Recorder
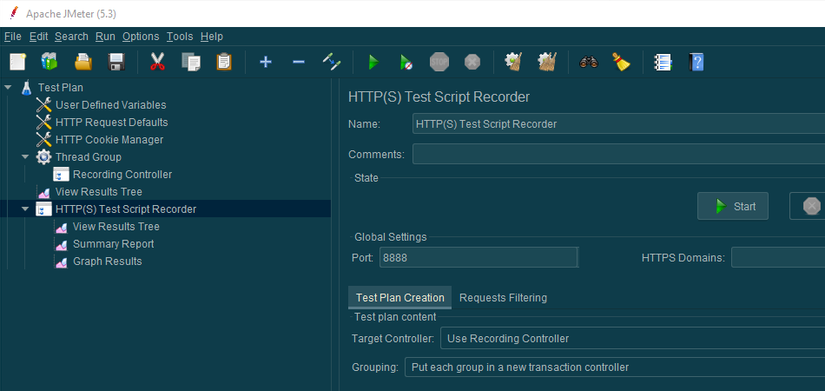
Basic ingredients
- #1. Name : Change to any name, default will be HTTP(S) Test Script Recorder.
- #2. Port: JMeter will rely on this Port to record user actions when performing on the web. Normally will set 8888.
- #3. HTTPs Domains: JMeter can automatically get your domain name, so it can be set or left blank.
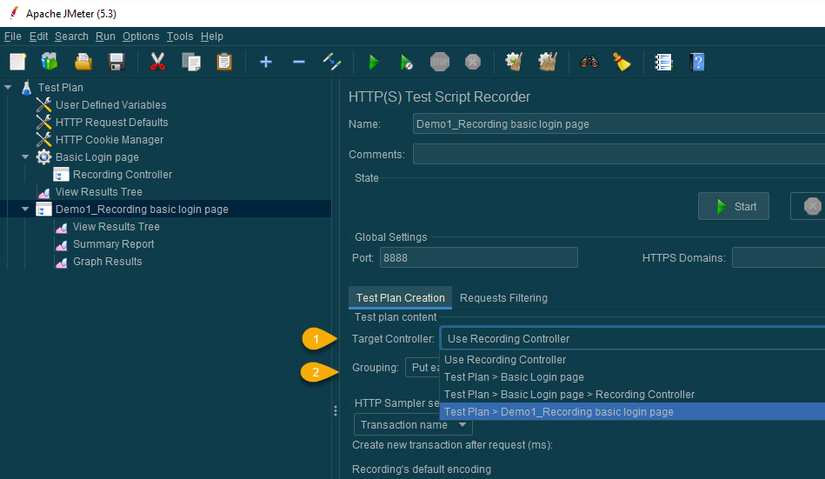
b. Test plan creation
- There are 2 basic components:
- Targer Controller : Is a place to reset the storage location after JMeter records the scripts (user actions). Normally, it will be set to save it to the corresponding HTTP(S) Test Script Recorder.
- Grouping: Choose how to group scripts.
c. Requests Filtering tab
- As a place to filter the components that make up a full website such as Images, adds, buttons,… Since we actually only need HTTP Request and Response, there will be some unnecessary components we configure at here to filter.
- If you do not know which elements should be filtered out, you can choose [Add suggested Excludes], JMeter will support this part.

4. Browser Configuration
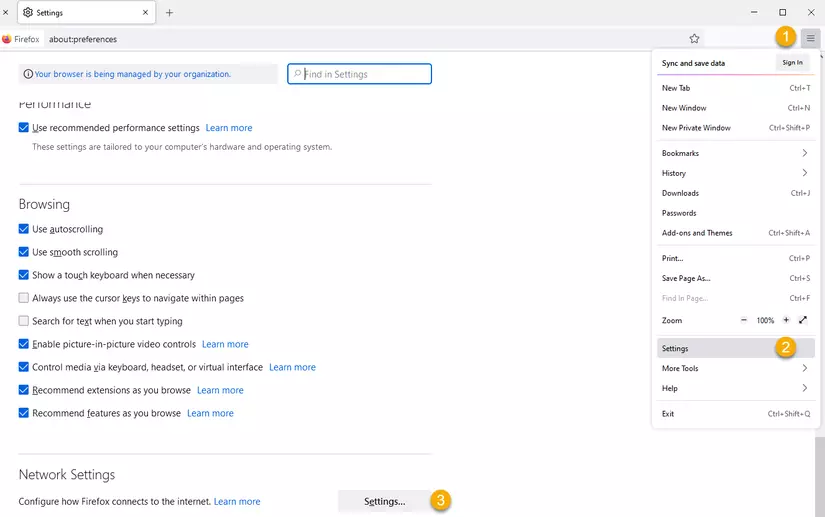
- Here, I will use Firefox to configure.
- Download Firefox browser if you haven’t installed it yet.
- Open the browser → Select Hamburger menu on the right corner → Select Settings → Network Settings → Settings button.
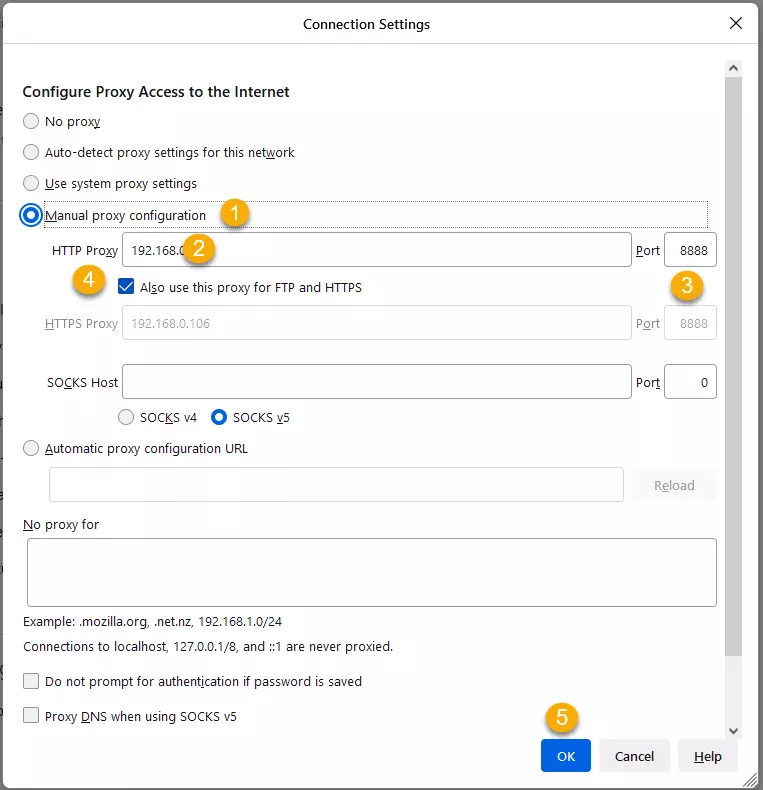
- In the Connection Settings window:
- Reconfigure Proxy Access to the Internet → Select Manual proxy configuration → Enter your localhost → Enter port (8888) → Check TíchAlso use this proxy for FTP and HTTPS → Click OK.
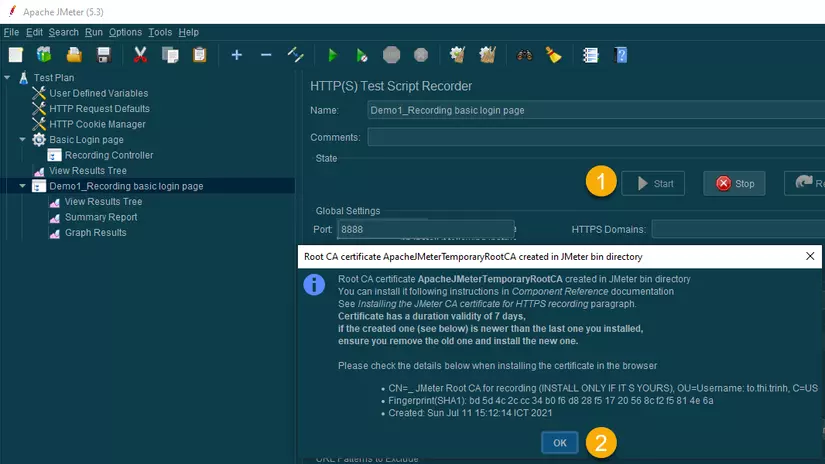
- Go back to JMeter → click Start at HTTP(S) Test Scripts Recorder
- At this point, the file Root CA certificate will be generated in the bin directory of JMeter. Because browsers always check that the certificate for the domain is correct, valid and still valid. So we need to set the certificate to be valid and usable by the browser.
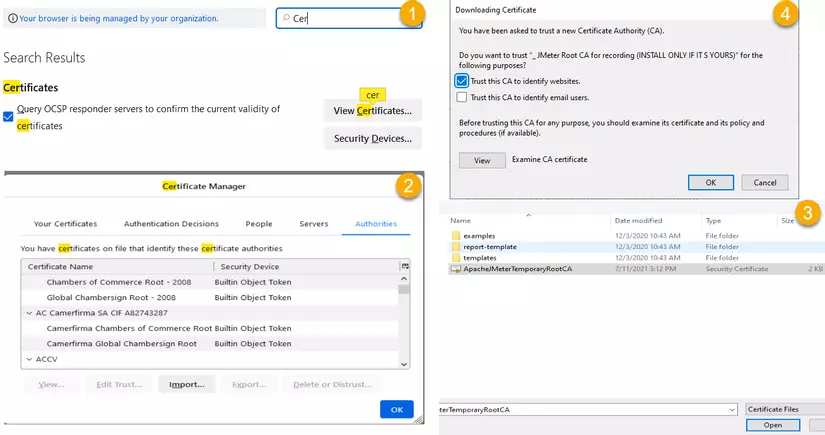
- Open browser → Search Certificate → View Certificates → Authorities → Import → Go to bin folder → Select ApacheJMeterTemporaryRoootCA → Select Open → Tick select Trust this CA to identify websites → Select OK.
5. Execute Script
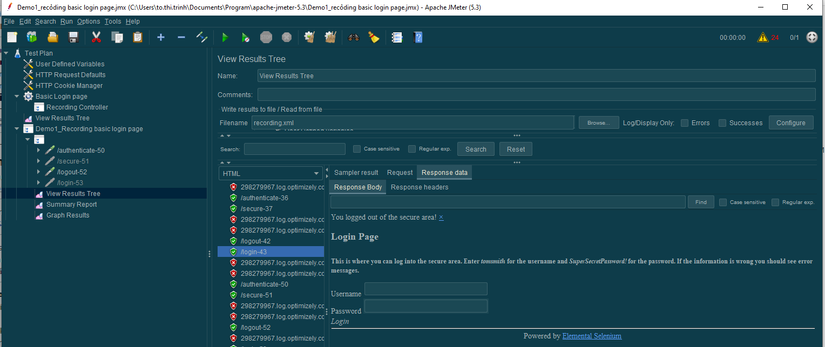
- When JMeter displays the Transactions control window, you can execute it in the browser, the scripts will be saved by JMeter in Testplan.
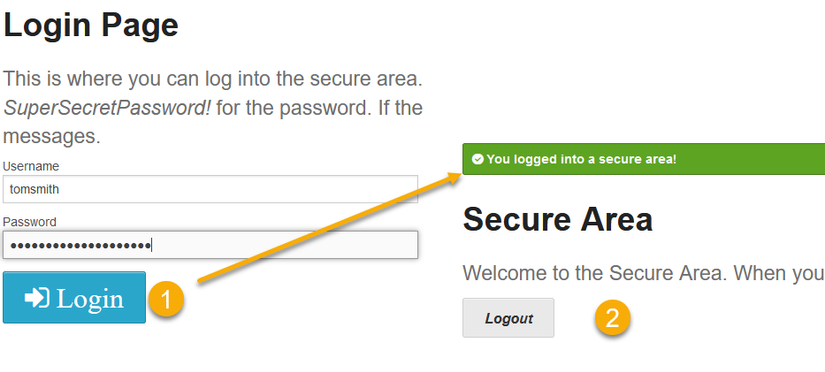
- Enter user=”tomsmith” and password=”SuperSecretPassword!” → Select Login → After successful login → Select Logout
- JMeter will record the script to the location corresponding to the Requests.
-
- You can open Listeners to see the results of running Scripts at View Result Tree
- So we have completed 1 Test plan with scripts generated automatically thanks to HTTP(S) Test Script Recorder.
- Good luck !!!