Idea
Yesterday there was a post about creating static web with Hugo with Github and Github Action tools, we can do the same with AWS services. For example, we can use Amazon S3 to host websites and Amazon CloudFront to deliver content. You can also use AWS CodePipeline and AWS CodeBuild to automate the deployment of your website whenever there is a change in the source code. This is a very convenient and efficient way to manage and update your website without having to worry about server installation and operation.
Accompanying the blog post, I have a video about the process of creating a website with Hugo using AWS services
Build Hugo Website with AWS Services
This article will dive into using AWS services to support the deployment of a static website using Hugo to S3 Static Web.
Create S3 Static Web
The first step is still to create the website first, the content is calculated later. To host a static website on AWS, we can use the Static website hosting feature of Amazon S3. However, before using this feature, we need to create an S3 bucket to store the website’s files. You can then configure the access permissions for the S3 bucket to allow the site to be accessed from outside. Using S3’s Static website hosting feature will make website hosting simpler and more efficient.
Create S3 Bucket
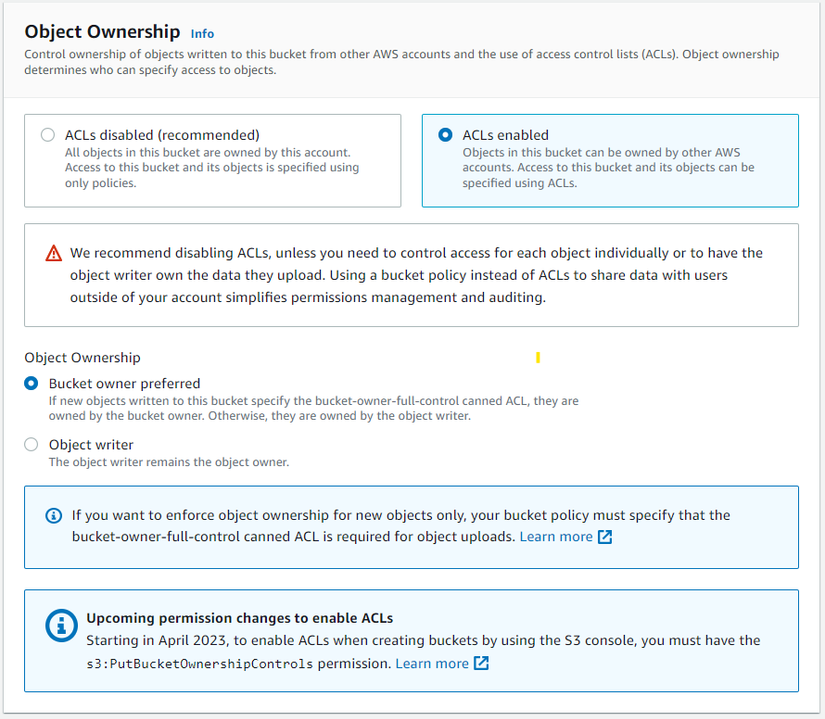
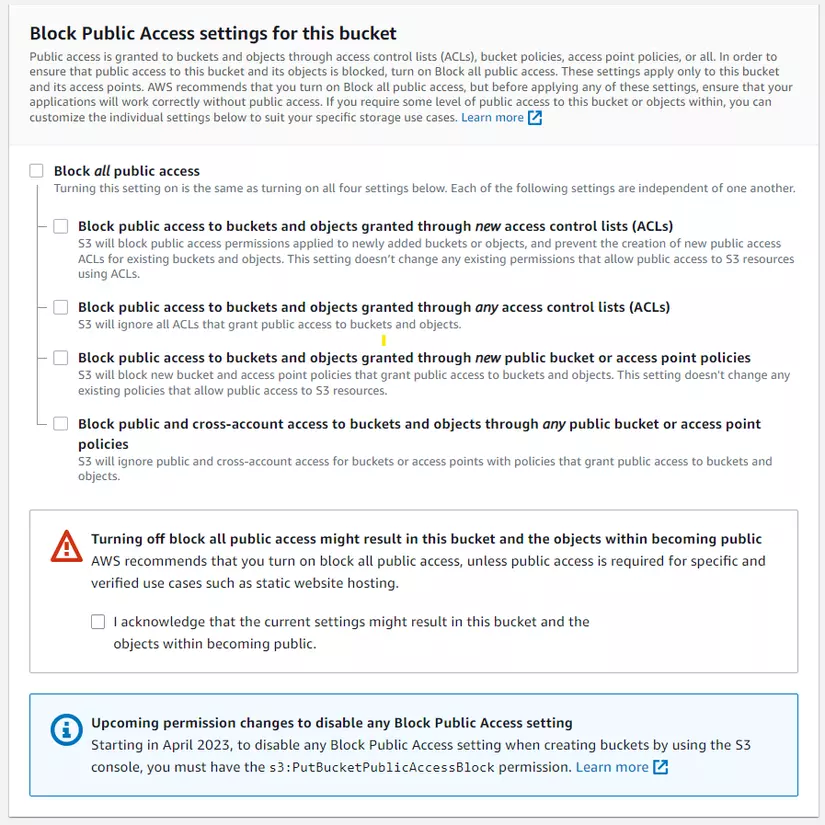
All you need to do is create an S3 bucket with a given name and tag. However, for easy website hosting and sharing, it is necessary to enable Object Ownership and disable the Block Public Access options on the bucket.
S3 Static Web Hosting
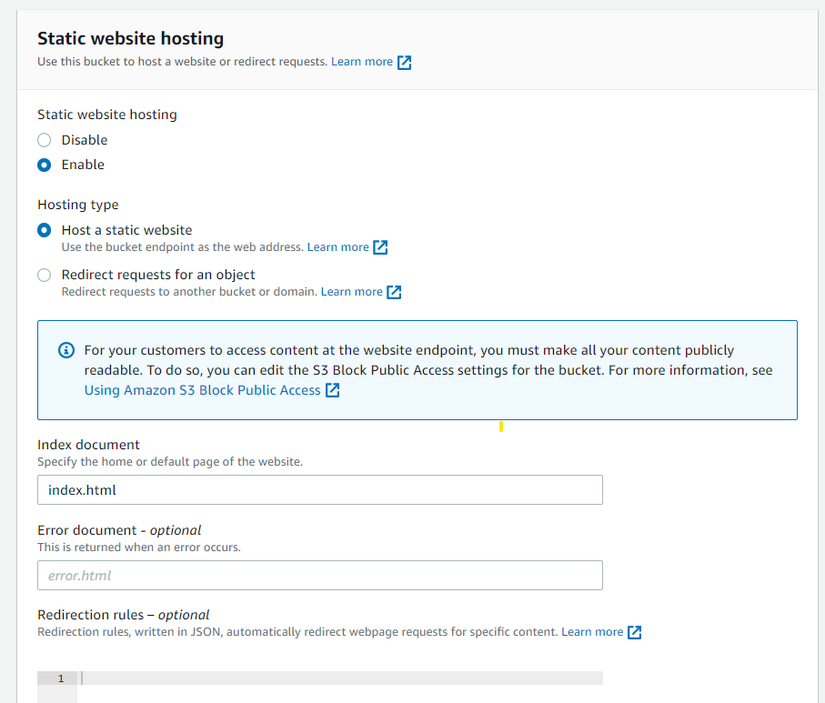
To enable this feature, you first need to select the S3 bucket you want to enable, then select the Properties tab, scroll down to the bottom of the page and select Enable Static Web Hosting, then enter index.html in the Index document section.
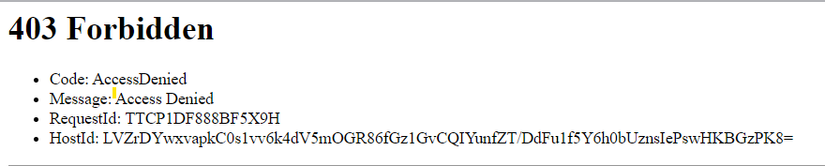
However, when accessing the S3 static web using the domain name, a 403 error may be encountered. This error occurs because the S3 bucket is not public yet, so it cannot be accessed by external users.
Add getObject permission
In order for users to be able to access the static website on S3 without getting 403 errors, it is necessary to add access permission to the bucket. This can be done by accessing the S3 bucket, selecting the Permissions tab, and selecting the Bucket policy section. Then, enter the following code in the policy section (remember to enter the S3 Bucket name in the ARN section).
1 2 3 4 5 6 7 8 9 10 11 12 13 14 15 16 17 | <span class="token punctuation">{</span> <span class="token property">"Version"</span> <span class="token operator">:</span> <span class="token string">"2012-10-17"</span> <span class="token punctuation">,</span> <span class="token property">"Statement"</span> <span class="token operator">:</span> <span class="token punctuation">[</span> <span class="token punctuation">{</span> <span class="token property">"Sid"</span> <span class="token operator">:</span> <span class="token string">"Statement1"</span> <span class="token punctuation">,</span> <span class="token property">"Principal"</span> <span class="token operator">:</span> <span class="token string">"*"</span> <span class="token punctuation">,</span> <span class="token property">"Effect"</span> <span class="token operator">:</span> <span class="token string">"Allow"</span> <span class="token punctuation">,</span> <span class="token property">"Action"</span> <span class="token operator">:</span> <span class="token punctuation">[</span> <span class="token string">"s3:GetObject"</span> <span class="token punctuation">]</span> <span class="token punctuation">,</span> <span class="token property">"Resource"</span> <span class="token operator">:</span> <span class="token punctuation">[</span> <span class="token string">"arn:aws:s3:::<S3 Bucket name>/*"</span> <span class="token punctuation">]</span> <span class="token punctuation">}</span> <span class="token punctuation">]</span> <span class="token punctuation">}</span> |
Now try to access it with S3 Static web url, you will get a 404 Not Found error because the content of the website is empty (index.html file not found)

Create AWS Codepipeline
Want to deploy your website automatically every time you update the source code (on Code Commit)? Use AWS CodePipeline and AWS CodeBuild!
AWS CodeCommit
First, you need to have a place to store your website’s static files. You can create a repository on CodeCommit to store the source code of the Hugo website. You can use the web interface or the command line to do this (Here I use the console for it to be friendly).
First go to the AWS console and navigate to the Commit . section
Next, click Create Repository and fill in the information to create a repository.
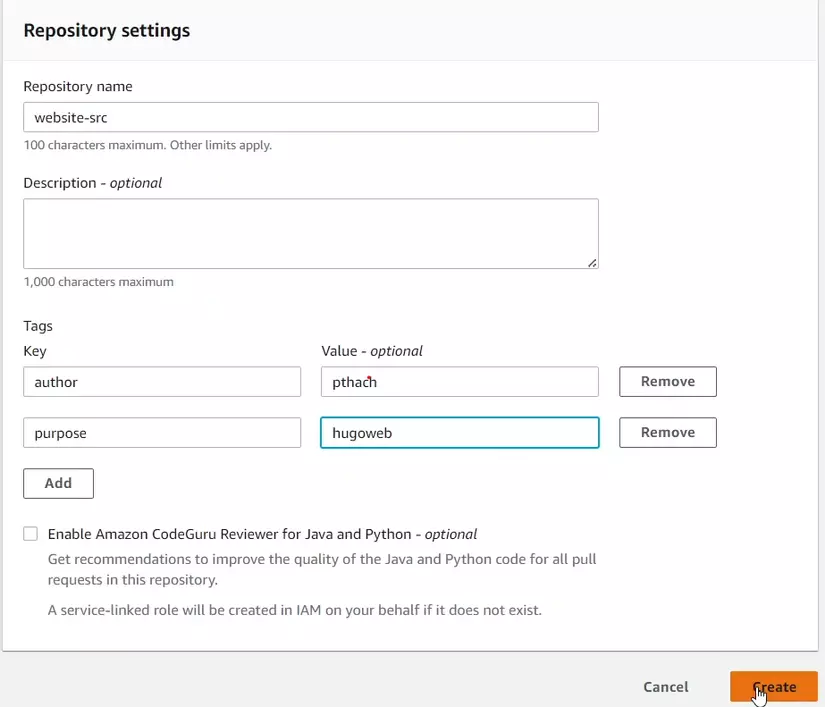
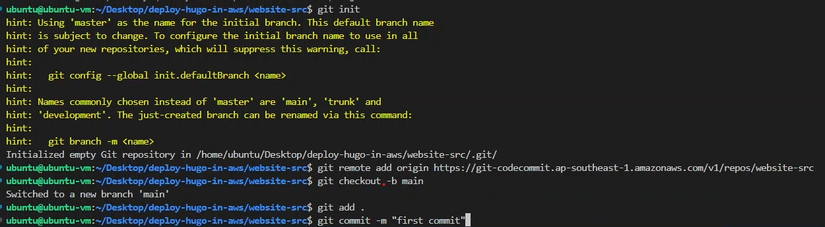
Once created, you clone the repository to your computer and copy the files of the Hugo website to the repository folder. The instructions are the same, but I do it a bit differently, first I cloned the resource from github and then changed the configuration of git accordingly and used it with the commands
1 2 3 4 5 6 7 8 9 10 11 | <span class="token function">git</span> clone git@github.com:thachpham2k/website-src.git <span class="token builtin class-name">cd</span> website-src/ <span class="token function">rm</span> -rf .git <span class="token function">rm</span> -rf .github <span class="token function">git</span> init <span class="token function">git</span> remote <span class="token function">add</span> origin https://git-codecommit.ap-southeast-1.amazonaws.com/v1/repos/hugo-codecommit <span class="token function">git</span> <span class="token function">add</span> <span class="token builtin class-name">.</span> <span class="token function">git</span> commit -m <span class="token string">"first commit"</span> <span class="token function">git</span> checkout -b main <span class="token function">git</span> push origin main |
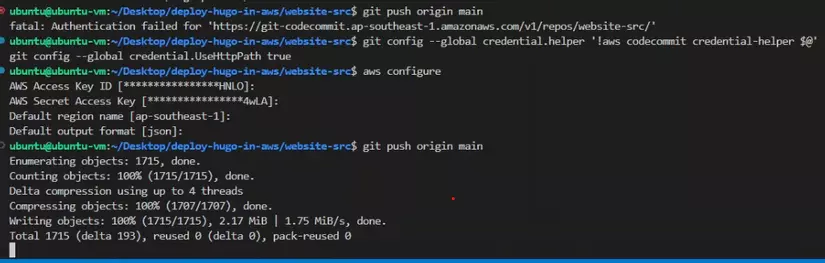
However, you do not want to commit to be committed. Note that you need to be logged in to commit the code. You must use the AccessToken to log in to the AWS Cli (with the aws configure command) and then use the Credential Helper to log in:
1 2 3 | <span class="token function">git</span> config --global credential.helper <span class="token string">'!aws codecommit credential-helper $@'</span> <span class="token function">git</span> config --global credential.UseHttpPath <span class="token boolean">true</span> |
In this part, I skipped about Hugo resource, if you want to learn more, please review my previous Blog post.
AWS CodeBuild
Before going into creating CodeBuild, you must build the build file first. Create a file named buildspec.yml and save it in the repository created in the previous step. And the content of the build file is as follows:
1 2 3 4 5 6 7 8 9 10 11 12 13 14 15 16 17 | <span class="token key atrule">version</span> <span class="token punctuation">:</span> <span class="token number">0.2</span> <span class="token key atrule">phases</span> <span class="token punctuation">:</span> <span class="token key atrule">install</span> <span class="token punctuation">:</span> <span class="token key atrule">commands</span> <span class="token punctuation">:</span> <span class="token punctuation">-</span> apt <span class="token punctuation">-</span> get update <span class="token punctuation">-</span> y <span class="token punctuation">-</span> echo Installing hugo <span class="token punctuation">-</span> curl <span class="token punctuation">-</span> L <span class="token punctuation">-</span> o hugo.deb https <span class="token punctuation">:</span> //github.com/gohugoio/hugo/releases/download/v0.111.3/hugo_0.111.3_linux <span class="token punctuation">-</span> amd64.deb <span class="token punctuation">-</span> dpkg <span class="token punctuation">-</span> i hugo.deb <span class="token punctuation">-</span> hugo version <span class="token key atrule">build</span> <span class="token punctuation">:</span> <span class="token key atrule">commands</span> <span class="token punctuation">:</span> <span class="token punctuation">-</span> hugo <span class="token punctuation">-</span> v <span class="token key atrule">artifacts</span> <span class="token punctuation">:</span> <span class="token key atrule">files</span> <span class="token punctuation">:</span> <span class="token punctuation">-</span> <span class="token string">'**/*'</span> <span class="token key atrule">base-directory</span> <span class="token punctuation">:</span> <span class="token string">'public'</span> |
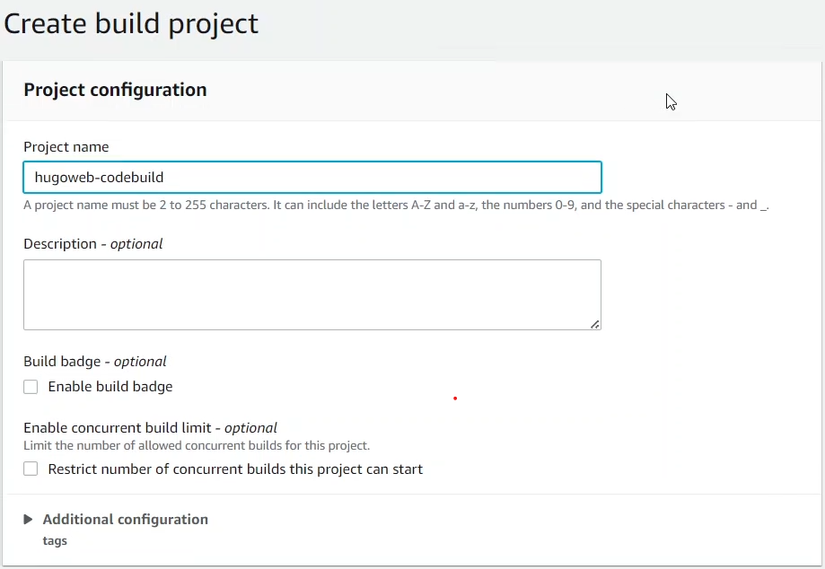
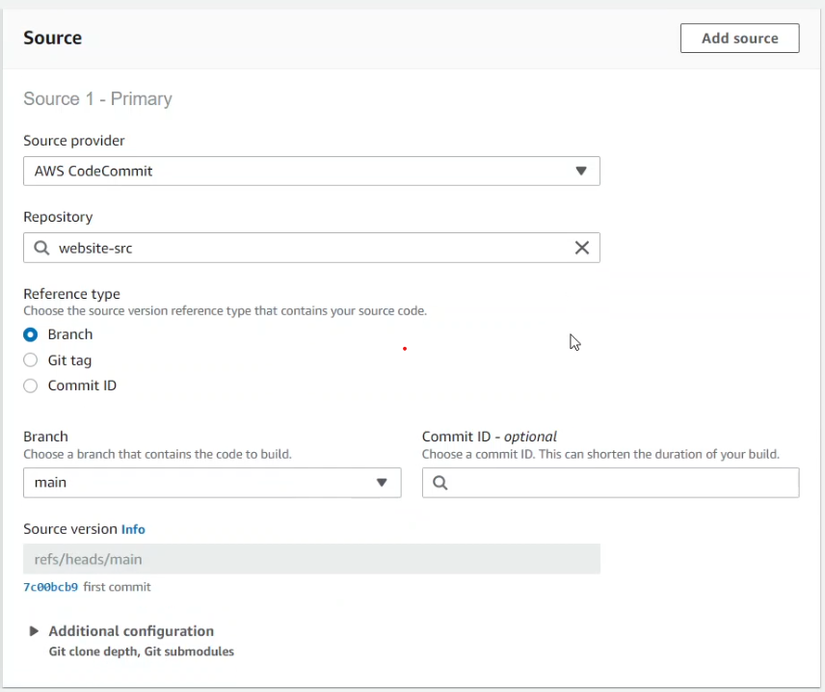
Once you have the buildspec.yml file, you can go to CodeBuild and select Create build project . You will need to fill in the following information:
Configure CodeBuild
Source code
Build environment
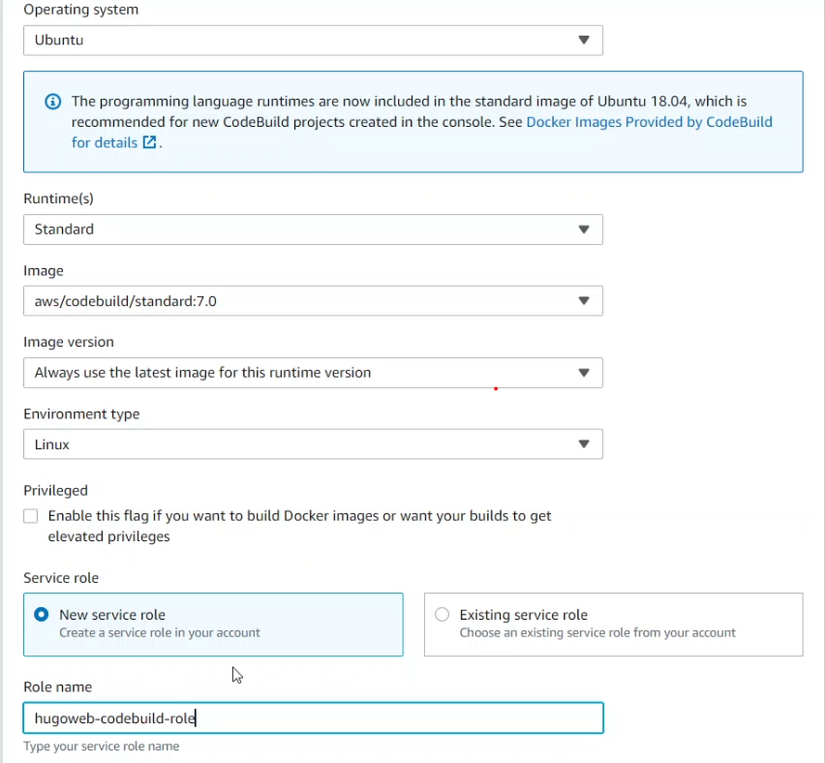
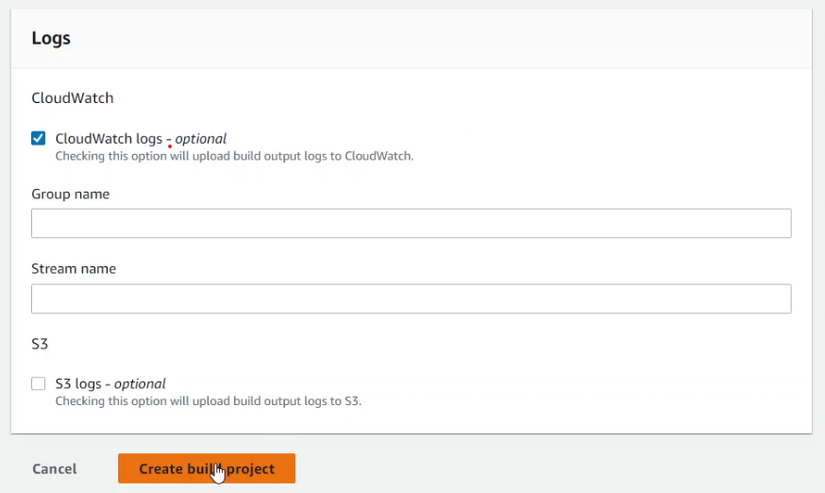
Besides, you also need to specify the location of the buildspec.yml file in your repository. Once done, you can click Create build project to generate CodeBuild.
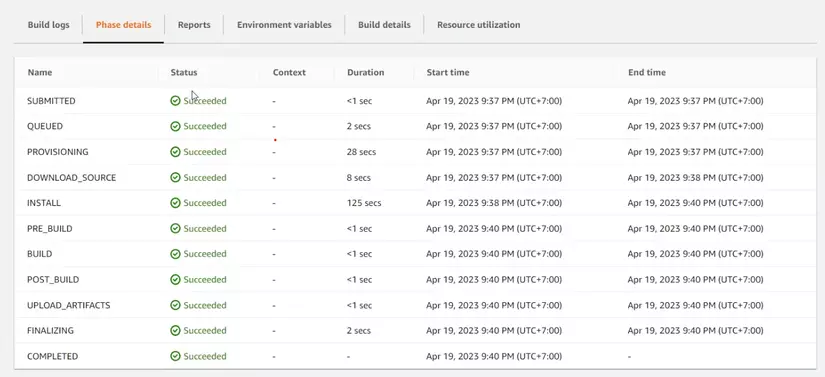
To test how CodeBuild works, you can click Start build and see the results.
AWS CodePipeline
Create a pipeline on CodePipeline to create a seamless flow from source code to Website. To configure CodePipeline it is necessary to configure the following components:
Pipeline name
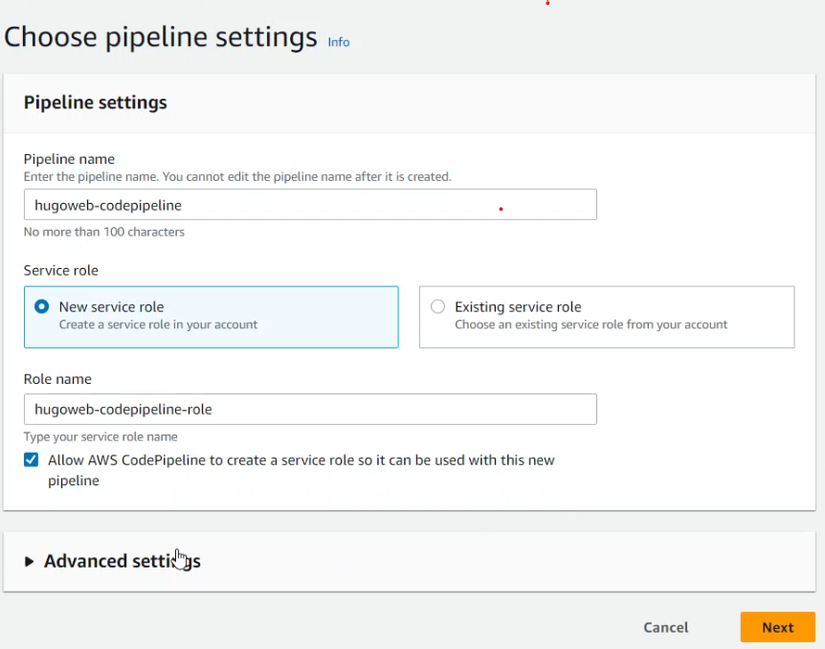
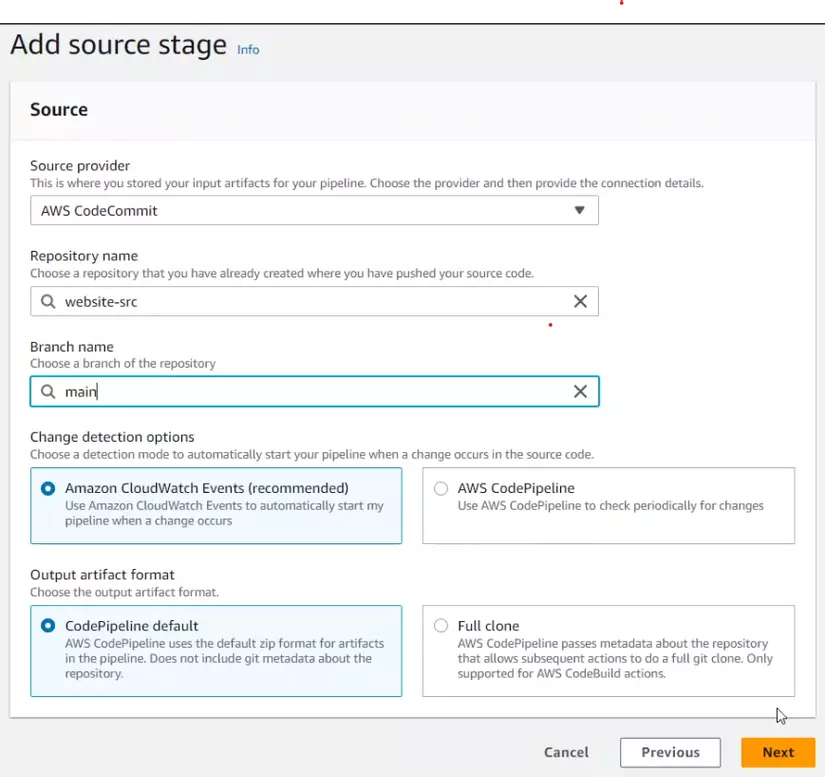
Source Code (CodeCommit)
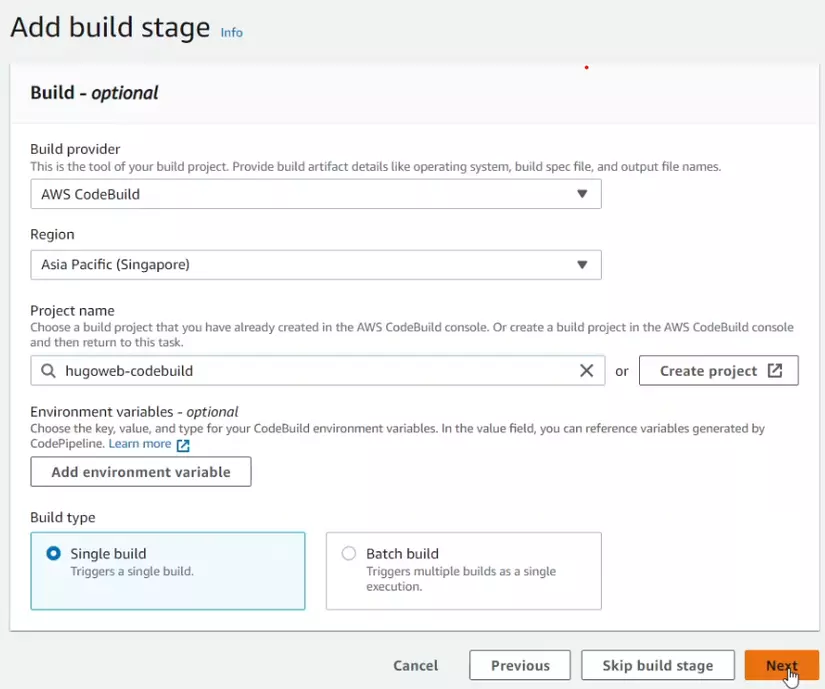
Build phase (CodeBuild)
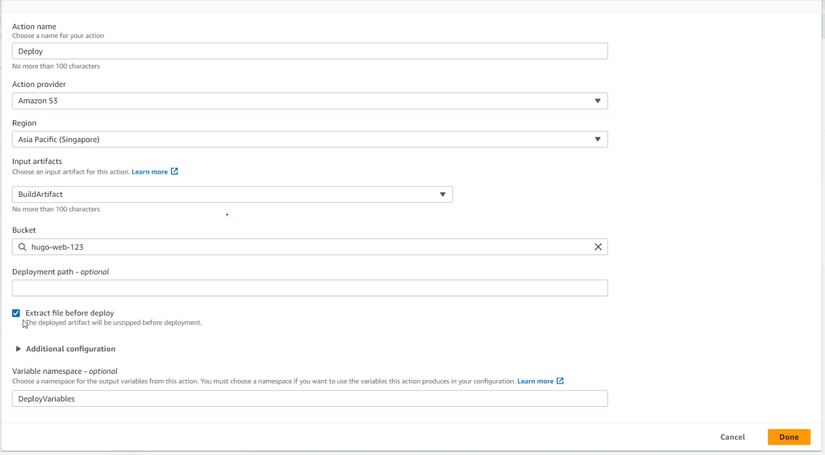
Deployment phase (S3)
Once you’ve finished creating the pipeline, you can track the progress of your phases and see the results of your deployment on S3.
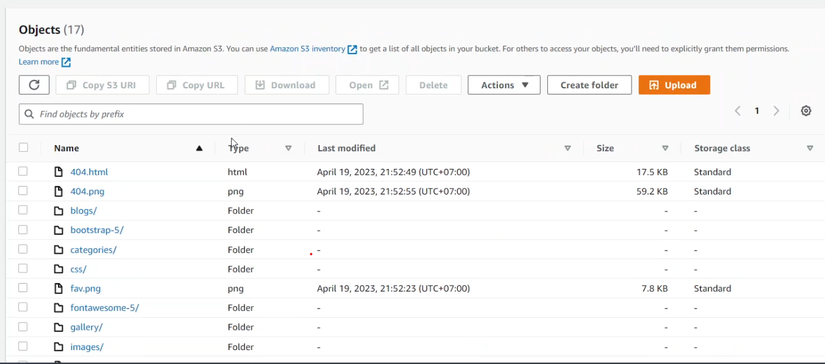
Check if files are installed and moved to S3
Problems encountered and solutions
Can’t push code to CodeCommit
This problem is because you have not performed the AWS authentication step. I know 2 AWS authentications to use AWS CodeCommit:
- Use Git credentials
- Using AWS Access Token
- Using Git Credentials
- Using AWS Access Tokens
This way, you need an Access Token and a Credential Helper. An Access Token is a string of characters used to authenticate your identity when you submit source code to CodeCommit. Credential Helper is a tool to help you manage Access Token automatically.
To get the Access Token, you can use the Console interface by:
Access Security credentials

or link
Then move to the Access Keys section and create Access Keys (remember to save the Access key information to use in the next step).
Next, you need to install AWS CLI (Command Line Interface) on your computer. You can download the AWS CLI from the official AWS website or use package management tools like pip, npm, homebrew… to install.
After installing the AWS CLI, you need to configure your AWS account information using the aws configure command. You will need to enter the following information:
- AWS Access Key ID: is a string of characters used to identify your AWS account.
- AWS Secret Access Key: is a string of characters used to authenticate your AWS account.
- Default region name: is the name of the region where you want to use AWS services. For example, ap-southeast-1 is the name of the Singapore region.
- Default output format: is the format of the output when you use the AWS CLI. You can choose json, text or table.
Information about the AWS Access Key ID and AWS Secret Access Key can be found in the IAM section of the AWS console. You should create a separate IAM User for using CodeCommit and assign it the necessary permissions.
After configuring the AWS CLI, you can get the Access Token with aws codecommit get-login-password command. This command will return a string that is your Access Token.
To use Credential Helper, you need to have Git installed on your computer (if you don’t already have it). Then you need to set up Credential Helper with git config --global credential.helper '!aws codecommit credential-helper $@' command. This command will allow Git to use the Credential Helper to obtain and store Access Tokens when you submit source code to CodeCommit.
Finally, you can clone the repository from CodeCommit to your computer with the command git clone https://git-codecommit.<region>.amazonaws.com/v1/repos/<repository-name> . You need to replace <region> with the region name you selected when configuring the AWS CLI and <repository-name> with the repository name you created on CodeCommit.
After the clone is complete, you can copy the files of the Hugo website to the repository’s directory and submit the source code to CodeCommit with the git add . , git commit -m "<message>" and git push origin main .
Extract file before deploying option

When I created AWS CodePipeline, in the deploy stage I had a little mistake in the Extract file before deploying part. After finding out, when I click on this option, the first time I go to S3 Artifact has been extracted and besides, the Deployment path option will help us customize the location where the extracted file is taken to in the S3 Bucket.
Epilogue
At this point, you have completed deploying Hugo website to S3 Static Web using CodeCommit, CodeBuild and CodePipeline. You can try changing the content of the website on CodeCommit and see the pipeline automatically run and update the website on S3. Good luck!