Introduction
The Svelte JavaScript framework is free and open-source. Created by Rich Harris and maintained by the core members of Svelte. Svelte applications do not include other framework references. Building a Svelte application instead generates code to manipulate the DOM, which can reduce the size of the transferred files as well as provide better application launch and runtime performance. . Svelte has its own compiler for converting application code into client-side JavaScript at build time. It is written in TypeScript. Svelte source code is licensed under the MIT License and hosted on GitHub.
Build Svelte ecommerce cart.
We will start creating the svelte application. We will create a sveltecart directory in the home directory using the following command.
1 2 | npx degit sveltejs/template sveltecart |
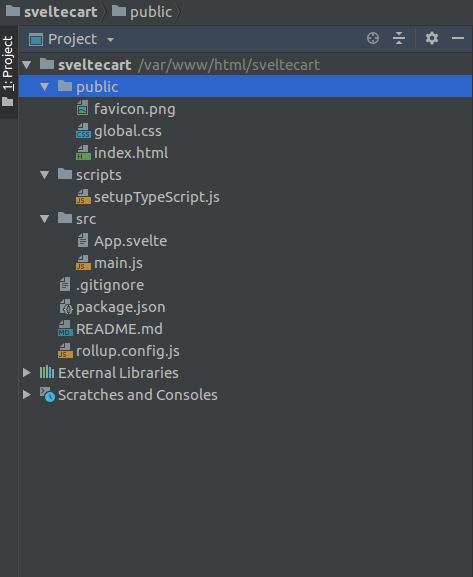
Directory structure
The most important files in this application are:
- src / main.js
- src / App.svelte
- public / index.html
The file public/index.html has the following content:
1 2 3 4 5 6 7 8 9 10 11 12 13 14 15 | <!DOCTYPE html> <html lang="en"> <head> <meta charset='utf-8'> <meta name='viewport' content='width=device-width,initial-scale=1'> <title>Svelte app</title> <link rel='icon' type='image/png' href='/favicon.png'> <link rel='stylesheet' href='/global.css'> <link rel='stylesheet' href='/build/bundle.css'> <script defer src='/build/bundle.js'></script> </head> <body> </body> </html> |
Note: In the above html, there are call 2 css files and 1 js file in the same directory. The global.css file that holds the css can affect any component. The build/bundle.css file is generated from css in each component . The build / bundle.js file is generated from JavaScript and HTML in each component and any other javascript in the application.
The src/main.js file has the following content:
1 2 3 4 5 6 7 8 9 | import App from './App.svelte'; const app = new App({ target: document.body, props: { name: 'world' } }); export default app; |
This creates the App component , the target property can indicate where the component was created. For most applications, this is the body of the document. The name prop is passed to the App component.
The src/App.svelte file src/App.svelte the following content:
1 2 3 4 5 6 7 8 9 10 11 12 13 14 15 16 17 18 19 20 21 22 23 24 25 26 27 | <script> export let name; </script> <main> <h1>Hello {name}!</h1> <p>Visit the <a href="https://svelte.dev/tutorial">Svelte tutorial</a> to learn how to build Svelte apps.</p> </main> <style> main { text-align: center; padding: 1em; max-width: 240px; margin: 0 auto; } h1 { color: #ff3e00; text-transform: uppercase; font-size: 4em; font-weight: 100; } @media (min-width: 640px) { main { max-width: none; } } </style> |
The variables exported to the script tag are the values obtained from the src/main.js file. The {} brackets are used to output the value of a javascript expression. style tag to store all css styles applied to this app.
Building the Svelte eCommerce shopping cart
The first is to create folders and files and start the application. To create required components, do the following in the terminal
1 2 3 4 5 6 7 8 9 10 11 12 13 14 15 | cd src mkdir CartComponents mkdir Stores cd CartComponents touch card.svelte touch cardwrapper.svelte touch checkout.svelte touch checkoutitem.svelte touch navbar.svelte cd .. cd Stores touch stores.js cd.. touch items.js |
In the src directory, we can create the CartComponents directory and inside the CartComponents directory we will create the file:
1 2 3 4 5 6 | card.svelte cardwrapper.svelte checkout.svelte checkoutitem.svelte navbar.svelte |
Like, In the src directory we can create directory Stores and inside the Stores directory, we can create stores.js . Next in the src directory. We will create an Item.js. file.
We will use Bootstrap CSS for our application, first we will add Bootstrap cdn to the index.html file. Go to file public/index.html and add bootstrap cdn.
1 2 3 4 5 6 7 8 9 10 11 12 13 14 15 16 17 18 19 20 21 22 23 24 25 26 27 28 | <!DOCTYPE html> <html lang="en"> <head> <meta charset="utf-8" /> <meta name="viewport" content="width=device-width,initial-scale=1" /> <title>Svelte app</title> <link rel="icon" type="image/png" href="/favicon.png" /> <link rel="stylesheet" href="/global.css" /> <link rel="stylesheet" href="/build/bundle.css" /> <!-- boostarp cdn starts here --> <link rel="stylesheet" href="https://stackpath.bootstrapcdn.com/bootstrap/4.4.1/css/bootstrap.min.css" integrity="sha384-Vkoo8x4CGsO3+Hhxv8T/Q5PaXtkKtu6ug5TOeNV6gBiFeWPGFN9MuhOf23Q9Ifjh" crossorigin="anonymous" /> <!-- bootstrap cdn ends here --> <script defer src="/build/bundle.js"></script> <style> body { background: #f2f4f8; } </style> </head> <body></body> </html> |
Update the stores/stores.js file
1 2 3 4 | import { writable } from 'svelte/store' export const cart = writable({}) |
In the above code, we import writable() function from svelte/store and use it to create a store that calls cart . Open the src/items.js file and update as follows:
1 2 3 4 5 6 7 8 9 10 11 12 13 14 15 16 17 18 19 20 21 22 23 24 25 26 27 28 29 30 31 32 33 34 | export default [ { name: 'laptop', price: '500', img: 'laptop1.png' }, { name: 'Latest PC', price: '1,000', img: 'mobile1.png' }, { name: 'Latest laptop', price: '1000', img: 'laptop2.png' }, { name: 'latest smart watch', price: '5,000,000', img: 'smartwatch.png' }, { name: 'Monitor', price: '2000', img: 'display.png' }, { name: 'playstation', price: '2,670', img: 'playstation.png' } ] |
Building the Cards Components
Open the file srcCartComponentscard.svelte and update the content.
1 2 3 4 5 6 7 8 9 10 11 12 13 14 15 16 17 18 19 20 21 22 23 24 25 26 27 28 29 30 31 32 33 34 35 36 37 38 39 40 41 42 | <script> import { get } from "svelte/store"; import { cart } from "../Stores/stores.js"; export let item; let { img, name, price } = item; img = `img/${img}`; const cartItems = get(cart); let inCart = cartItems[name] ? cartItems[name].count : 0; function addToCart() { inCart++; cart.update(n => { return { ...n, [name]: { ...item, count: inCart } }; }); } </script> <div class="card"> <img class="card-img-top" width="200" src={img} alt={name} /> <div class="card-body"> <h5 class="card-title">{name}</h5> <b class=alert alert-info > $ {price}</b> <p class=alert alert-info >{#if inCart > 0} <span> <em>({inCart} in cart)</em> </span> {/if}</p> </div> <div class="btn-group" role="group"> <button type="button" class="btn btn-primary" on:click={addToCart}> <object aria-label="shopping cart" type="image/svg+xml" data="img/svg/shopping-cart.svg" /> Add to cart </button> </div> </div> |
In the code above we imported get() from svelte/store . It uses get and set manually. Update the srcCartComponentsCardWrapper.svelte
1 2 3 4 5 6 7 8 9 10 11 12 13 14 15 16 17 18 | <script> import Card from "./Card.svelte"; import items from "../items.js"; </script> <div class="container"> <div class="row"> {#each items as item} <div class="col-md-4"> <Card {item} /> </div> {/each} </div> </div> |
In the code above we imported the previously created Card.svelte & item.js to use and display for the tags using the Bootsrap class.
Working with the Checkout Components
Update the srcCartComponentsCheckoutItem.svelte
1 2 3 4 5 6 7 8 9 10 11 12 13 14 15 16 17 18 19 20 21 22 23 24 25 26 27 28 29 30 31 32 33 34 35 36 37 38 39 40 41 42 43 44 45 46 47 48 49 50 51 52 53 54 55 56 57 58 59 | <script> import { cart } from "../Stores/stores.js"; export let item; let { name, price, img, count } = item; const countButtonHandler = (e) => { if (e.target.classList.contains("add")) { count++; } else if (count >= 1) { count--; } cart.update((n) => ({ ...n, [name]: { ...n[name], count } })); }; const removeItem = () => { cart.update((n) => { delete n[name]; return n; }); }; </script> <div class="row"> <img class="img-fluid img-thumbnail" width="300" src={`img/${img}`} alt={name} /> <div class="item-meta-data"> <h3 class="title">{name}</h3> <p class="price">Price: $ {price}</p> <div class="col"> <button type="button" class="btn btn-success add" on:click={countButtonHandler}>+</button > {" "} <span>{count}</span> {" "} <button type="button" class="btn btn-warning" on:click={countButtonHandler}>-</button > {" "} <button type="button" class="btn btn-danger" on:click={removeItem}> <object aria-label="remove" type="image/svg+xml" data="img/svg/cancel.svg" /> Remove </button> </div> </div> </div> |
In the above code we have written a simple logic that returns Items to cart . Checks checked-out for each cart and displays the message according to the correct condition.
Next we update the srcCartComponentsNavbar.svelte
1 2 3 4 5 6 7 8 9 10 11 12 13 14 15 16 17 18 19 20 21 22 23 24 25 26 27 28 29 30 31 32 33 34 35 36 37 38 39 40 41 42 43 44 45 46 47 48 49 50 51 52 53 54 55 56 57 58 59 60 61 62 63 64 65 66 67 68 69 70 | <script> import { cart } from "../Stores/stores.js"; import { createEventDispatcher } from "svelte"; const dispatch = createEventDispatcher(); let cart_sum = 0; const unsubscribe = cart.subscribe(items => { const itemValues = Object.values(items); cart_sum = 0; itemValues.forEach(item => { cart_sum += item.count; }); }); function goToHome() { dispatch("nav", { option: "home" }); } function goToCheckout() { dispatch("nav", { option: "checkout" }); } </script> <nav class="navbar navbar-dark bg-primary navbar-expand-lg navbar-dark "> <div class="container"> <a class="navbar-brand logo-font" id="brand" on:click={goToHome}> SvelteCart </a> <!-- links toggle --> <button class="navbar-toggler order-first" type="button" data-toggle="collapse" data-target="#links" aria-controls="navbarResponsive" aria-expanded="false" aria-label="Toggle navigation"> <i class="fa fa-bars"></i> </button> <!-- account toggle --> <button class="navbar-toggler" type="button" data-toggle="collapse" data-target="#account" aria-controls="navbarResponsive" aria-expanded="false" aria-label="Toggle navigation"> <i class="fa fa-shopping-cart fa-1x" aria-hidden="true"></i> <span class="badge badge-light">88</span> </button> <div class="collapse navbar-collapse" id="links"> <ul class="navbar-nav mr-auto"> <li class="nav-item"> <a class="nav-link" href="#"> Electronics</a> </li> <li class="nav-item"> <a class="nav-link" href="#">customer care</a> </li> </ul> </div> <div class="collapse navbar-collapse" id="account"> <ul class="navbar-nav ml-auto"> <li class="nav-item active"><a class="nav-link" on:click={goToCheckout}>Items in Cart <svg xmlns="http://www.w3.org/2000/svg" width="24" height="24" fill="currentColor" class="bi bi-cart-dash-fill" viewBox="0 0 16 16"> <path d="M.5 1a.5.5 0 0 0 0 1h1.11l.401 1.607 1.498 7.985A.5.5 0 0 0 4 12h1a2 2 0 1 0 0 4 2 2 0 0 0 0-4h7a2 2 0 1 0 0 4 2 2 0 0 0 0-4h1a.5.5 0 0 0 .491-.408l1.5-8A.5.5 0 0 0 14.5 3H2.89l-.405-1.621A.5.5 0 0 0 2 1H.5zM6 14a1 1 0 1 1-2 0 1 1 0 0 1 2 0zm7 0a1 1 0 1 1-2 0 1 1 0 0 1 2 0zM6.5 7h4a.5.5 0 0 1 0 1h-4a.5.5 0 0 1 0-1z"/> </svg> </a></li> <li class="nav-link active"> {#if cart_sum > 0} {cart_sum} {/if} </li> </ul> </div> </div> </nav> <br> |
In the code above we import createEventDispatcher funtion from the svelte package and called an event dispatcher. Finally, update the App.svelte file
1 2 3 4 5 6 7 8 9 10 11 12 13 14 15 16 17 | <script> import CardWrapper from "./CartComponents/CardWrapper.svelte"; import Navbar from "./cartComponents/Navbar.svelte"; import Checkout from "./CartComponents/Checkout.svelte"; let nav = "home"; function navHandler(event) { nav = event.detail.option; } </script> <Navbar on:nav={navHandler} /> {#if nav === 'home'} <CardWrapper /> {:else} <Checkout /> {/if} |
In the above code we have imported all the necessary components to create the App.svelte file.
Conclusion
Svelte is a worthy replacement for today’s popular React, Vue, and Angular options. It has many benefits, including small package sizes, simple component definitions, easy state management, and the ability to react without the need for a virtual DOM. Through this tutorial you learned how to build a simple shopping cart application using Svelte. You can refer to the source code here: GitHub .
References
https://en.wikipedia.org/wiki/Svelte
https://codesource.io/building-an-ecommerce-shopping-cart-with-svelte/