Hello everyone, today I will introduce you a small application using React that is the weather app (see weather conditions by location). I personally find this app also covers quite a lot of basic knowledge of React, so it will help people who are new to React, or do not know anything about React. (When I first learned React, I also practiced to make this app ). The article is aimed at people who are new to React, so in practice I will kick through some basic components.
Well, no more words, let’s get started:
Prerequisites
- The only condition the app needs is React 16 or greater, because the code uses the arrow function inside the react component
- npm> 5.2 the better, no it doesn’t matter.
Create a React app
There are many ways to create a new React app, you can google to learn more, but I personally use the command line for convenience. Open a terminal and type the following commands:
1 2 3 4 | npx create-react-app weather-app cd weather-app npm start |
Note npx is used with npm version 5.2 or more, if your npm version is 5.1 or lower, you can create a new project by running the command:
1 2 3 4 | npm install -g weather-app create-react-app weather-app |
App component
In ReactJS, each piece of code will be divided into components that are not interdependent and can be reused when needed. Specifically in our weather app will be divided into 3 components, which are:
- Component Titles: Displays the title, some small descriptions for the app (this part is only for coloring, but not necessary.
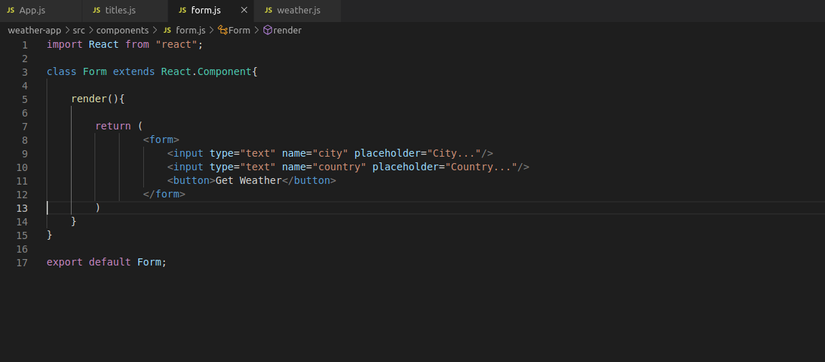
- Component Form: Displays the form for users to enter locations, cities to view
- Weather Component: Displays the result of the weather returned after the user enters the location
After creating a new React app, edit the directory structure as follows:

In which: components is the directory containing the components I have listed above
img is the folder that contains the background image
titles.js 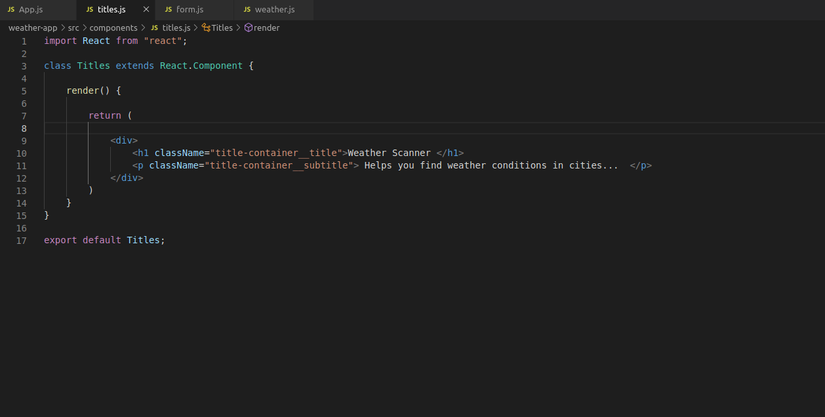
form.js
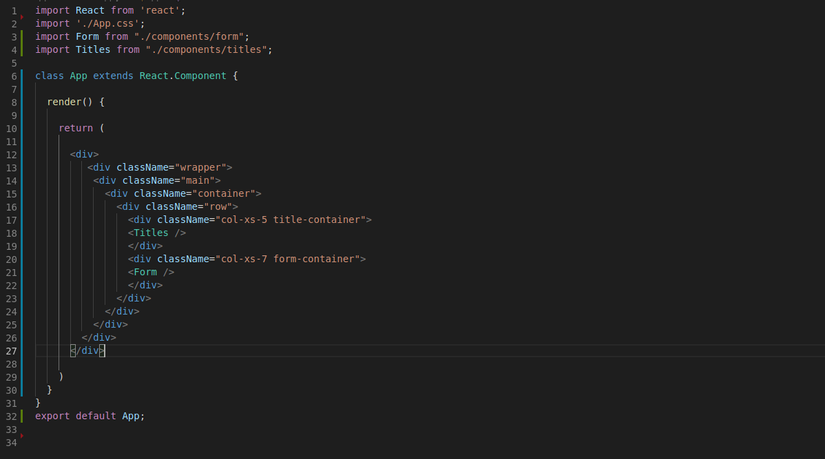
App.js
ReactDOM
ReactDOM is an independent library used to render React components into the DOM. If you open the index.js file you will see we are rendering the App component using ReactDOM.
The ReactDOM.render () method takes two parameters, the first is the component to render, and the second is the html element (id, class …) to render.
1 2 | ReactDOM.render(<App />, document.getElementById('root')); |
Here we render the App component into the element whose id is root in the index.html file inside the public directory.
Now the App component has been rendered, import the title and form components, and then run npm start :

API call
Next, we’ll call an API to get data for our app. There are many APIs with large data sets updated regularly so we can get weather data such as metaweather, openweathermap... , in this article I will use OpenWeatherMap. Very simple, you just need to visit openweathermap.org/api , login, create an api keys and create a const in App.js you can call the API already: Or you can use your key: const Api_Key = "8d2de98e089f1c28e1a22fc19a24ef04"; 
Set the default value for any state:
1 2 3 4 5 6 7 8 9 | state = { temperature: undefined, city: undefined, country: undefined, humidity: undefined, description: undefined, error: undefined } |
Here I know in advance what the API will return, and what information I need to get, if you do not know what the API will return then console.log response or use Postman to check the response to create a state variable for suitable offline.  Next is the call API stage, create a getWeather () function and use async / await to get the results returned less complicated:
1 2 3 4 5 6 7 8 9 10 11 12 13 14 15 16 17 18 19 20 21 22 23 24 25 26 27 28 29 30 31 32 33 34 35 | getWeather = async (e) => { const city = e.target.elements.city.value; const country = e.target.elements.country.value; e.preventDefault(); try { const api_call = await fetch(`http://api.openweathermap.org/data/2.5/weather?q=${city},${country}&appid=${Api_Key}`); const response = await api_call.json(); console.log(response) if (city && country) { this.setState({ temperature: response.main.temp, city: response.name, country: response.sys.country, humidity: response.main.humidity, description: response.weather[0].description, error: "" }) } else { this.setState({ error: "Please fill all fields..." }) } } catch (error) { this.setState({ temperature: undefined, city: undefined, country: undefined, humidity: undefined, description: undefined, error: "Can not find out this city..." }) } } |
Where 2 city and country variables store the value of the user entering the city and country. We will use these two information to submit to the API via url.
1 2 3 | const api_call = await fetch(`http://api.openweathermap.org/data/2.5/weather?q=${city},${country}&appid=${Api_Key}`); const response = await api_call.json(); |
This part calls the API and takes the return value assigned to the const response rest is the error handling part, and changes the state to display an error (if it occurs) or to display information.
This part is almost done.  Once the getWeather () method is available, we need to know when to call this function when it’s true. First we need to pass through the Form component, and call it when submitting the form via props:
App.js
1 2 | <Form loadWeather={this.getWeather} /> |
form.js
1 2 3 4 5 6 | <form onSubmit = {this.props.loadWeather}> <input type="text" name="city" placeholder="City..."/> <input type="text" name="country" placeholder="Country..."/> <button>Get Weather</button> </form> |
A little forgotten, we need to import the weather component to display the information after calling the API again.
App.js
1 2 3 4 5 6 7 8 9 10 | <Form loadWeather={this.getWeather} /> <Weather temperature={this.state.temperature} city={this.state.city} country={this.state.country} humidity={this.state.humidity} description={this.state.description} error={this.state.error} /> |
and weather.js
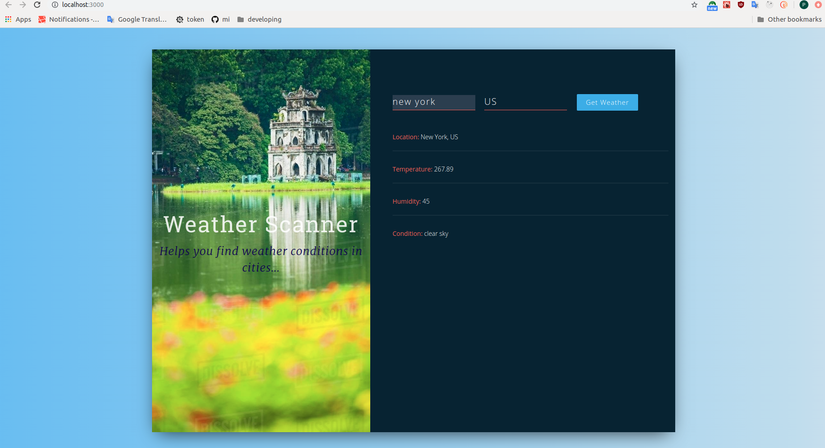
1 2 3 4 5 6 7 8 9 10 11 12 13 14 15 16 17 18 19 20 21 22 23 24 25 26 27 28 29 30 31 32 33 34 35 36 37 38 39 | import React from "react"; class Weather extends React.Component{ render(){ return( <div className="weather-info"> { this.props.country && this.props.city && <p className="weather__key">Location: <span className="weather__value"> {this.props.city}, {this.props.country}</span> </p> } { this.props.temperature && <p className="weather__key">Temperature: <span className="weather__value"> {this.props.temperature}</span> </p> } { this.props.humidity && <p className="weather__key">Humidity: <span className="weather__value"> {this.props.humidity}</span> </p> } { this.props.description && <p className="weather__key">Condition: <span className="weather__value"> {this.props.description}</span> </p> } { this.props.error && <p className="weather__error">{this.props.error}</p> } </div> ) } } export default Weather; |
We get: 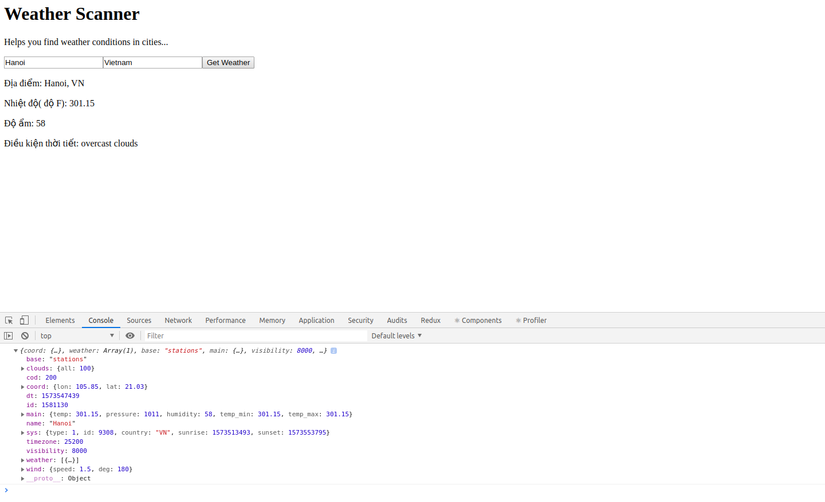
It’s done temporarily, now is the last stage to makeup her a little bit more. =))
You can clone the code here: github
Conclude
Above I have introduced you how to create a basic weather app, hope that after the article you can better understand React. The article is a summary of my knowledge as well as a reference to some other websites, if there are deficiencies, please comment. Chin thanks and see you in the following article. 